Flutter Flow: Use the NHTSA API to get vehicle information
I’m going to show you how to use the National Highway Traffic Safety Administration API to get the make and model of a car. in the next article, I will demonstrate how to use the VIN of a vehicle to get its information.
Custom development
I get a lot of requests for custom tweaks of Google Maps with Flutter.
I have created a form to capture these requests to better understand everyone’s needs. You can also request custom Flutter Flow development and/or Flutter Flow training.
If you have urgent specific requests, please leave your contact information in the survey.
Adding API Calls
First, on the left side, click the API Calls tab.
Click on the Add button.
Get Car Makes
Now let’s define the car makes API
For the API name I used Get Car Makes
The method type is GET
The API URL is https://vpic.nhtsa.dot.gov/api/vehicles/GetMakesForVehicleType/car?format=json
If you click on the Response & Test tab, click Test API Call, you will see the response. Notice the results have MakeId, MakeName, etc.
Get Car Models
There are two ways to get the make from the model, by using the **MakeId (Get Models for Make) **or MakeName (Get Models for Make) from the make response.
I believe using MakeId would be a better option, because they may change the name anytime. For this simple example, I’m using MakeName.
I gave it the name Get Models For Make
The method type is GET
The API URL is https://vpic.nhtsa.dot.gov/api/vehicles/GetModelsForMake/[make]?format=json
Notice I have make in square brackets. In this API we need to pass it as a path parameter.
Go to the Variables tab and add a String parameter
If you click on the Response & Test tab and click Test API Call, you will see the response. Notice the results have Make_Id, Make_Name, Model_Name, etc.
Create data types
For this example, I have created data types for the API responses, by going to the Data Types tab to the left.
Get Vehicle Make and Models UI
Now let’s create the UI for getting a vehicle’s make and models. For this example, I have two dropdown widgets.
I’m going to populate the first one once the screen is loaded. After the user chooses a make from the options, I will make a call to get the models for that vehicle. After the user chooses a model, it will populate the text field below it.
I have created three state variables on the top-level widget.
Makes and models are types of list of Data Types we created earlier
I have a z instead of a s at the end of the models state field. I believe I can’t reuse models because the data type uses it.
The makeAndModel state field is a nullable String
Querying vehicle makes
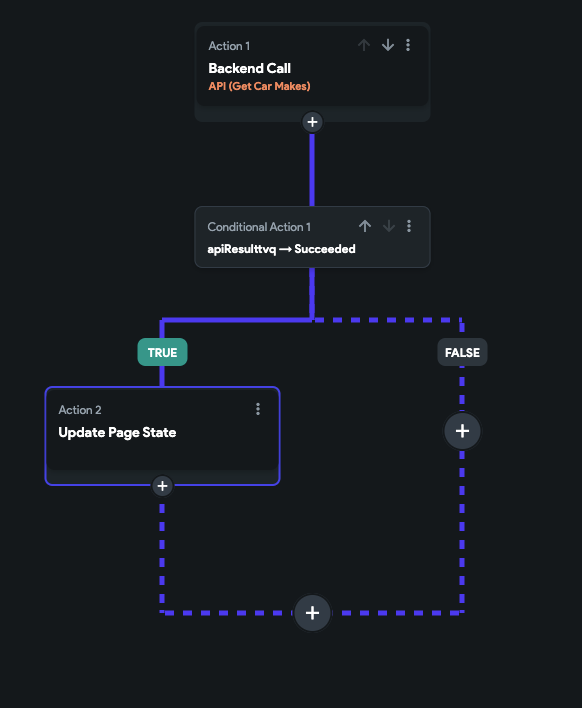
On the top-level widget, I am also creating an action to make the API Call to get the car makes.
For the Action Output Variable Name, I left it to what Flutter Flow generated.
If the API result was a success I update the page state by setting Results field to the makes page state
Showing make results in a dropdown
To show the list of makes in the first dropdown, click on the dropdown, and find Define Options.
Click the orange settings button, choose the makes page state variable, and choose MakeName as the value to show. In this example, I decided to sort them by the MakeName.
Making the Get Models API call when choosing a vehicle make
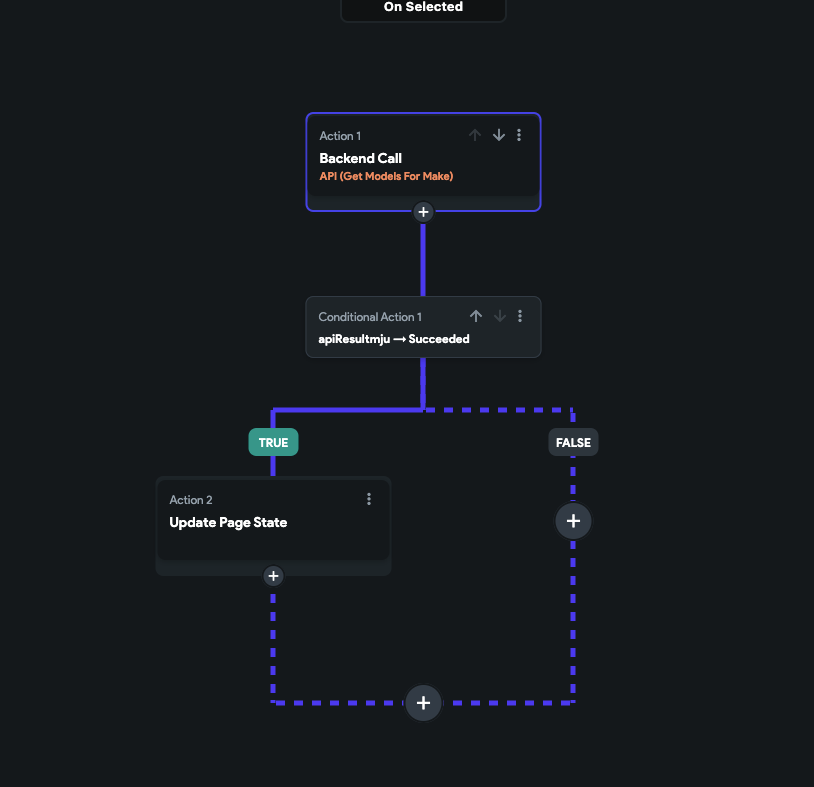
For the action of On Selected, on the makes dropdown, let’s create an action.
The first action calls the model API using the make value from the make dropdown. I keep the default generated Action Output Variable Name, but remember it so we can use it in the next steps.
In the success action, I am setting the action output to the modelz page state.
Showing the models in the dropdown
Showing the models in the models dropdown to what we did previously for the makes dropdown.
Use the page state variable modelz, choose the Model_Name as the value to show, and sort the items by Model_Name.
We will also create an action when a model is selected. It will set the String variable to the values of the dropdowns.
Unity Game Engine — Communicating with Javascript (Javascript Plugin)
In this tutorial, I’ll show you how to send messages from Unity to Javascript. I’ll also show you how to send messages back from Javascript to your game. Sometimes this is also commonly referred to as creating Unity WebGL Plugins.
Setup
First, we’ll create a blank Unity Game. Note that you don’t have to use a blank template. I am doing this for simplicity. In Unity Hub, click “New Project”. Next, click Core on the right and choose a core project. I’m choosing the 2D core project. Give your project a name and click “Create Project”. Wait for your project to open automatically.
Switch Platform to WebGL
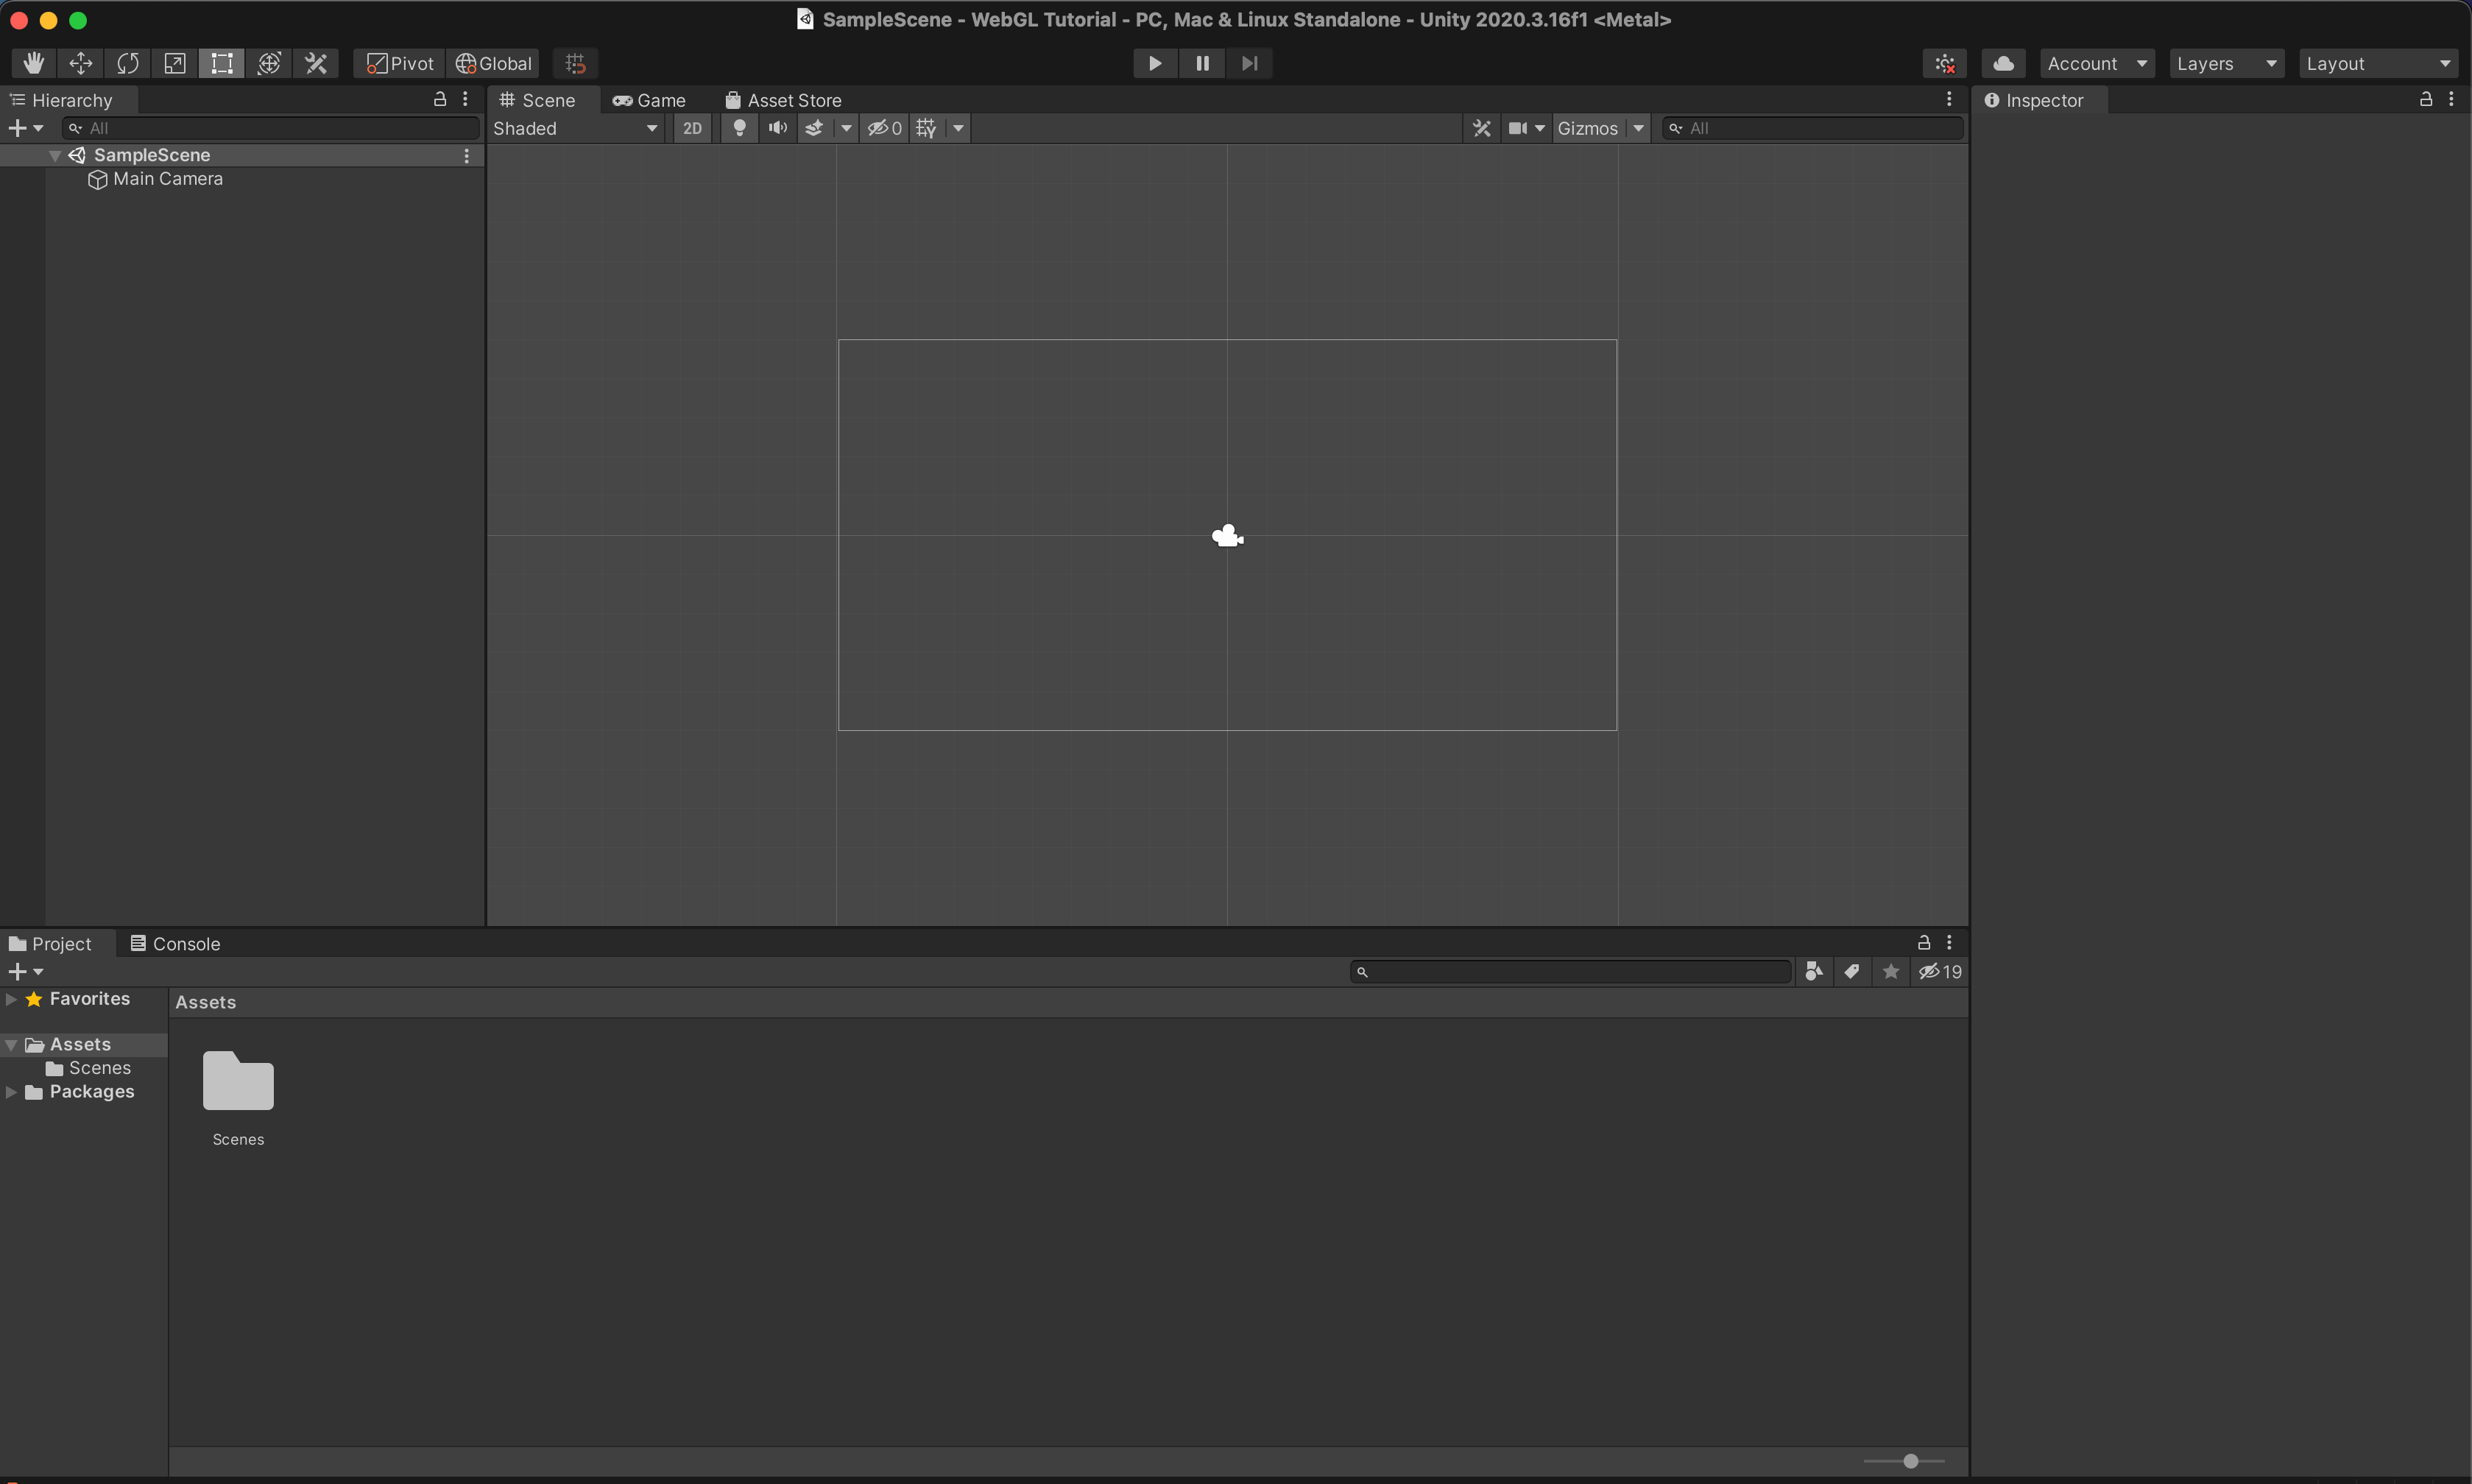
When Unity finally opens up with your blank project, it will look like this.
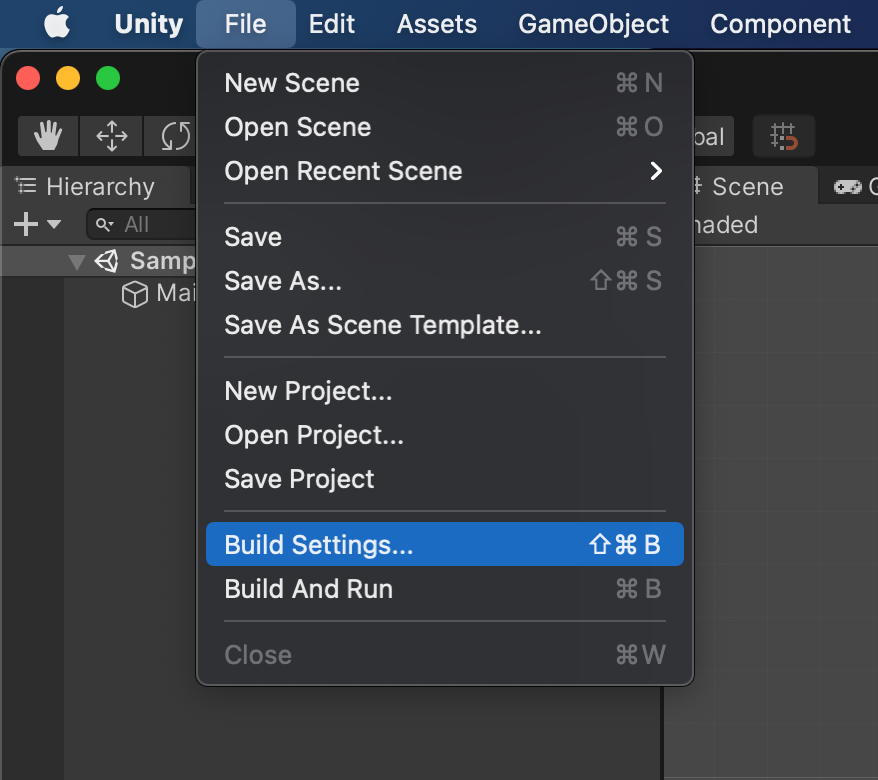
You will need to switch the platform to WebGL. While in Unity click File > Build Settings.
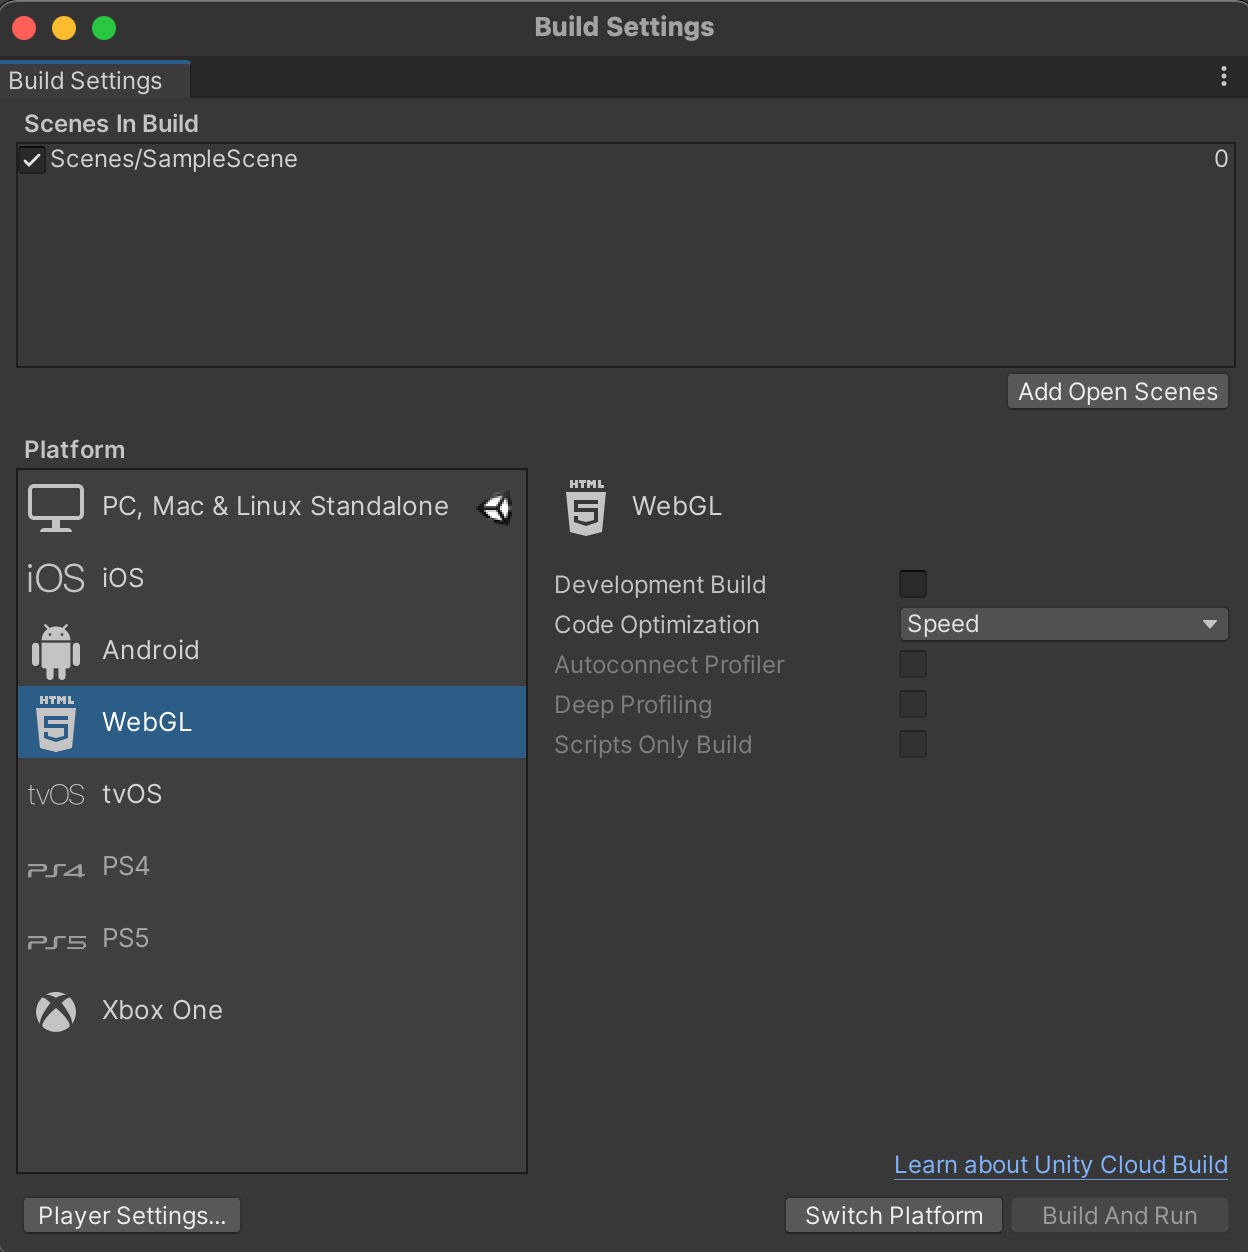
Next click on WebGL. You will then need to click on Switch Platform.
You know it has finally been switched when the Unity Logo is next to WebGL. “Build” and “Build and Run” buttons will also be present. Check the screenshot below.
You can now close the Build Settings Dialog/Pop-up.
Add a GameObject to your scene
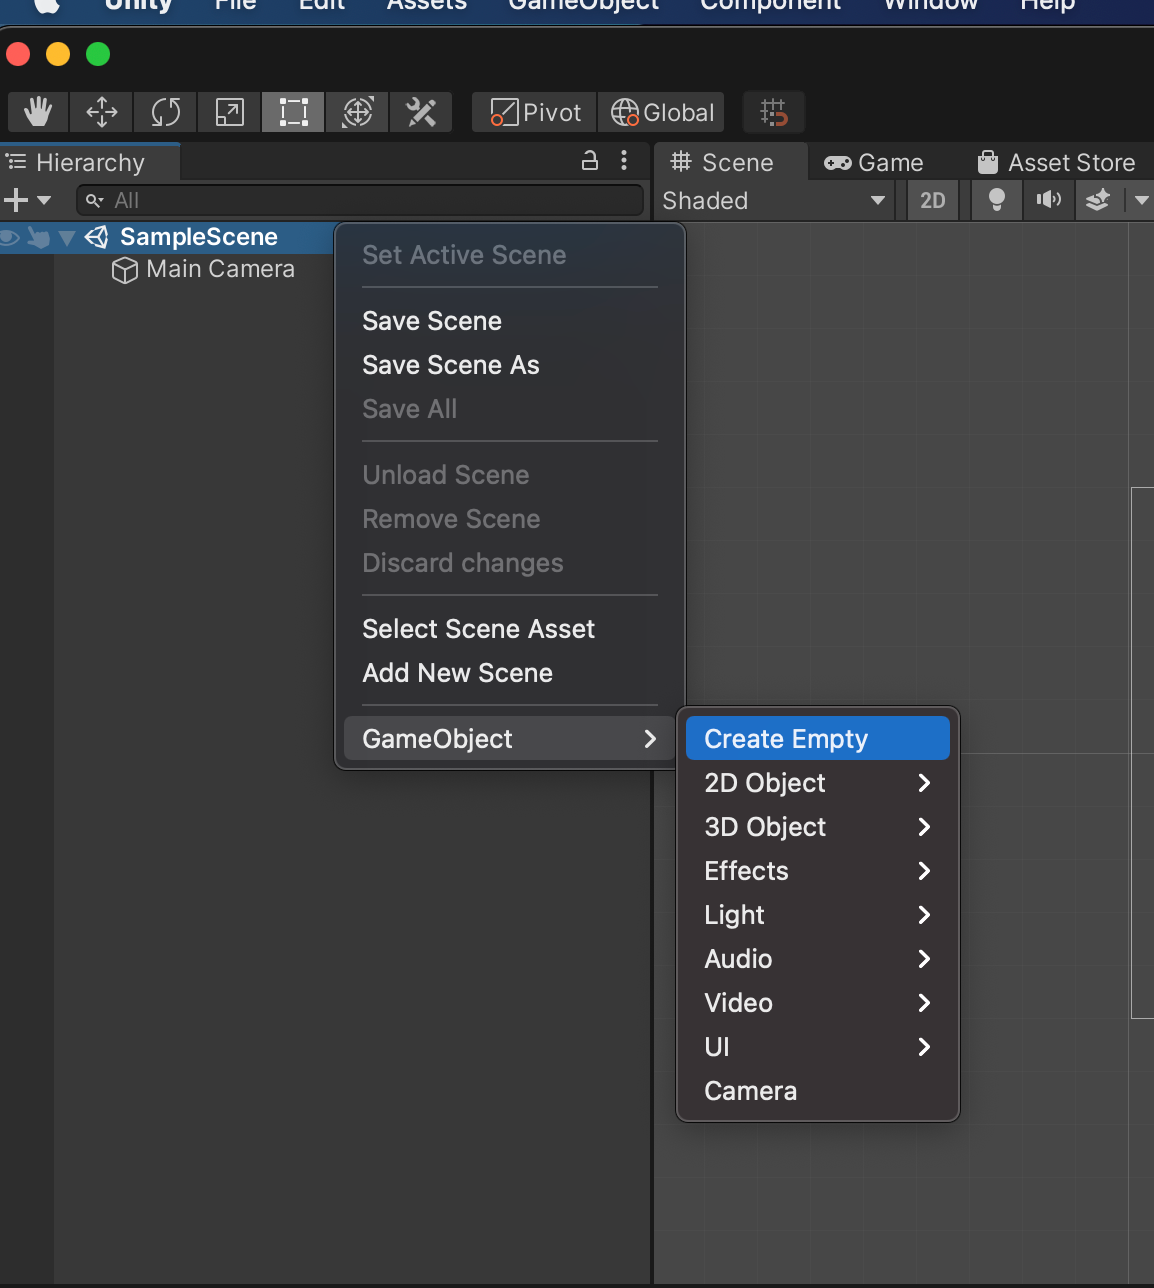
Next, we can add a blank GameObject to your scene. Right-click on Sample Scene then click GameObject > Create Empty. This can be any GameObject. We are using a blank one for simplicity.
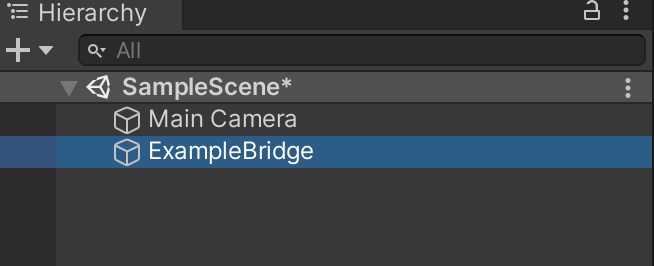
Next, rename the GameObject to ExampleBridge by Right-clicking on the GameObject > Rename. You can name this whatever you want, but it’s referenced when sending a message from Javascript to Unity, which we will cover soon.
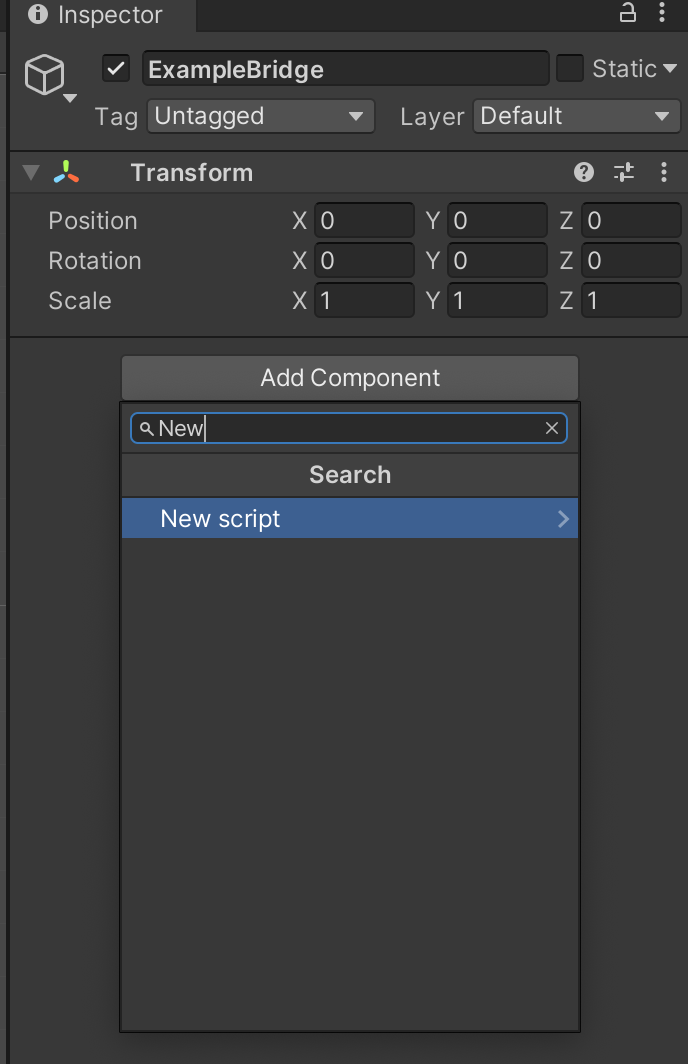
Now let’s create a new script. First, make sure to click on ExampleBridge and go to the Inspector tab which should be on the far right ( If you don’t see the inspector tab, in Unity you can click Window > General > Inspector ).
Click Add Component and search for “New Script”.
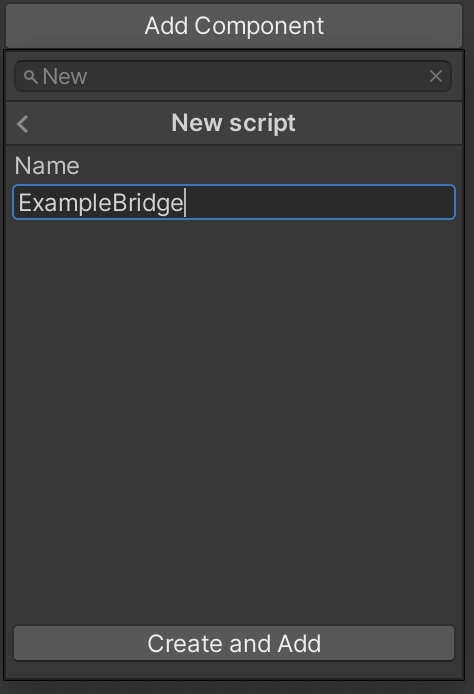
Click on New Script in the dropdown and name it ExampleBridge. Click Enter after typing the name to save it. You can also click the “Create and Add” button.
Create a Unity Javascript Plugin
Next, we will create a Unity Javascript Plugin to send messages to Javascript from Unity.
First, we will need to open the project in a code editor. I will use VS Code for this part.
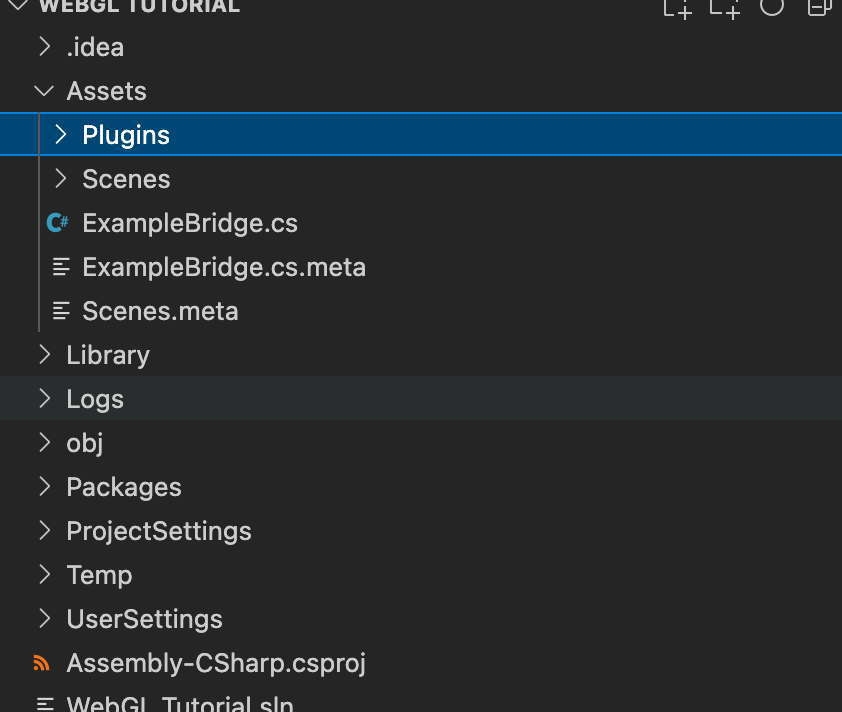
You will notice there is an Assets folder. Create a folder under that named “Plugins”.
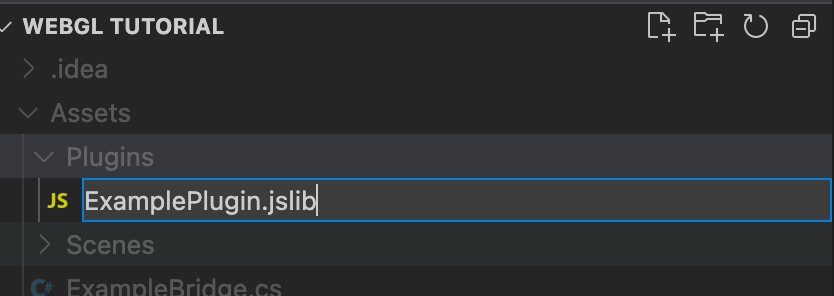
Next, create a file under that named ExamplePlugin.jslib
Add this code in ExamplePlugin.jslib
mergeInto(LibraryManager.library, {

    HelloWorld: function (message) {
        window.alert(message);
    },

});
The main thing to focus on is the HelloWorld block of code. It’s a function called HelloWorld that accepts a parameter. In the curly braces, you can write any Javascript code you want. Here we are just showing an alert.
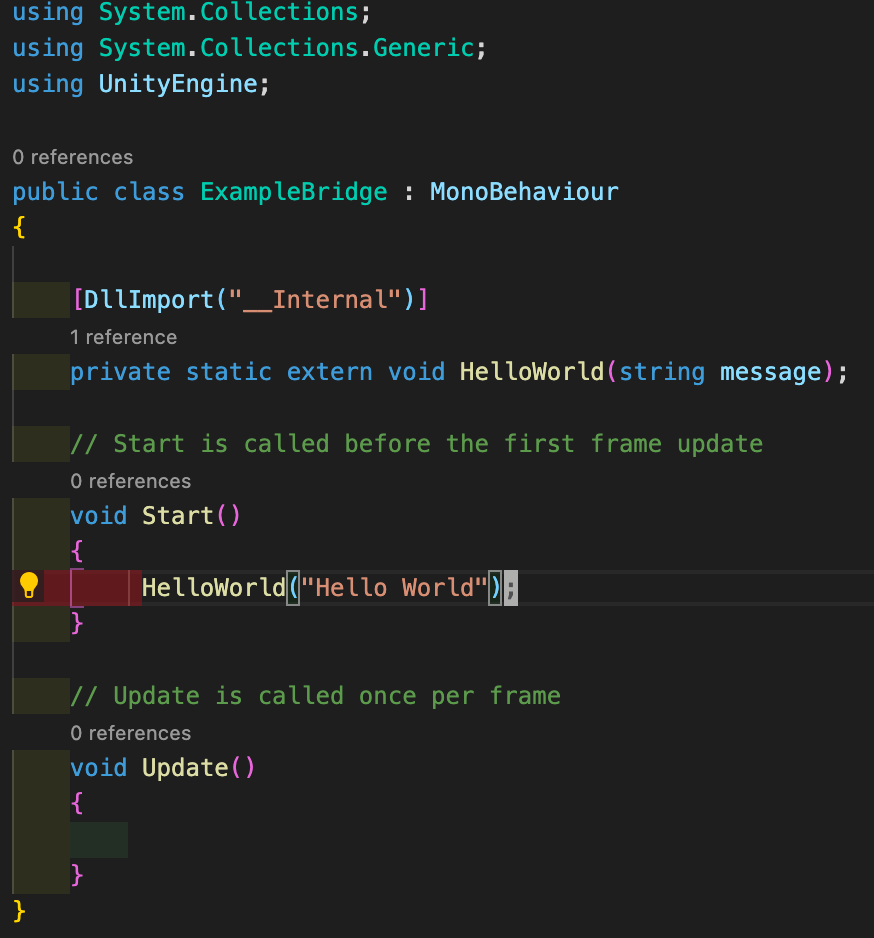
Next, open the ExampleBridge.cs script we created earlier. We are going to send a message to Javascript from this script. We need to add this code above the Start() method to let this script know about the plugin Javascript function.
Add the code below to the Start method to call the Javascript function.
HelloWorld("Hello World");
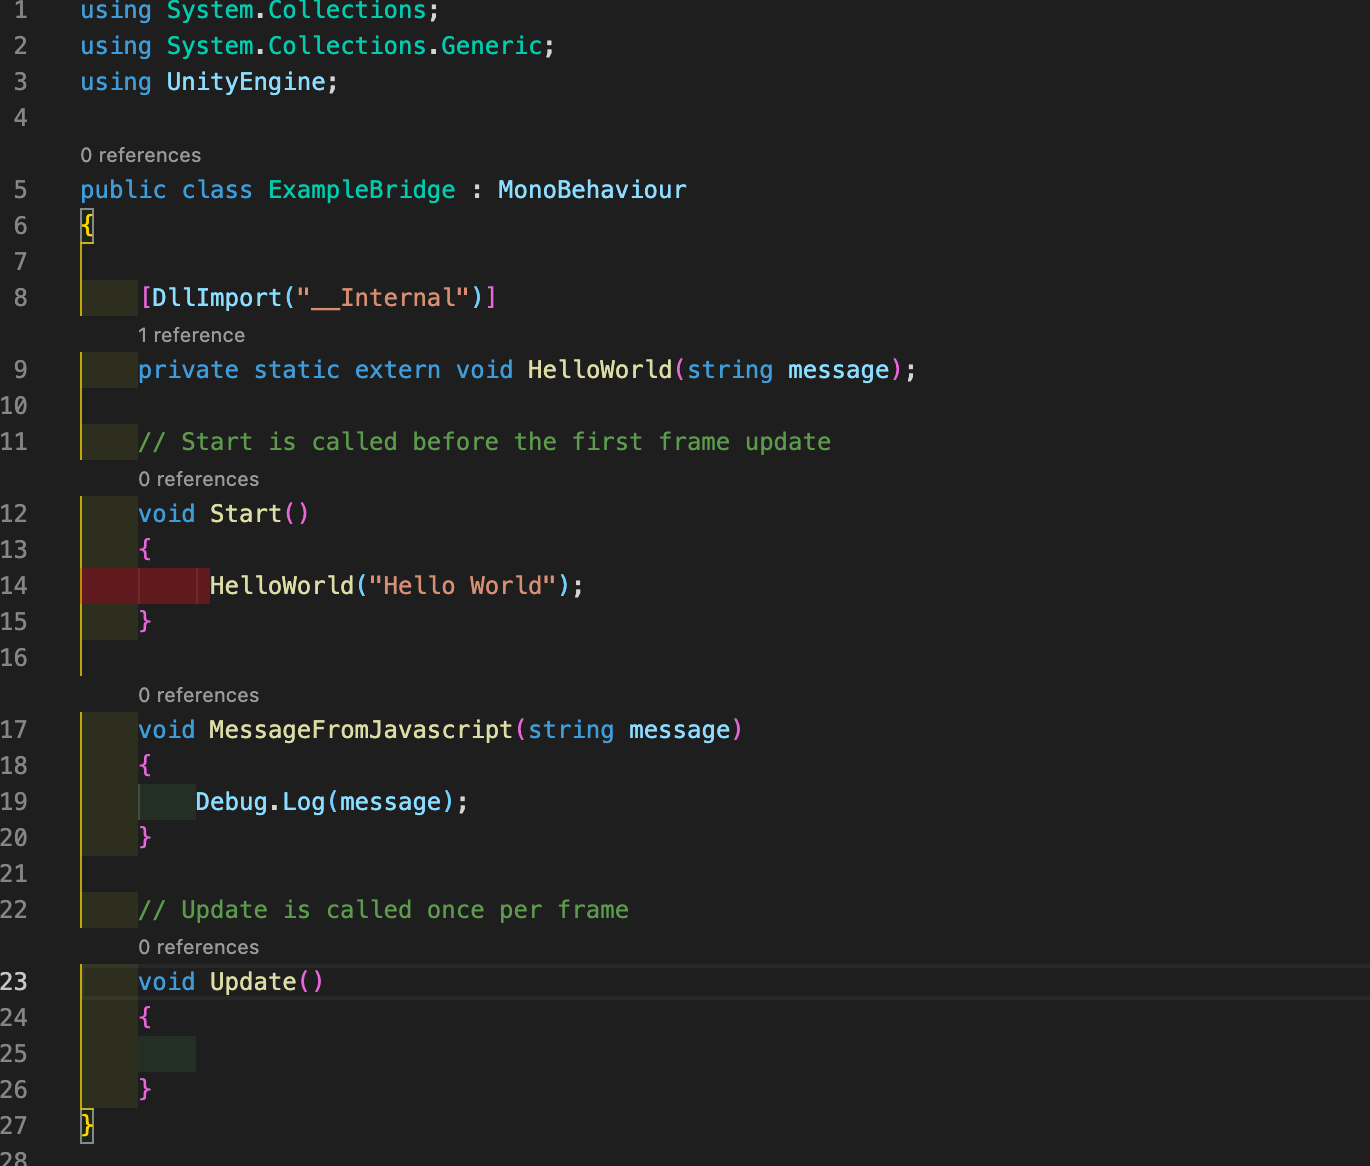
Let’s also add another method to get data back from Javascript. Add the code below. This will just print out a message, but it can be much more complex.
Now open up Build Settings in Unity again ( File > Build Settings ). Next click Build. It will ask what you want to save it as. We can name it unityWebTutorial for now. We need to build the game to write the code to send a message back from Javascript to Unity.
Send a message from Javascript to Unity
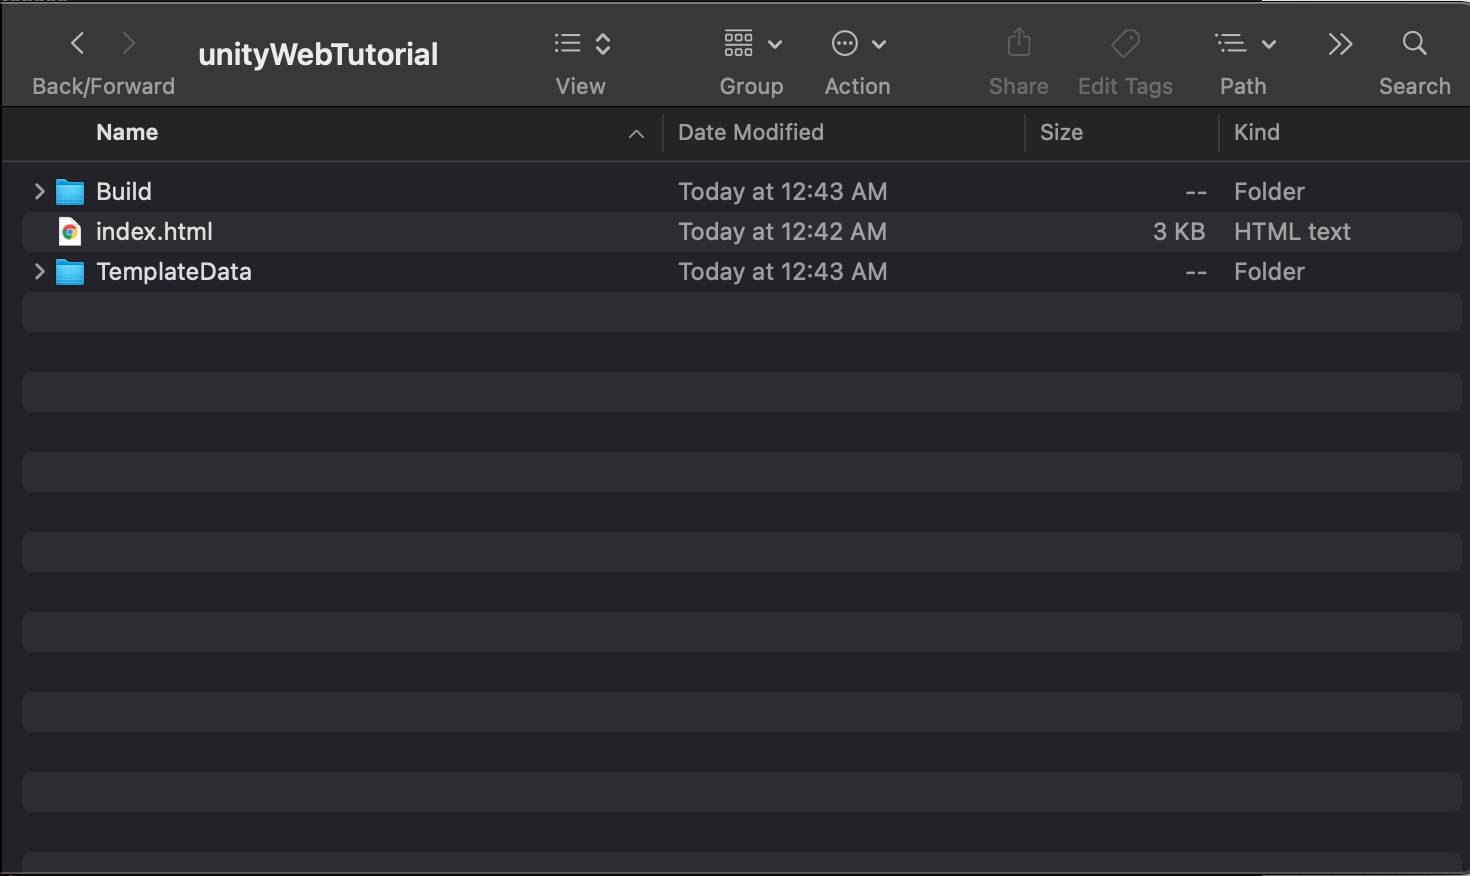
After Unity builds you will get a folder that looks like this.
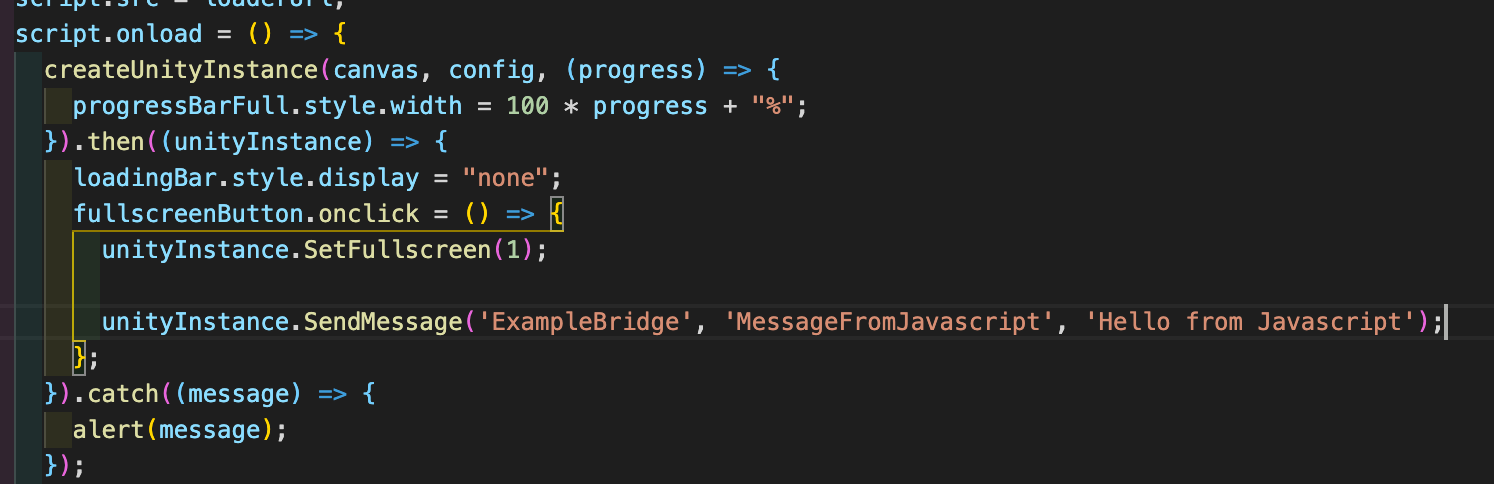
Open index.html in VS Code. Notice the unityInstance variable. We can use this to send a message back to Unity. Add this code under the full-screen button onClick listener. ( You can also comment out the code that makes the button full screen )
unityInstance.SendMessage('ExampleBridge', 'MessageFromJavascript', 'Hello from Javascript');
Let us walk through this code.
The first parameter is the name of the GameObject we created, NOT the script.
The second parameter is the name of the function in the script that is attached to our GameObject.
The third parameter is the message we want to send.
You can run the built game now. You should get a popup as soon as the game loads, which is the message sent from Unity to Javascript.
Also when you click on the blue button with arrows ( the full-screen button ) you will see “Hello from Javascript in the browser’s console. This is the message from Javascript to Unity.
Flutter Flow: Get Value From Multiple-Choice Choice Chips
There is currently no built-in way in Flutter Flow to get the list of values from multiple-choice choice chips. I will show you an approach I took to solve this.
Custom development
I get a lot of requests for custom tweaks of Google Maps with Flutter.
I have created a form to capture these requests to better understand everyone’s needs. You can also request custom Flutter Flow development and/or Flutter Flow training.
If you have urgent specific requests, please leave your contact information in the survey.
What are Choice Chips?
Choice Chips are material chips that let you choose multiple options. FlutterFlow’s implementation is a wrapper around Flutter’s choice chips with additional functionality. ChoiceChips ChoiceChip class – material library – Dart API
Example
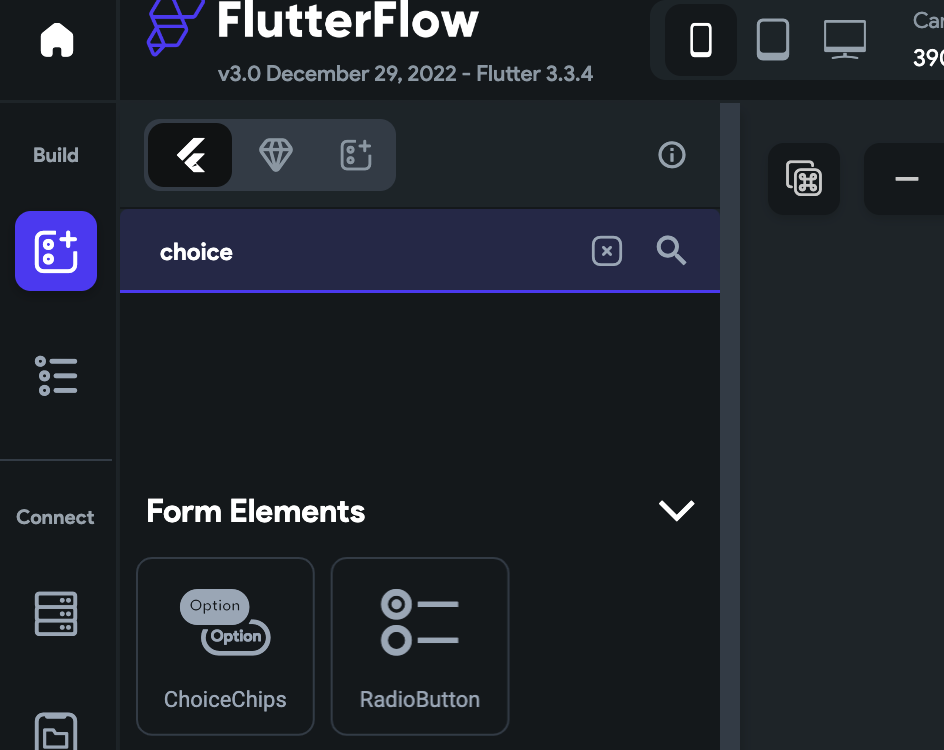
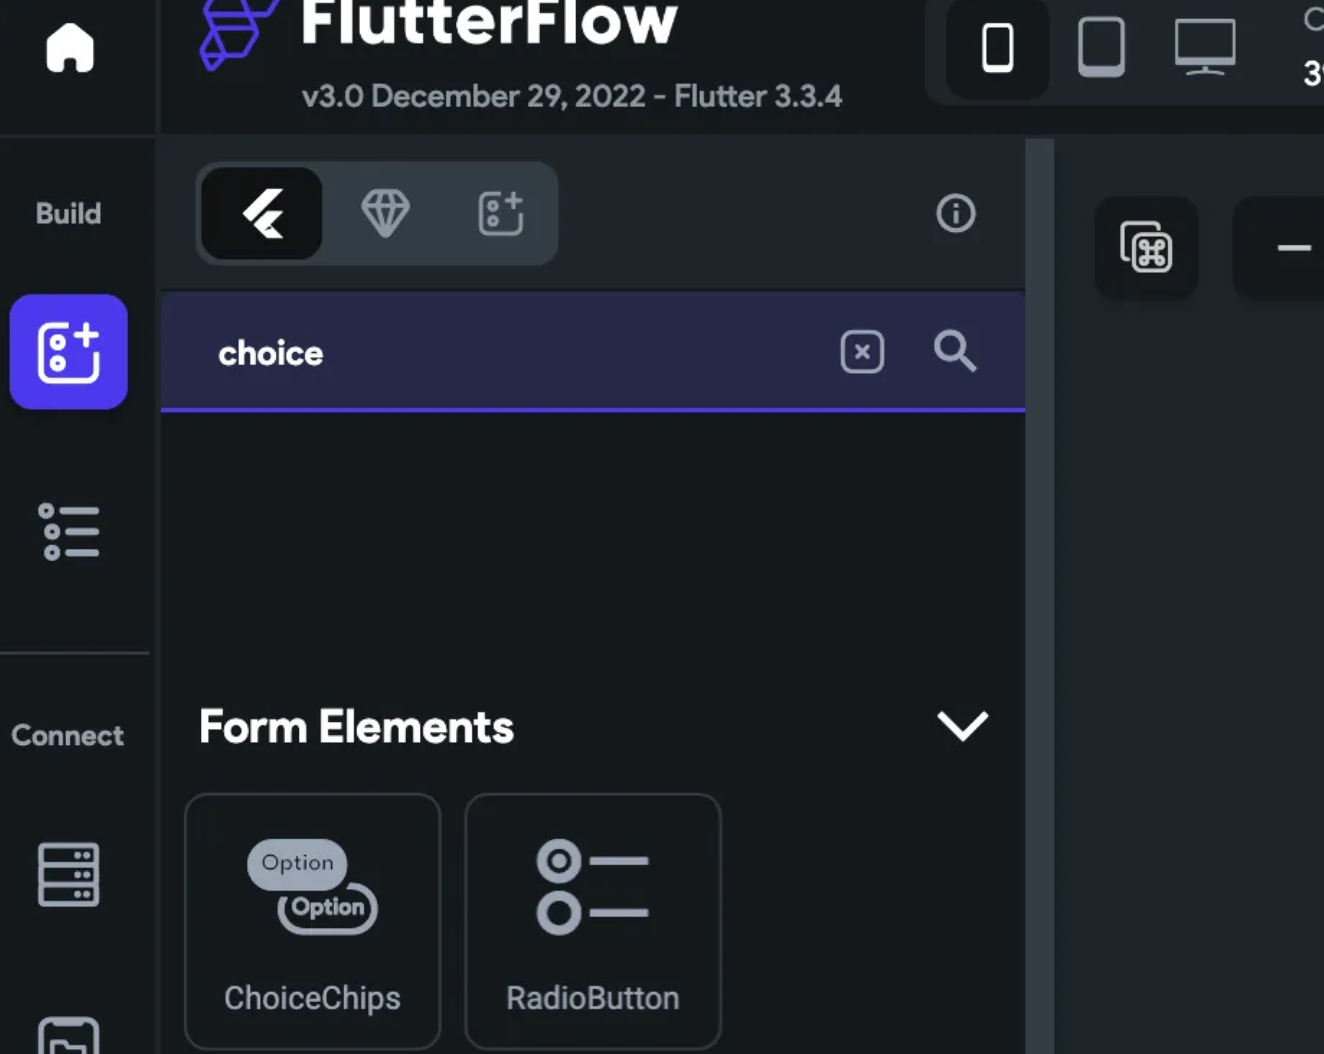
I will walk through a small example to accomplish this. Start with a blank page and go to the UI Builder in FlutterFlow.
Search for choice chips in the UI Builder and drag it on your blank screen.
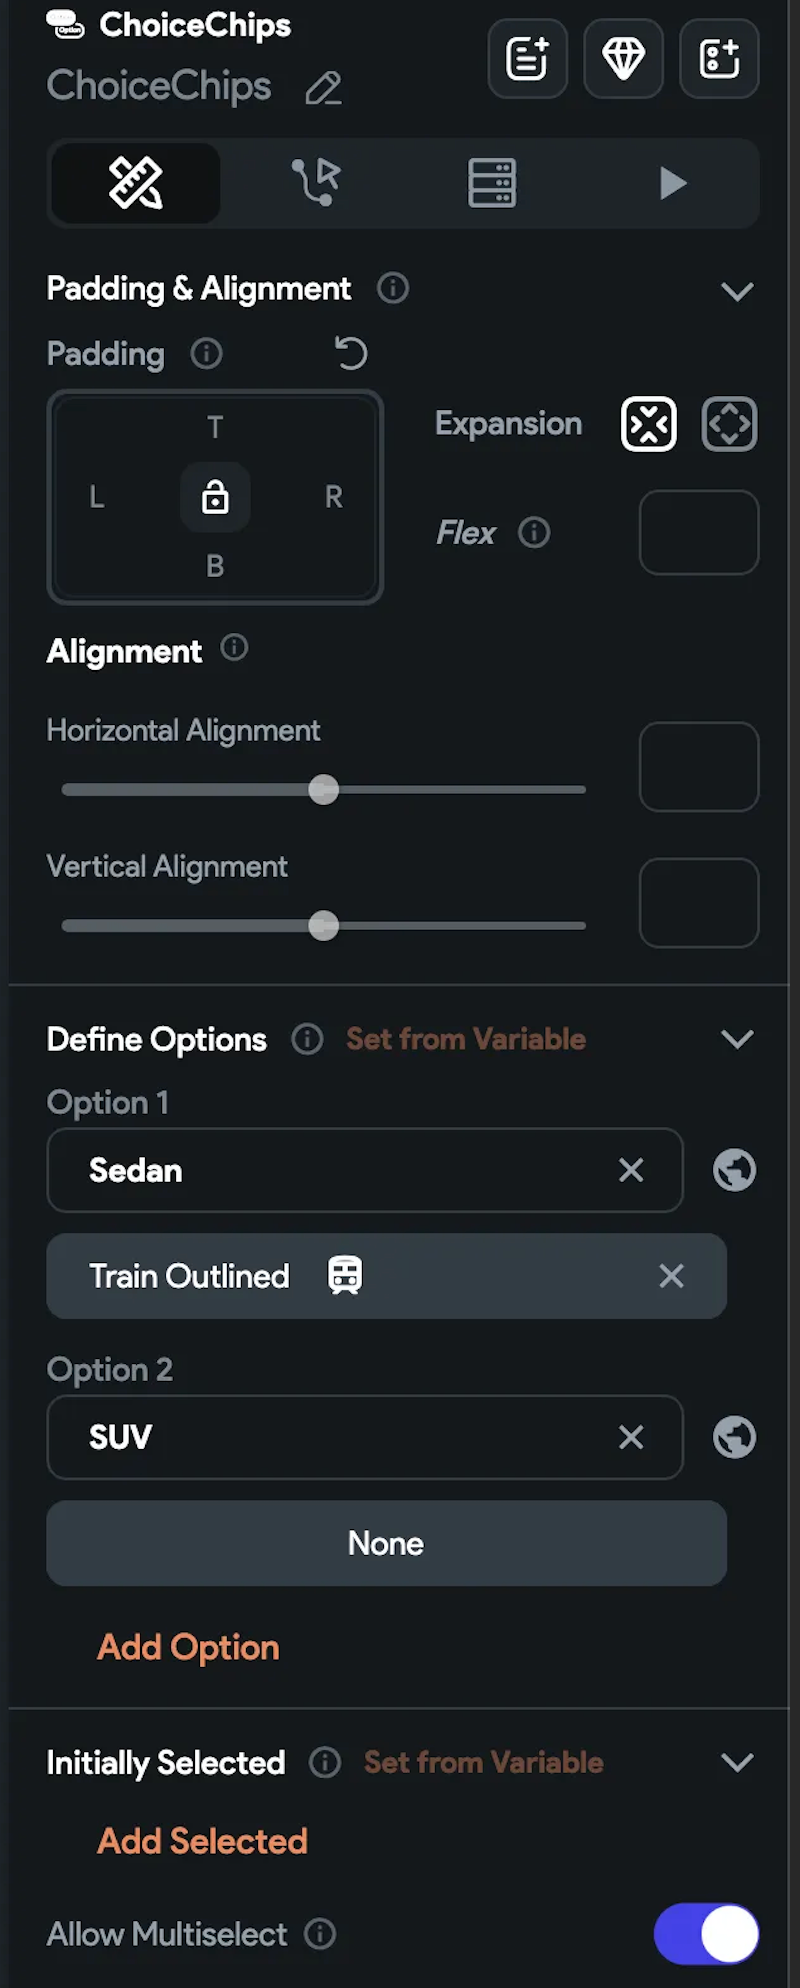
Add multiple options. For this example, I have two types of cars. Sedan and SUV. Also, turn the multiple-choice option on. Save the changes.
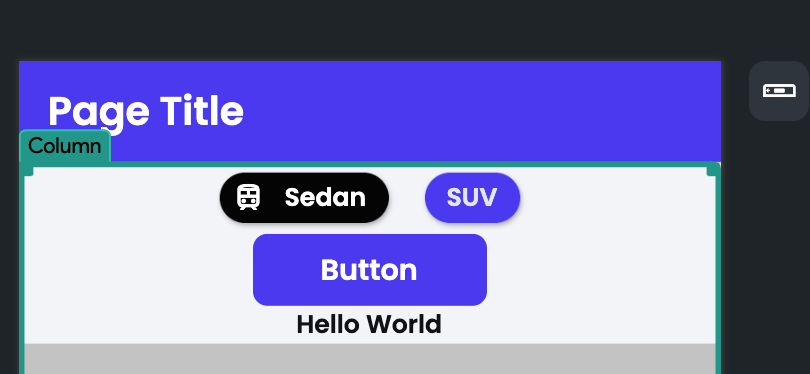
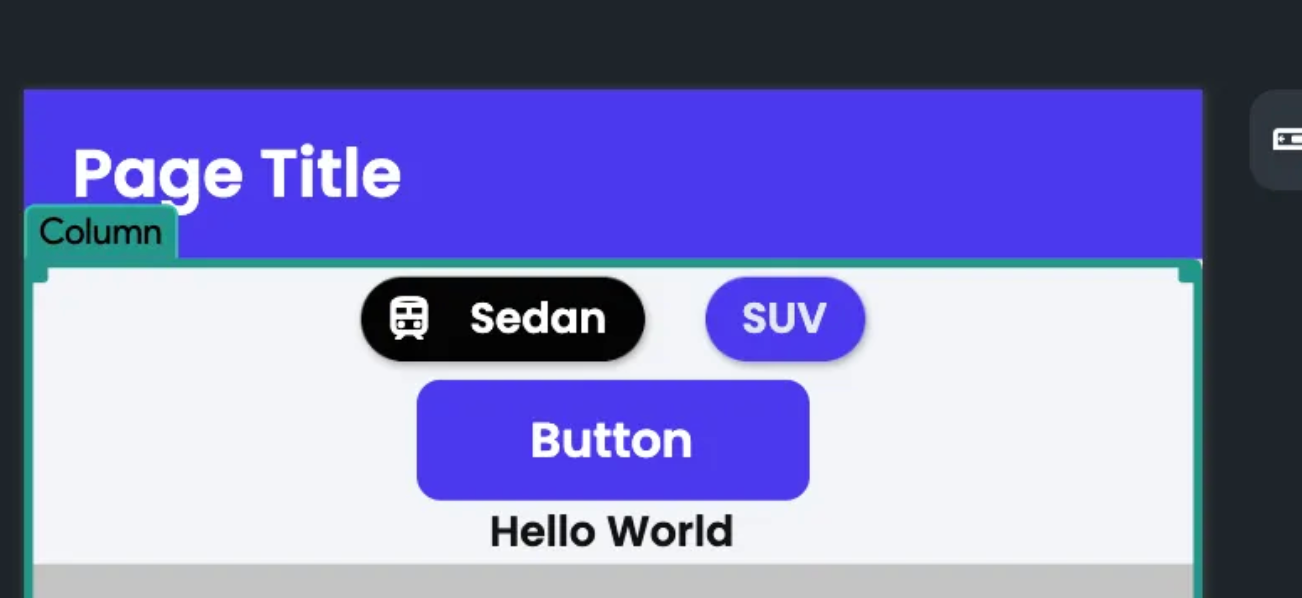
Drag a button and text field under the choice chips. Save the changes.
Note: Local State is now called App State in Flutter Flow
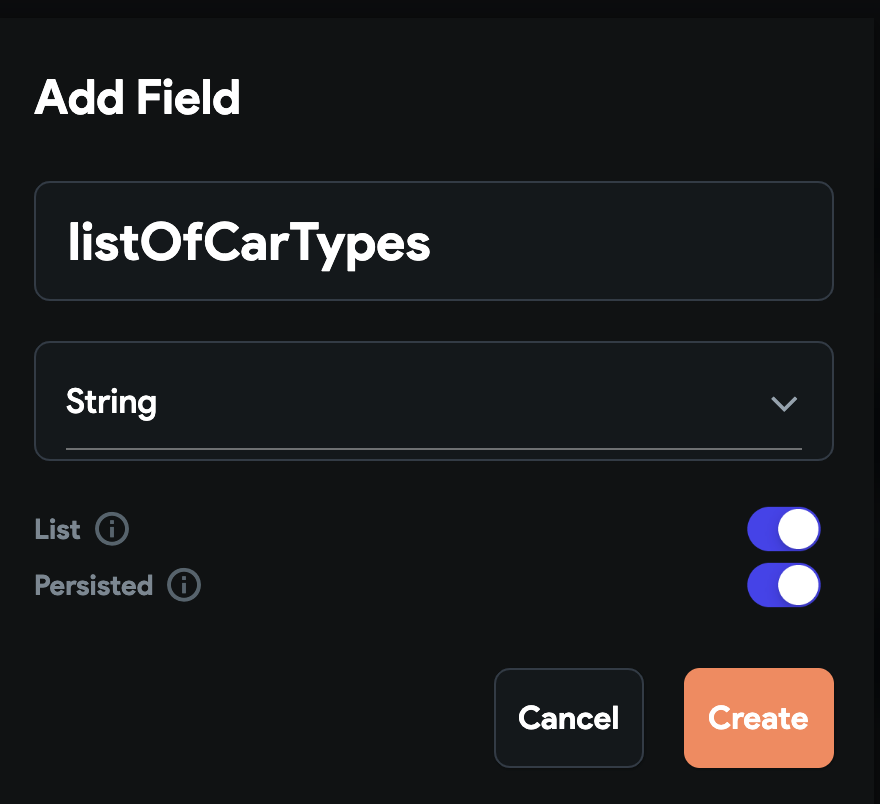
Now go to the Local State tab on the left-hand side of the screen. Create a local state of a list of strings. You may optionally choose to persist it.
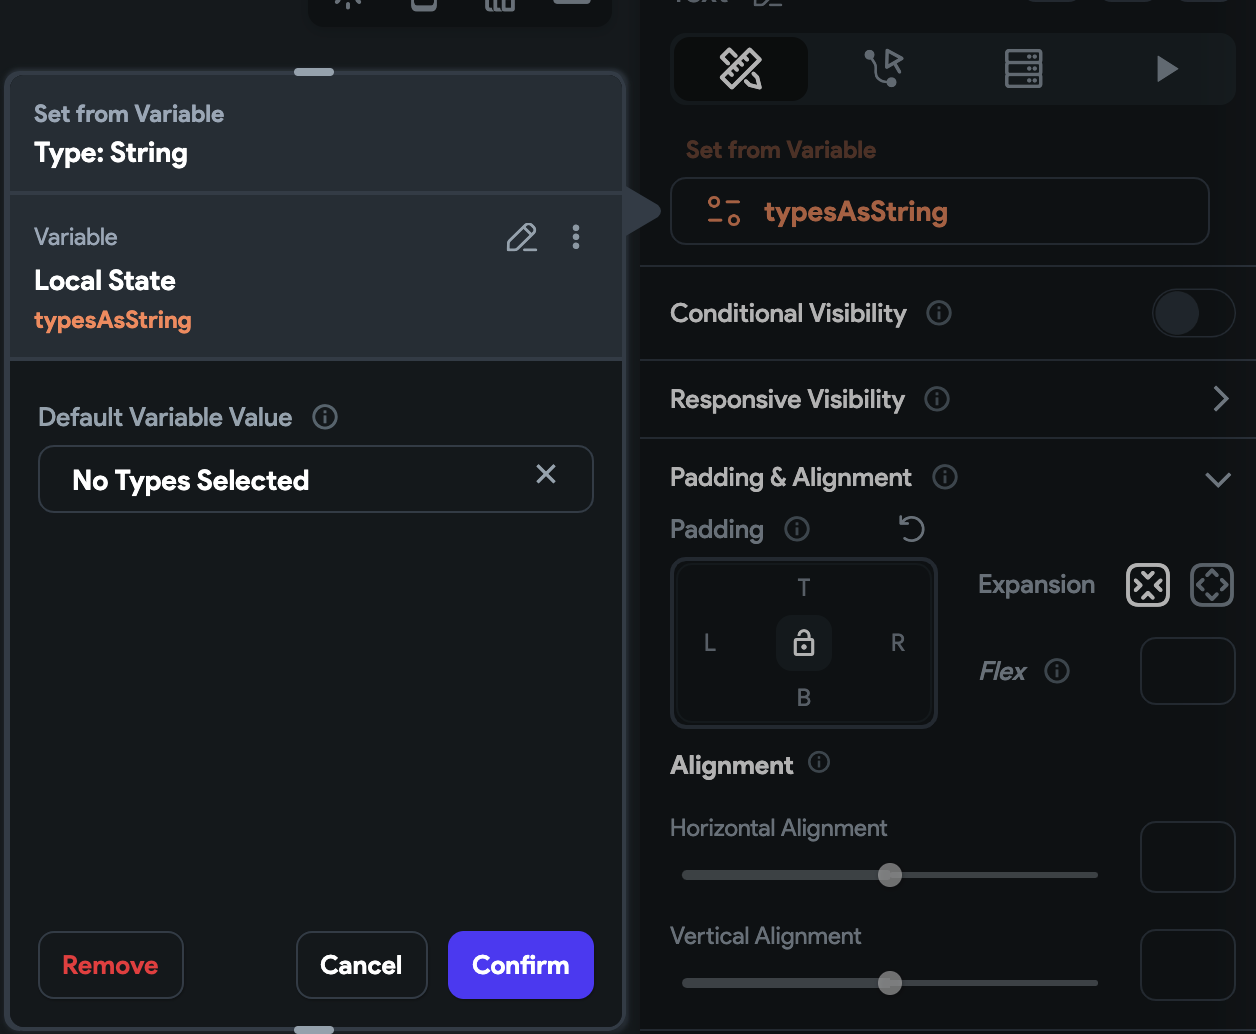
Also, create a string local state to save the single string of car types. Save the changes.
Go to the UI builder and set the text field to the local state string variable. Save the changes.
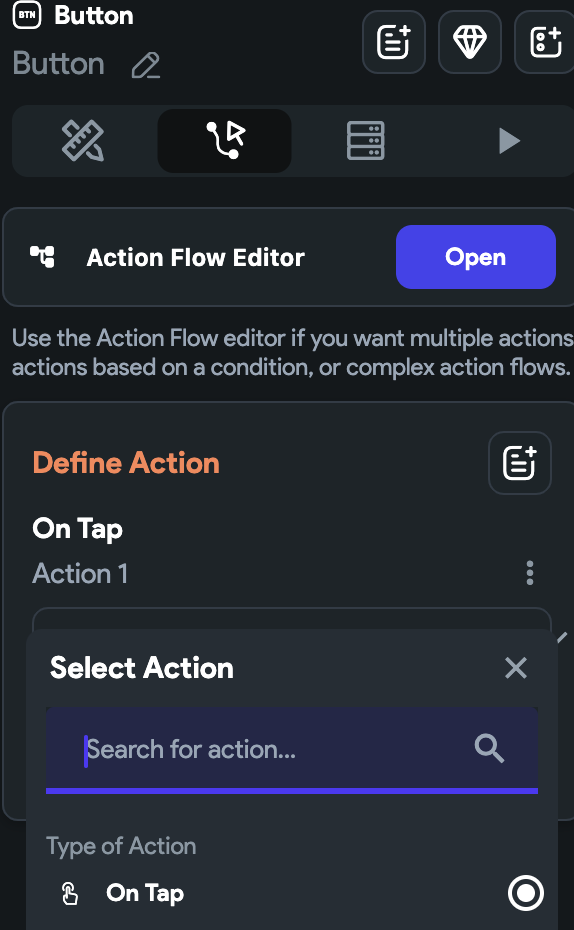
Click on the button so that we can create an action for it. Choose On Tap as the action.
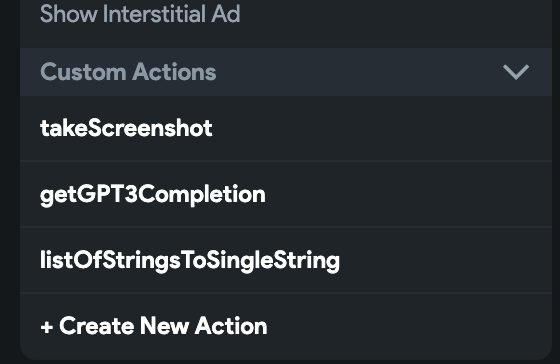
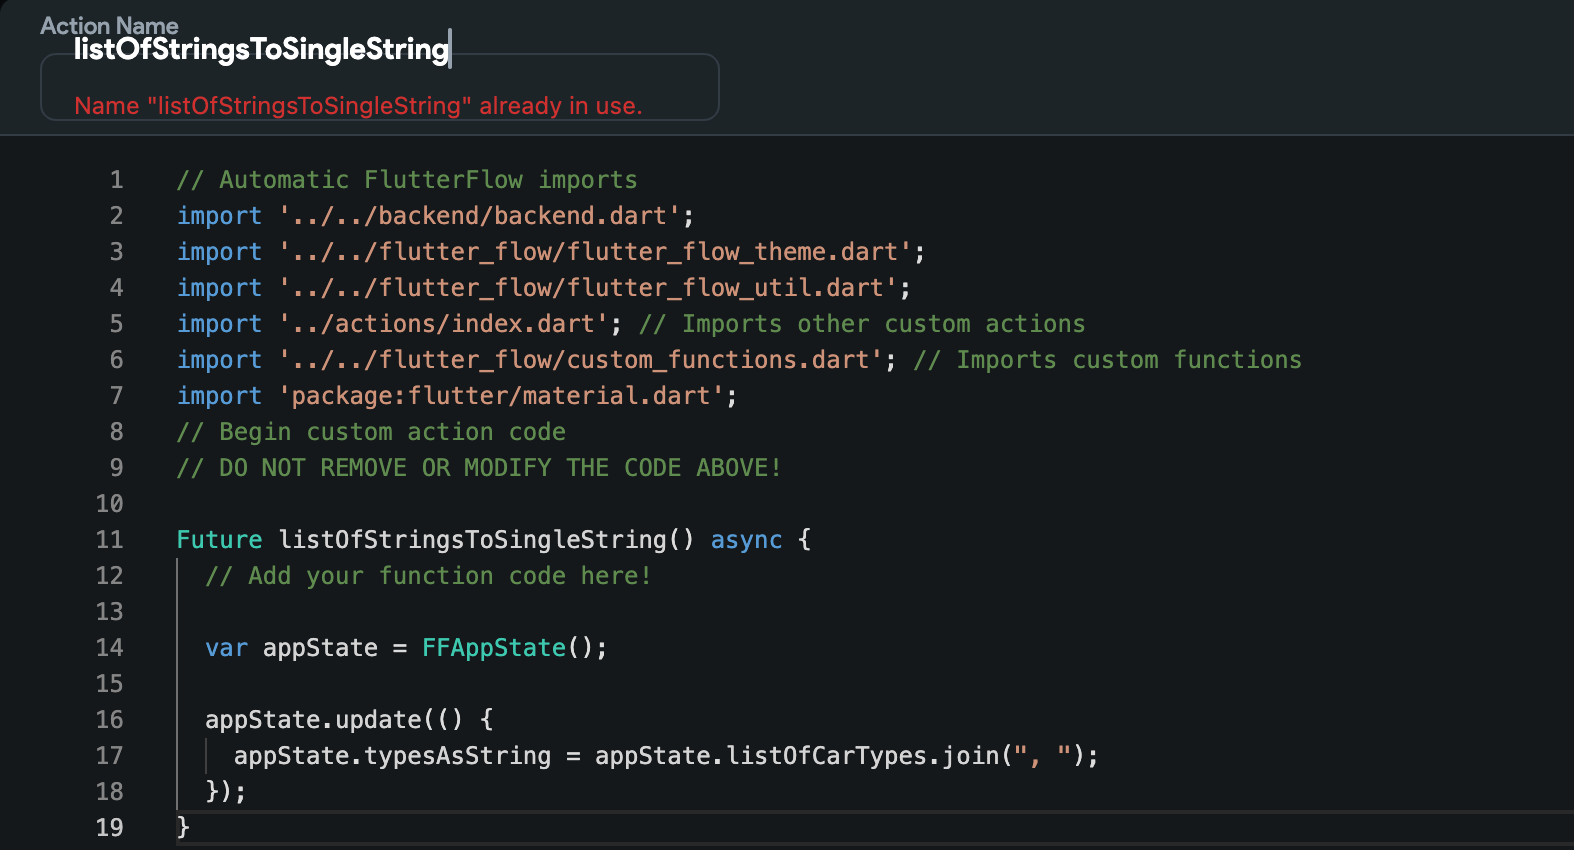
Scroll to the bottom to create a new action. You may also click on the Custom Code tab on the left to create an action.
For the custom action, I downloaded and looked at the flutter flow source code to get an idea of how they handle updating state. For this custom action, we are creating an app state variable and using that to update the state. We are setting the single string state from the local string list state. Save and compile this custom action.
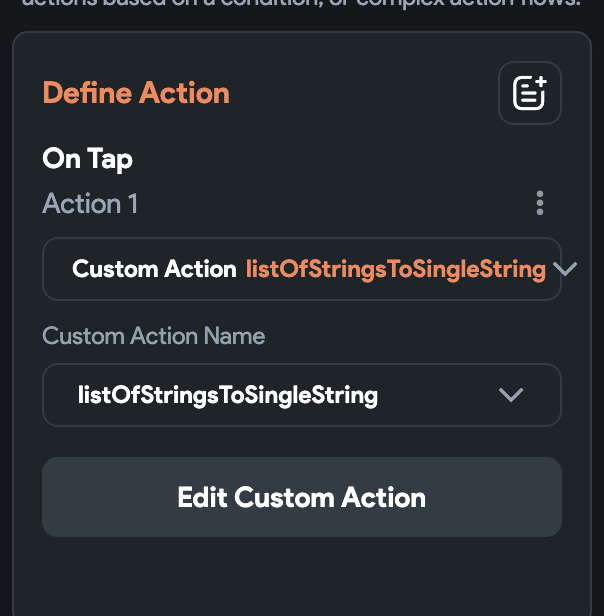
Now go back to the button and ensure the action is used when tapping it.
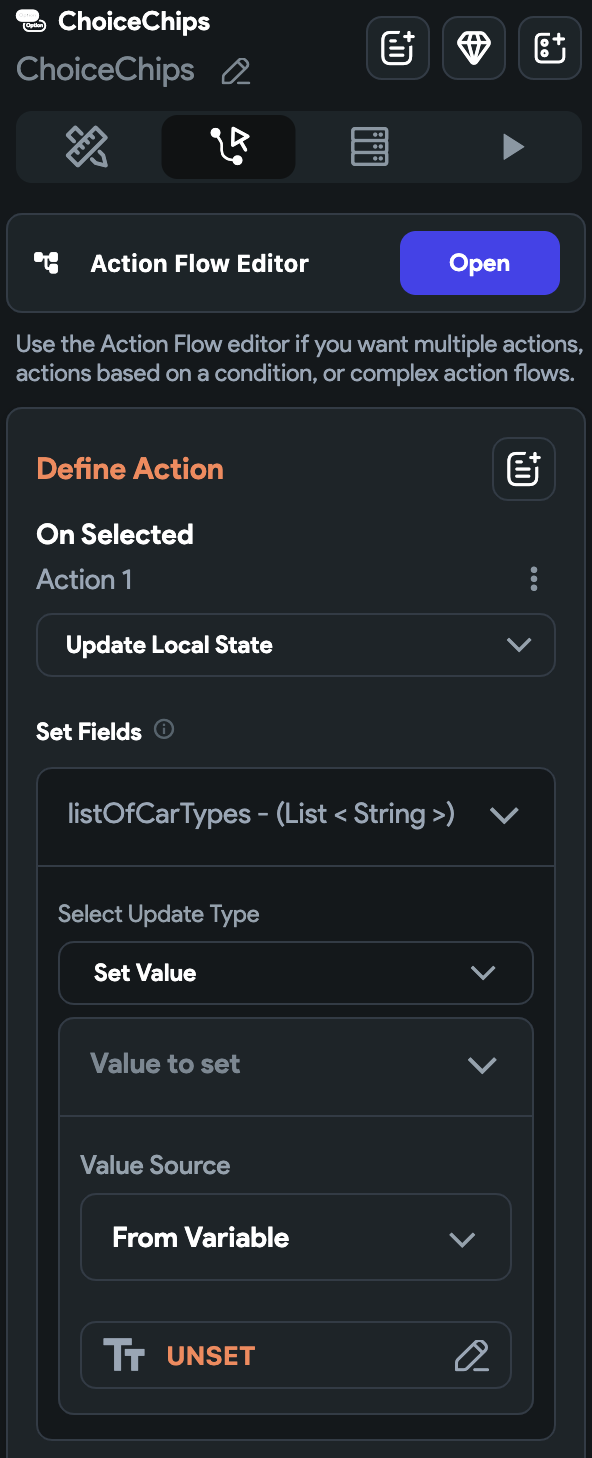
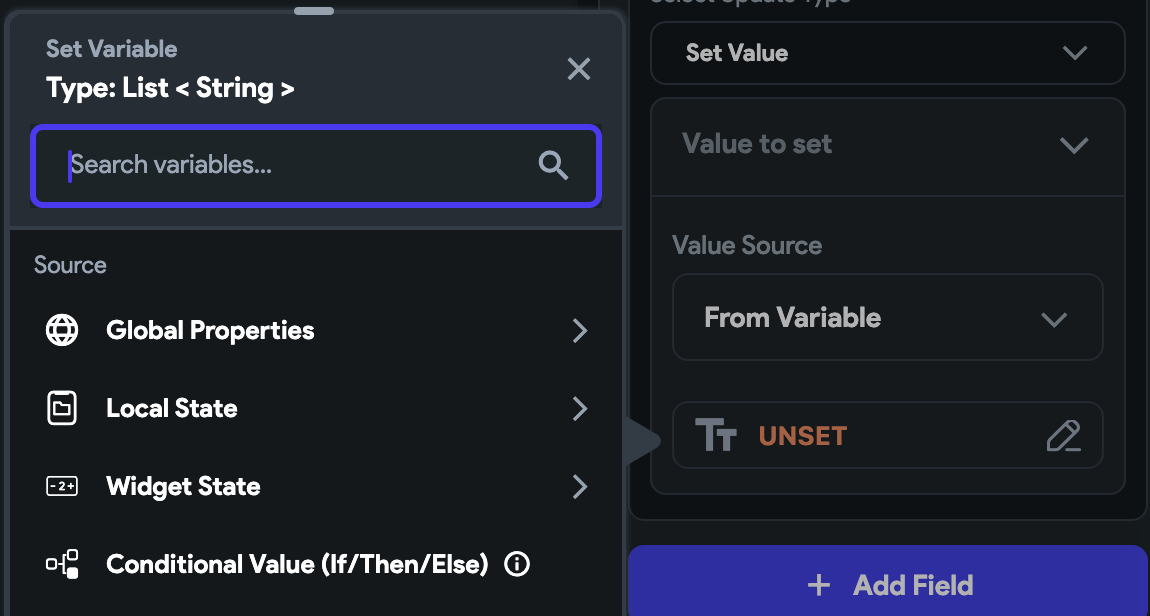
Click on the choice chips so that we can create an action for this. Choose On Selected and click Update Local State. For the Set Fields option, choose the list of strings local state. For the update type, choose Set Value. For the Value Source choose From Variable.
Now click the orange Unset text and choose Widget State. Now choose the Choice Chips. Save the changes.
Now run the app, choose some choice chips, and click the button. The list of options should update the Text widget. This is a small example, but their are probably a lot more useful cases, such as making API requests using the local state values.
Source Code
// Automatic FlutterFlow imports
import '../../backend/backend.dart';
import '../../flutter_flow/flutter_flow_theme.dart';
import '../../flutter_flow/flutter_flow_util.dart';
import '../actions/index.dart'; // Imports other custom actions
import '../../flutter_flow/custom_functions.dart'; // Imports custom functions
import 'package:flutter/material.dart';
// Begin custom action code
// DO NOT REMOVE OR MODIFY THE CODE ABOVE!

Future listOfStringsToSingleString() async {
  // Add your function code here!

  var appState = FFAppState();

  appState.update(() {
    appState.typesAsString = appState.listOfCarTypes.join(", ");
  });
}
Now I will show you another way to get the value using Page State and a custom function.
Custom development
I get a lot of requests for custom tweaks of Google Maps with Flutter.
I have created a form to capture these requests to better understand everyone’s needs. You can also request custom Flutter Flow development and/or Flutter Flow training.
If you have urgent specific requests, please leave your contact information in the survey.
Set up the UI
I am going to set up the same UI as the previous article.
Search for choice chips in the UI Builder and drag it on your blank screen.
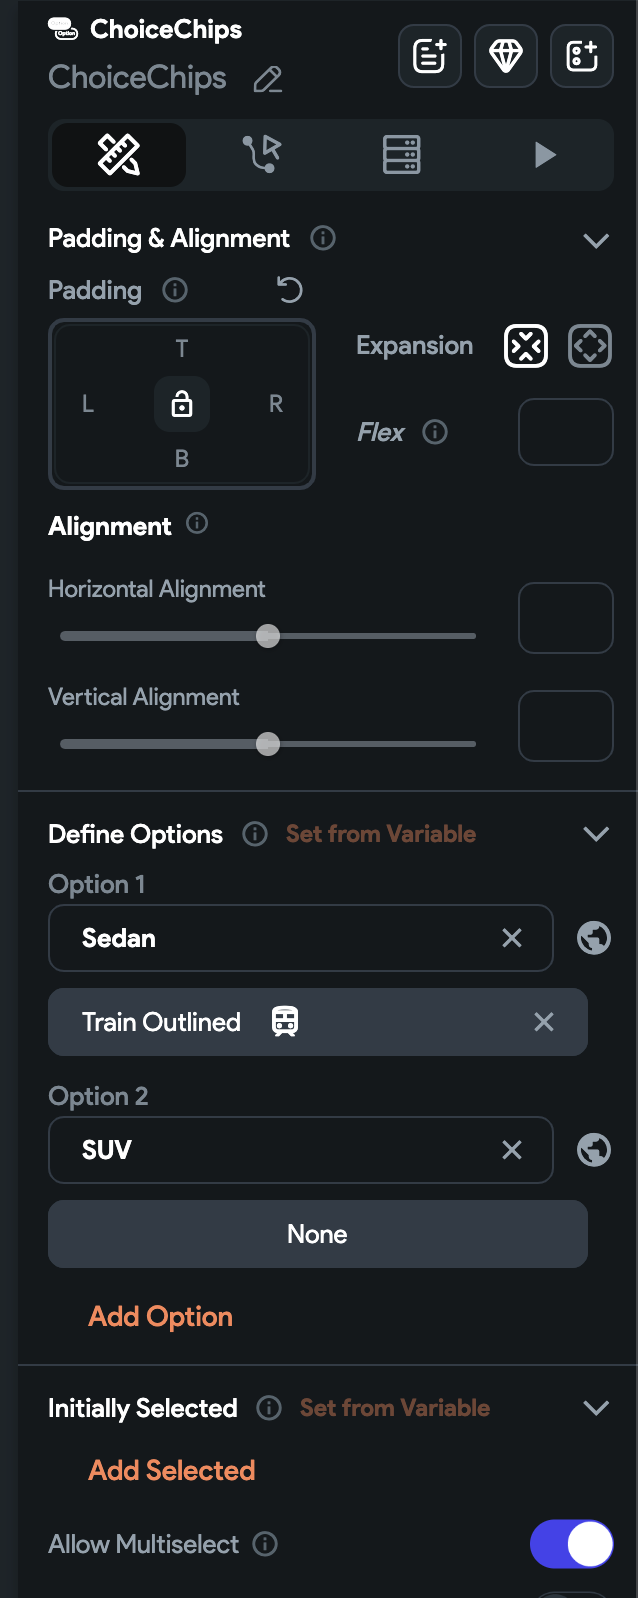
Add multiple options. For this example, I have two types of cars. Sedan and SUV. Also, turn the Allow Multi-Select option on. Save the changes.
Drag a button and text field under the choice chips. Save the changes.
Create Page State
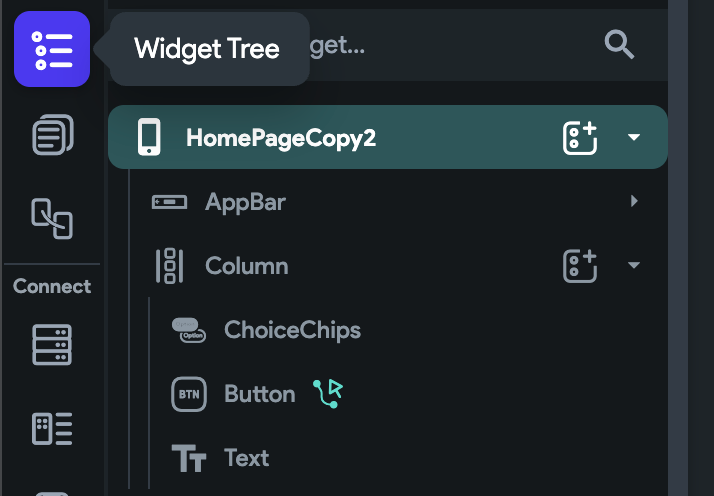
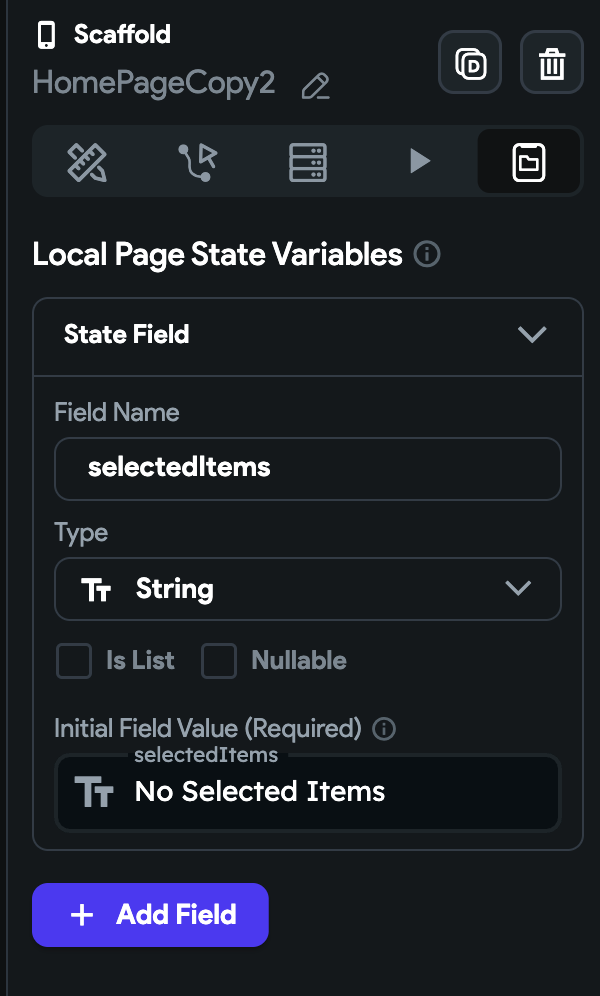
Click the top-level Widget in the Widget Tree to create Page State.
On the far right, click the last tab and add a Local Page State Variable. Give it a name and set the type to String. You can make it nullable and set the Initial Field Value to No Selected Items
Now click the text field and set the value to the selectedItems Page State.
Create a custom function
Now let’s create a custom function to show the selected values in our text field. The choice chips gives a list of strings when multi select is on.
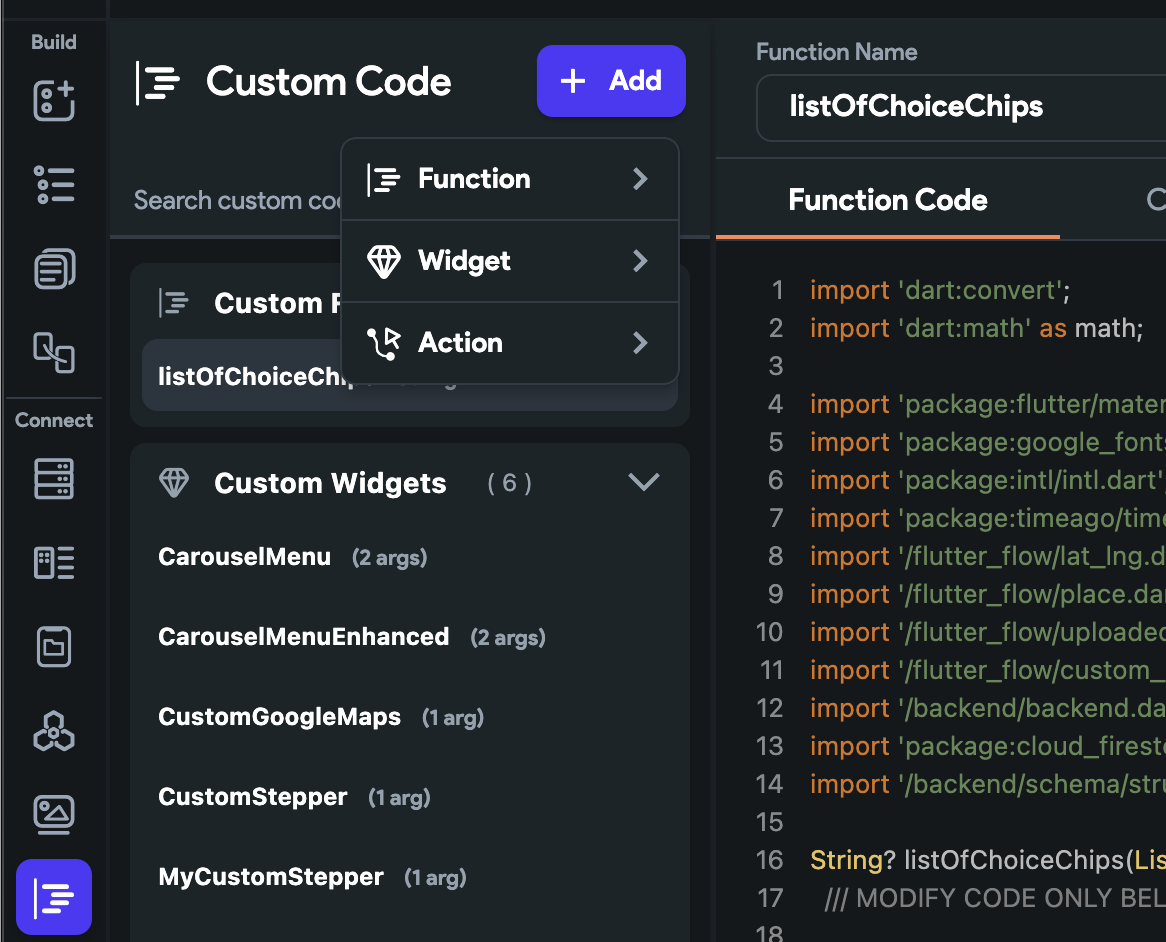
Go to Custom Code, click the purple + Add button, and Click **Function. **Give your function a name in camel case such as listOfChoiceChips.
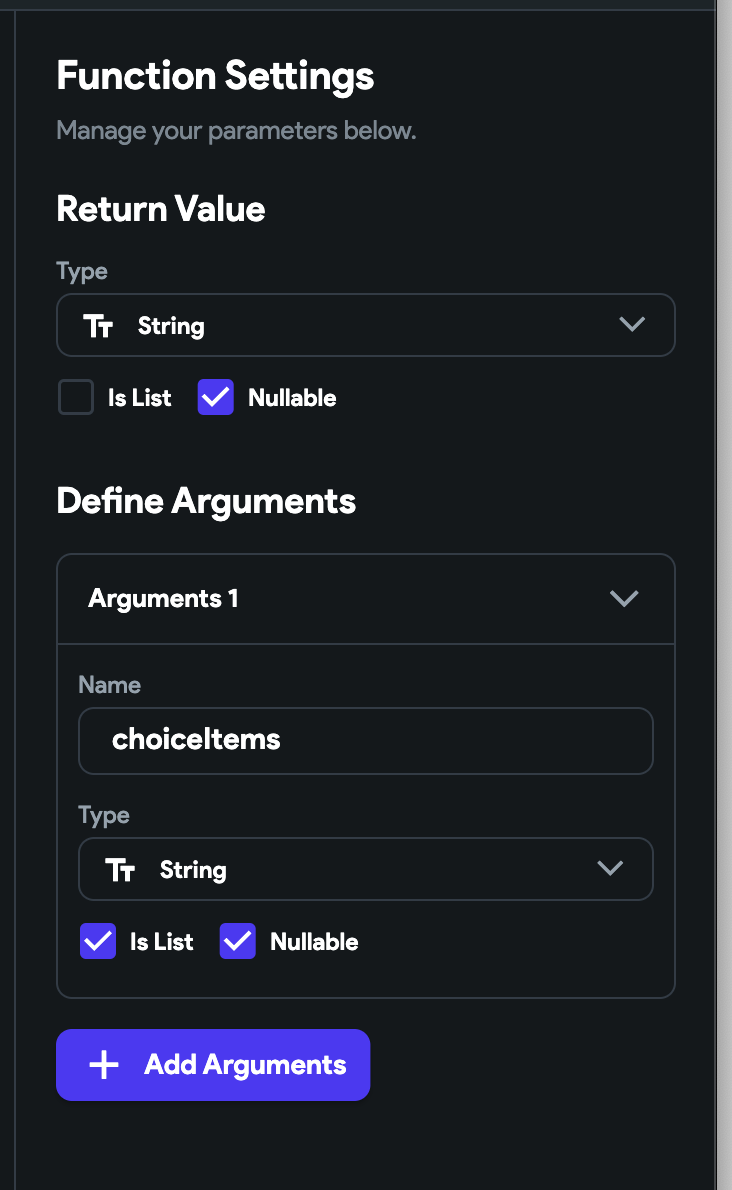
Now go over to right of the screen to Function Settings. Set the Return Value to a String. Create one argument choiceItems of Type String and check Is List.
Our code is simple, we will reuse some of the code before. Add this line between the comments:
return choiceItems?.join(", ") ?? "No selected Items";
Your final code should look like this:
import 'dart:convert';
import 'dart:math' as math;

import 'package:flutter/material.dart';
import 'package:google_fonts/google_fonts.dart';
import 'package:intl/intl.dart';
import 'package:timeago/timeago.dart' as timeago;
import '/flutter_flow/lat_lng.dart';
import '/flutter_flow/place.dart';
import '/flutter_flow/uploaded_file.dart';
import '/flutter_flow/custom_functions.dart';
import '/backend/backend.dart';
import 'package:cloud_firestore/cloud_firestore.dart';
import '/backend/schema/structs/index.dart';

String? listOfChoiceChips(List<String>? choiceItems) {
  /// MODIFY CODE ONLY BELOW THIS LINE

  return choiceItems?.join(", ") ?? "No selected Items";

  /// MODIFY CODE ONLY ABOVE THIS LINE
}
Save the function.
Create an action for the Button
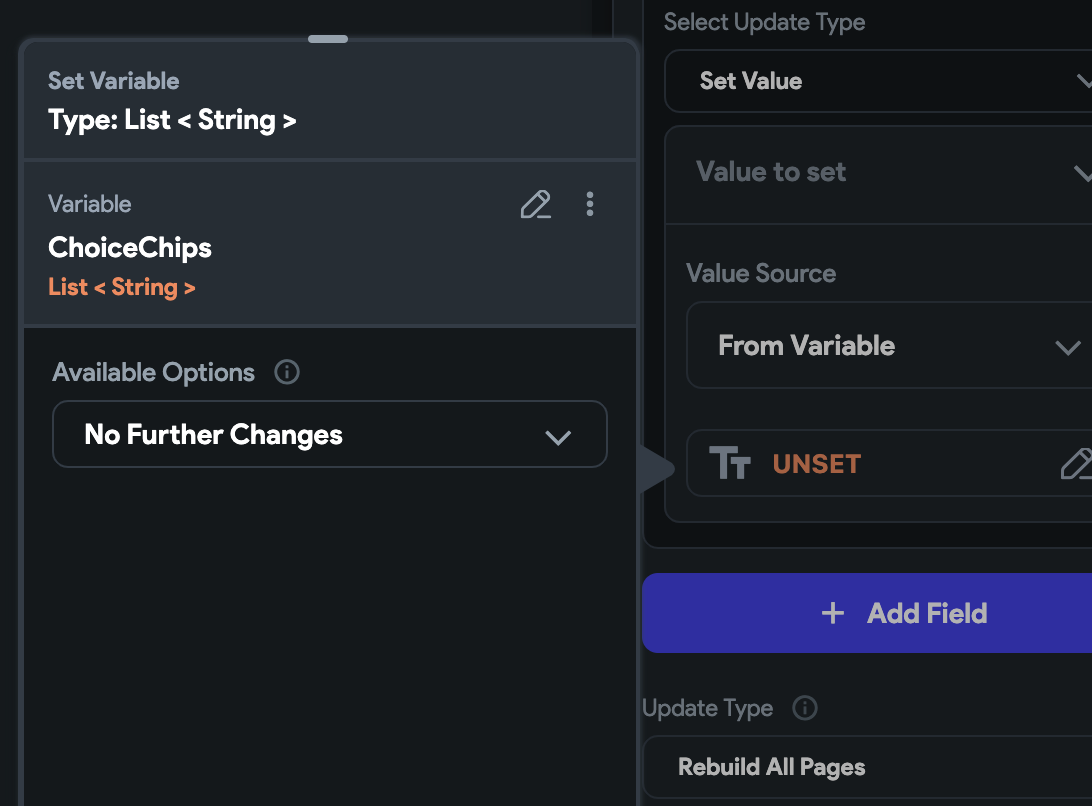
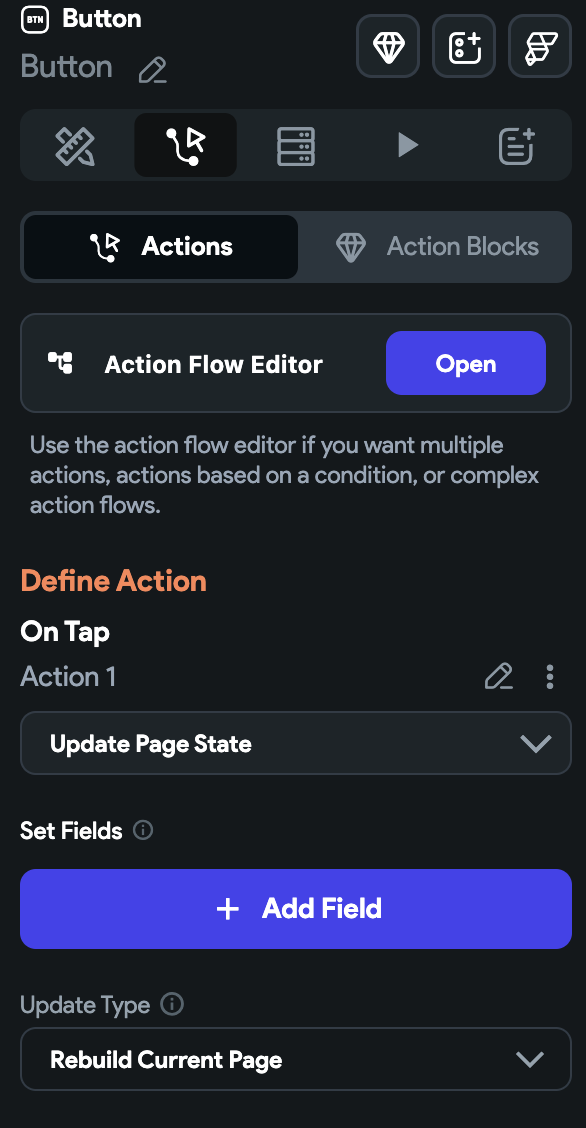
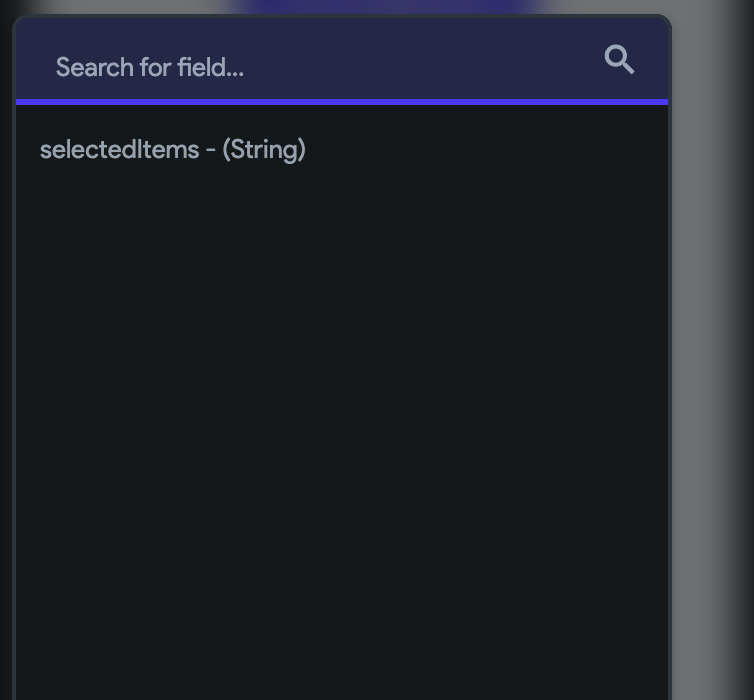
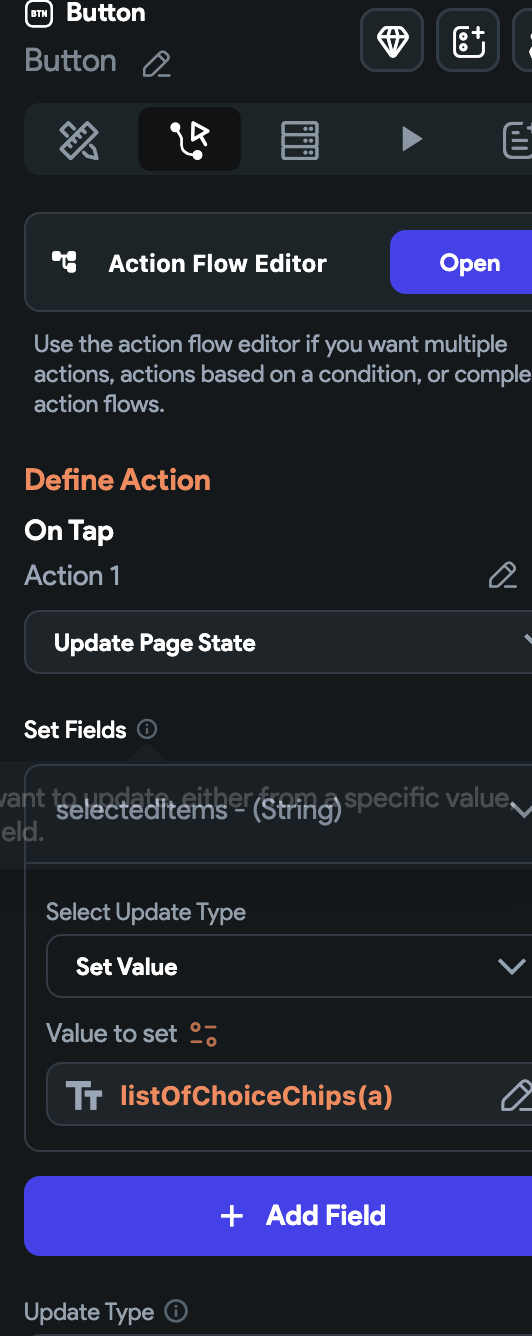
Go back to our page, click the Button, and Click the Actions tab. For On Tap click Update Page State. Click Add Field.
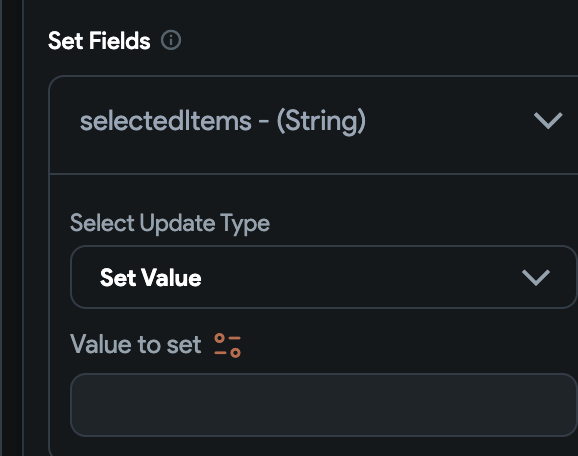
Click the selectedItems Page State Variable.
Choose Set Value as the Update Type.
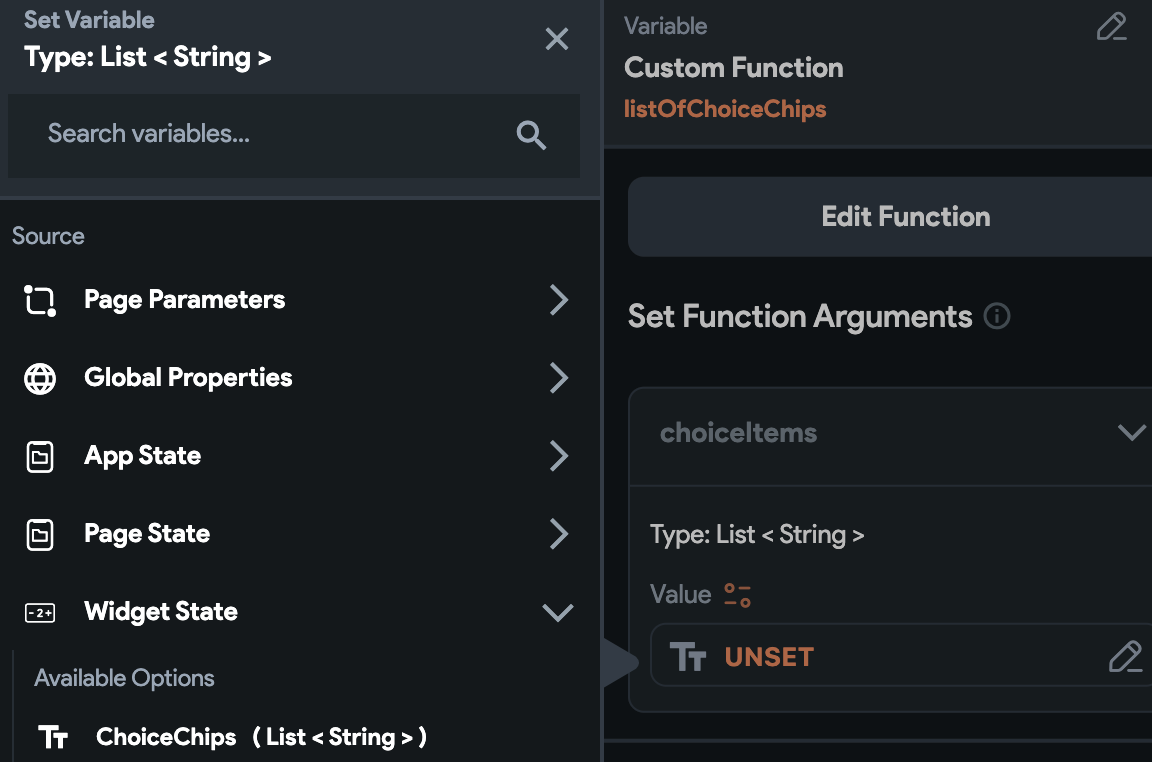
For Value to set, click the orange icon and find our listOfChoiceChips custom function.
For the choiceItems Function Argument, click UNSET or the orange icon, and under Widget State choose our ChoiceChips
Click Confirm. The Action for the button should now look like this.
I get a lot of requests for custom tweaks of Google Maps with Flutter.
I have created a form to capture these requests to better understand everyone’s needs. You can also request custom Flutter Flow development and/or Flutter Flow training.
If you have urgent specific requests, please leave your contact information in the survey.
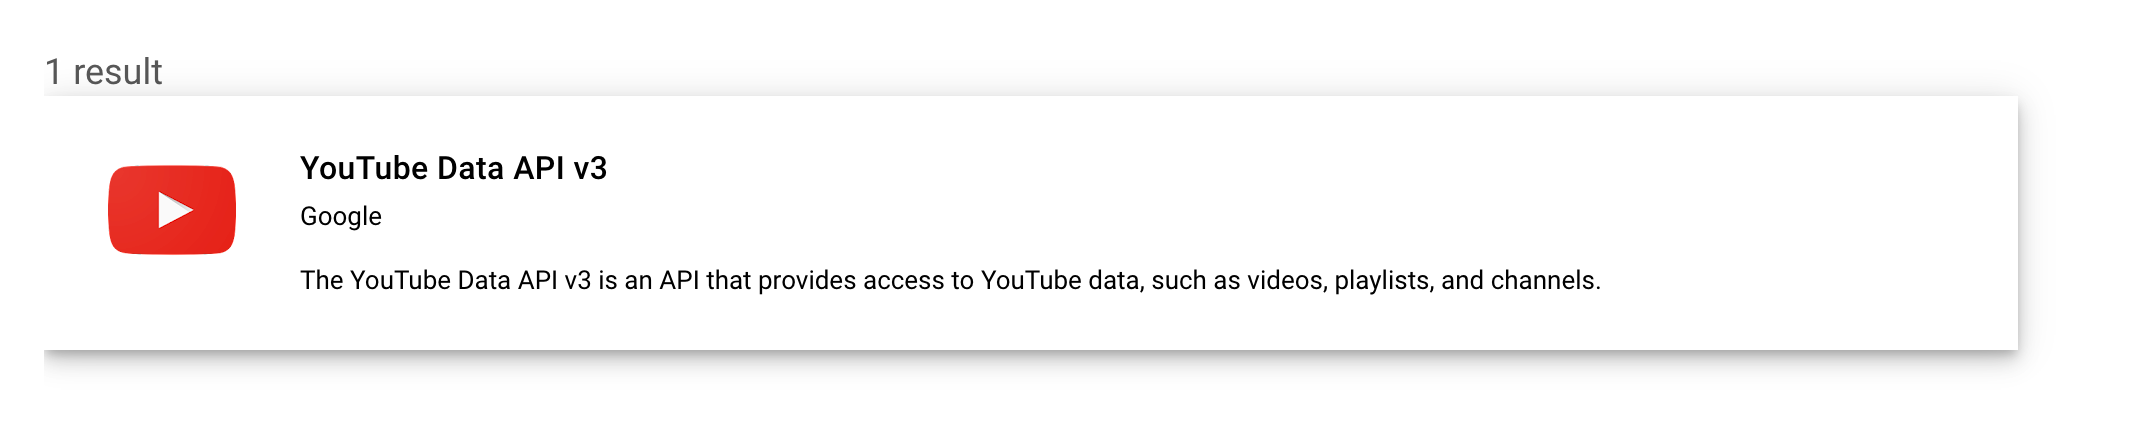
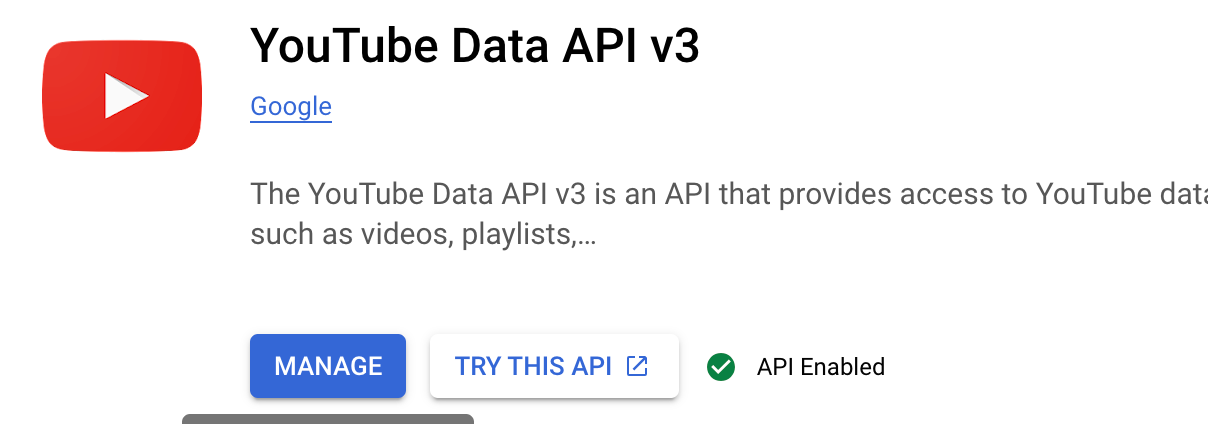
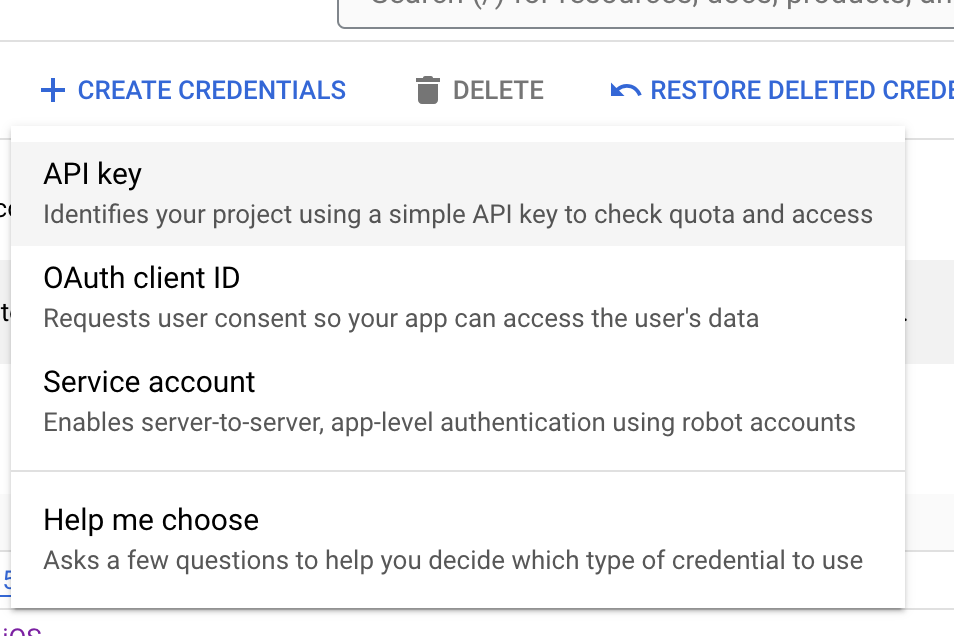
Enable Youtube Data API
First, we need to enable the Youtube Data API on the Google Cloud console. It will prompt you to make a project if you do not have one. Google Cloud console
Search for Youtube and click youtube data api v3
It will take you to the results. Click on the following
It will have a button that says ENABLE. I currently have it enabled so it shows manage
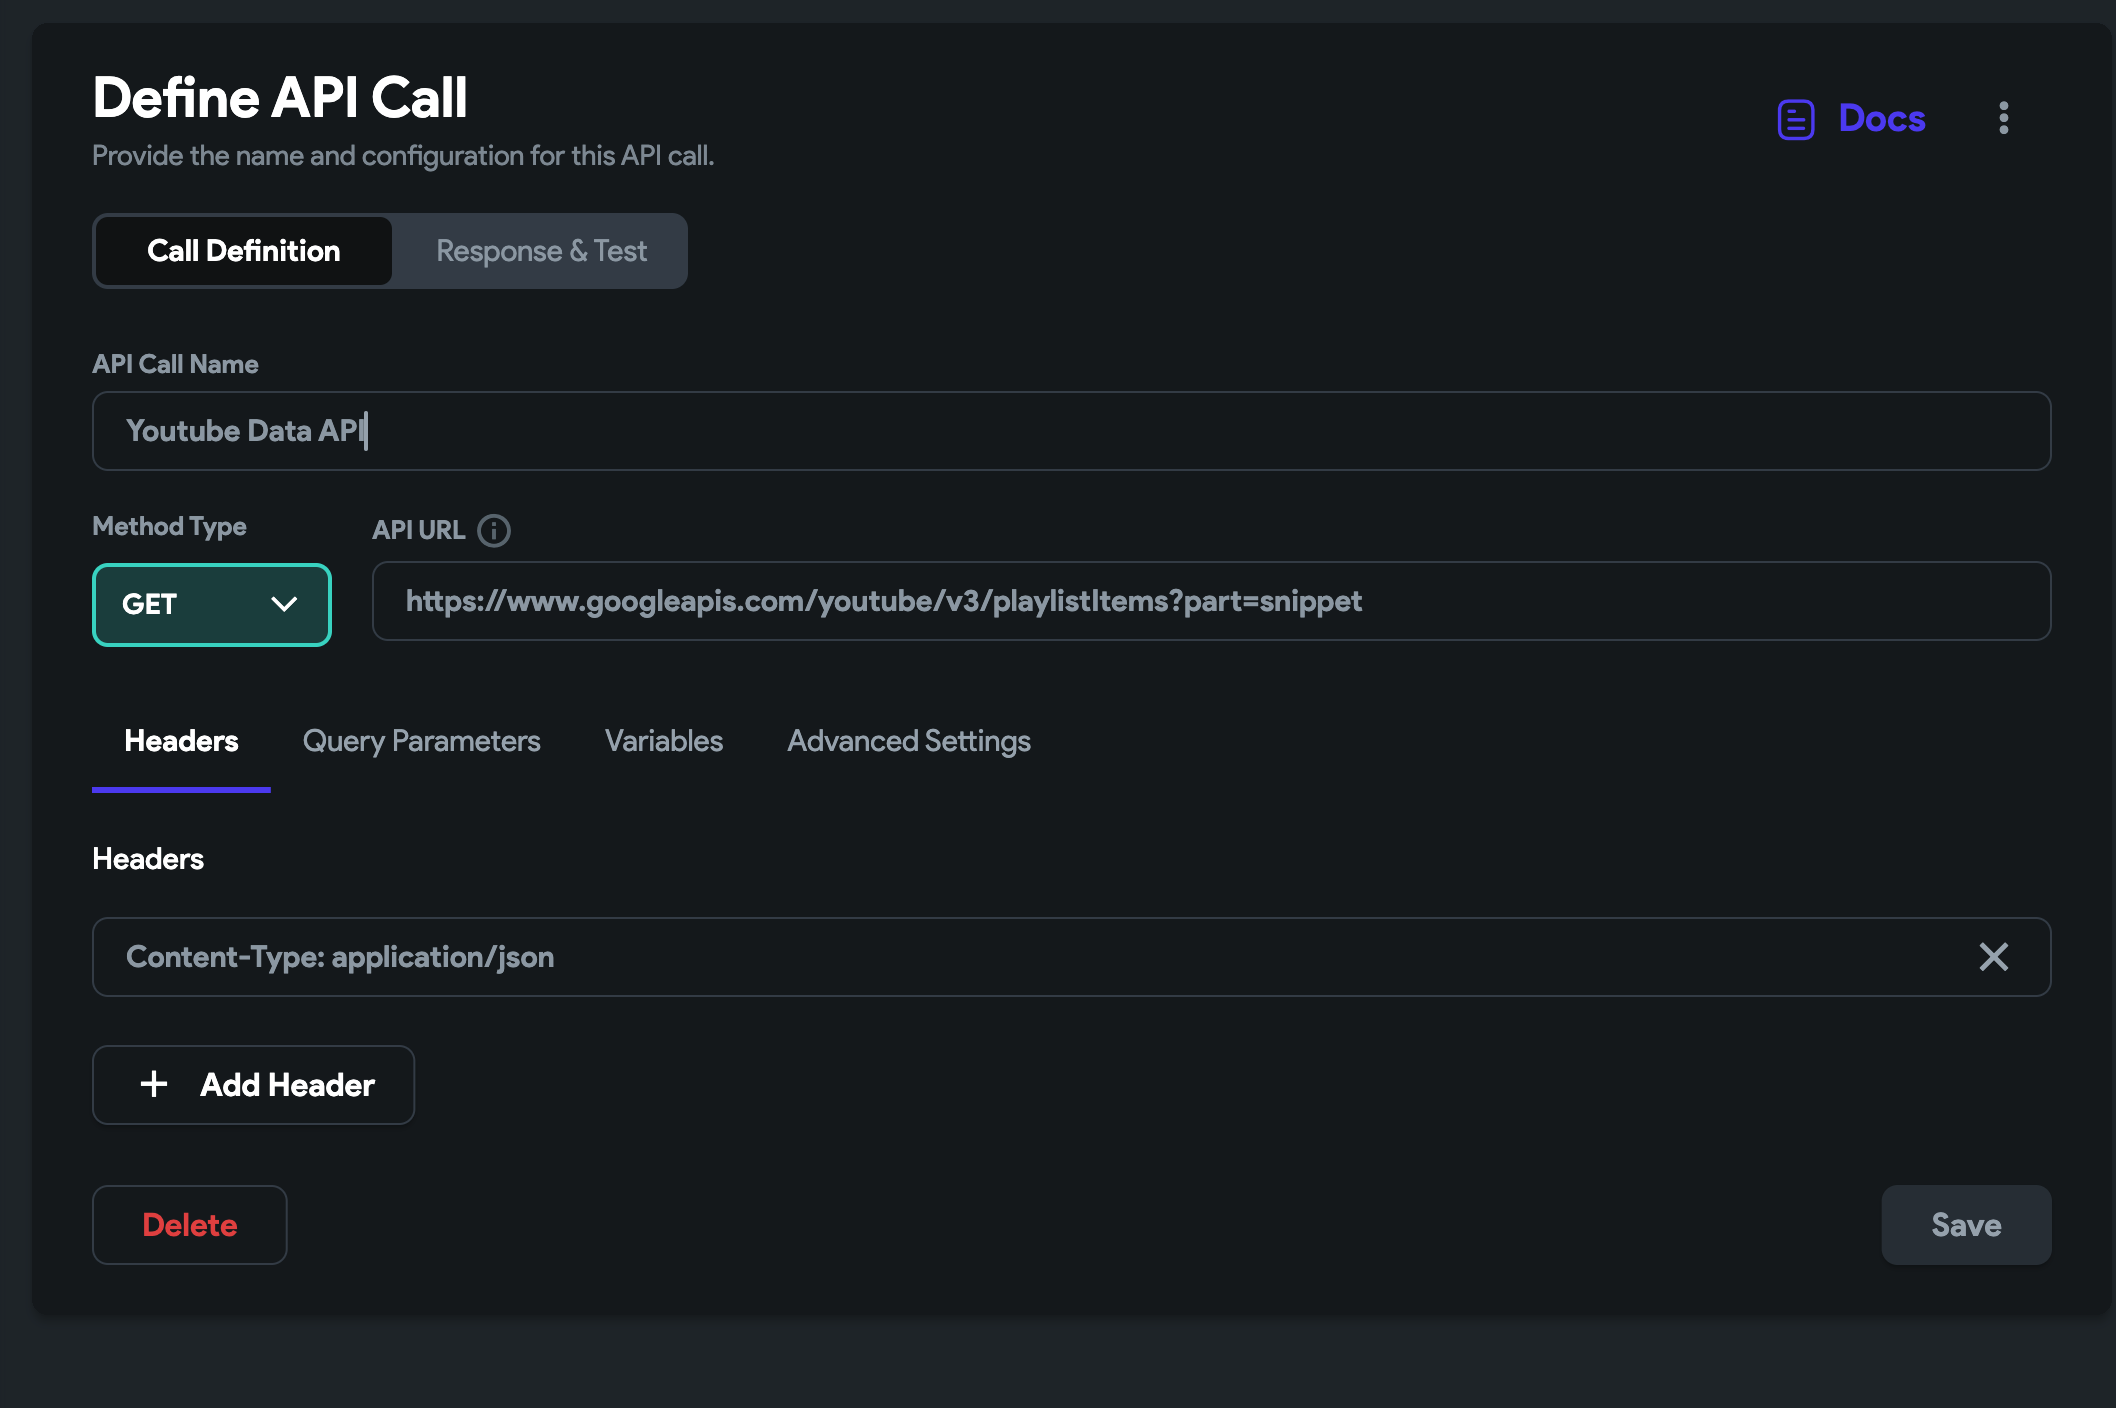
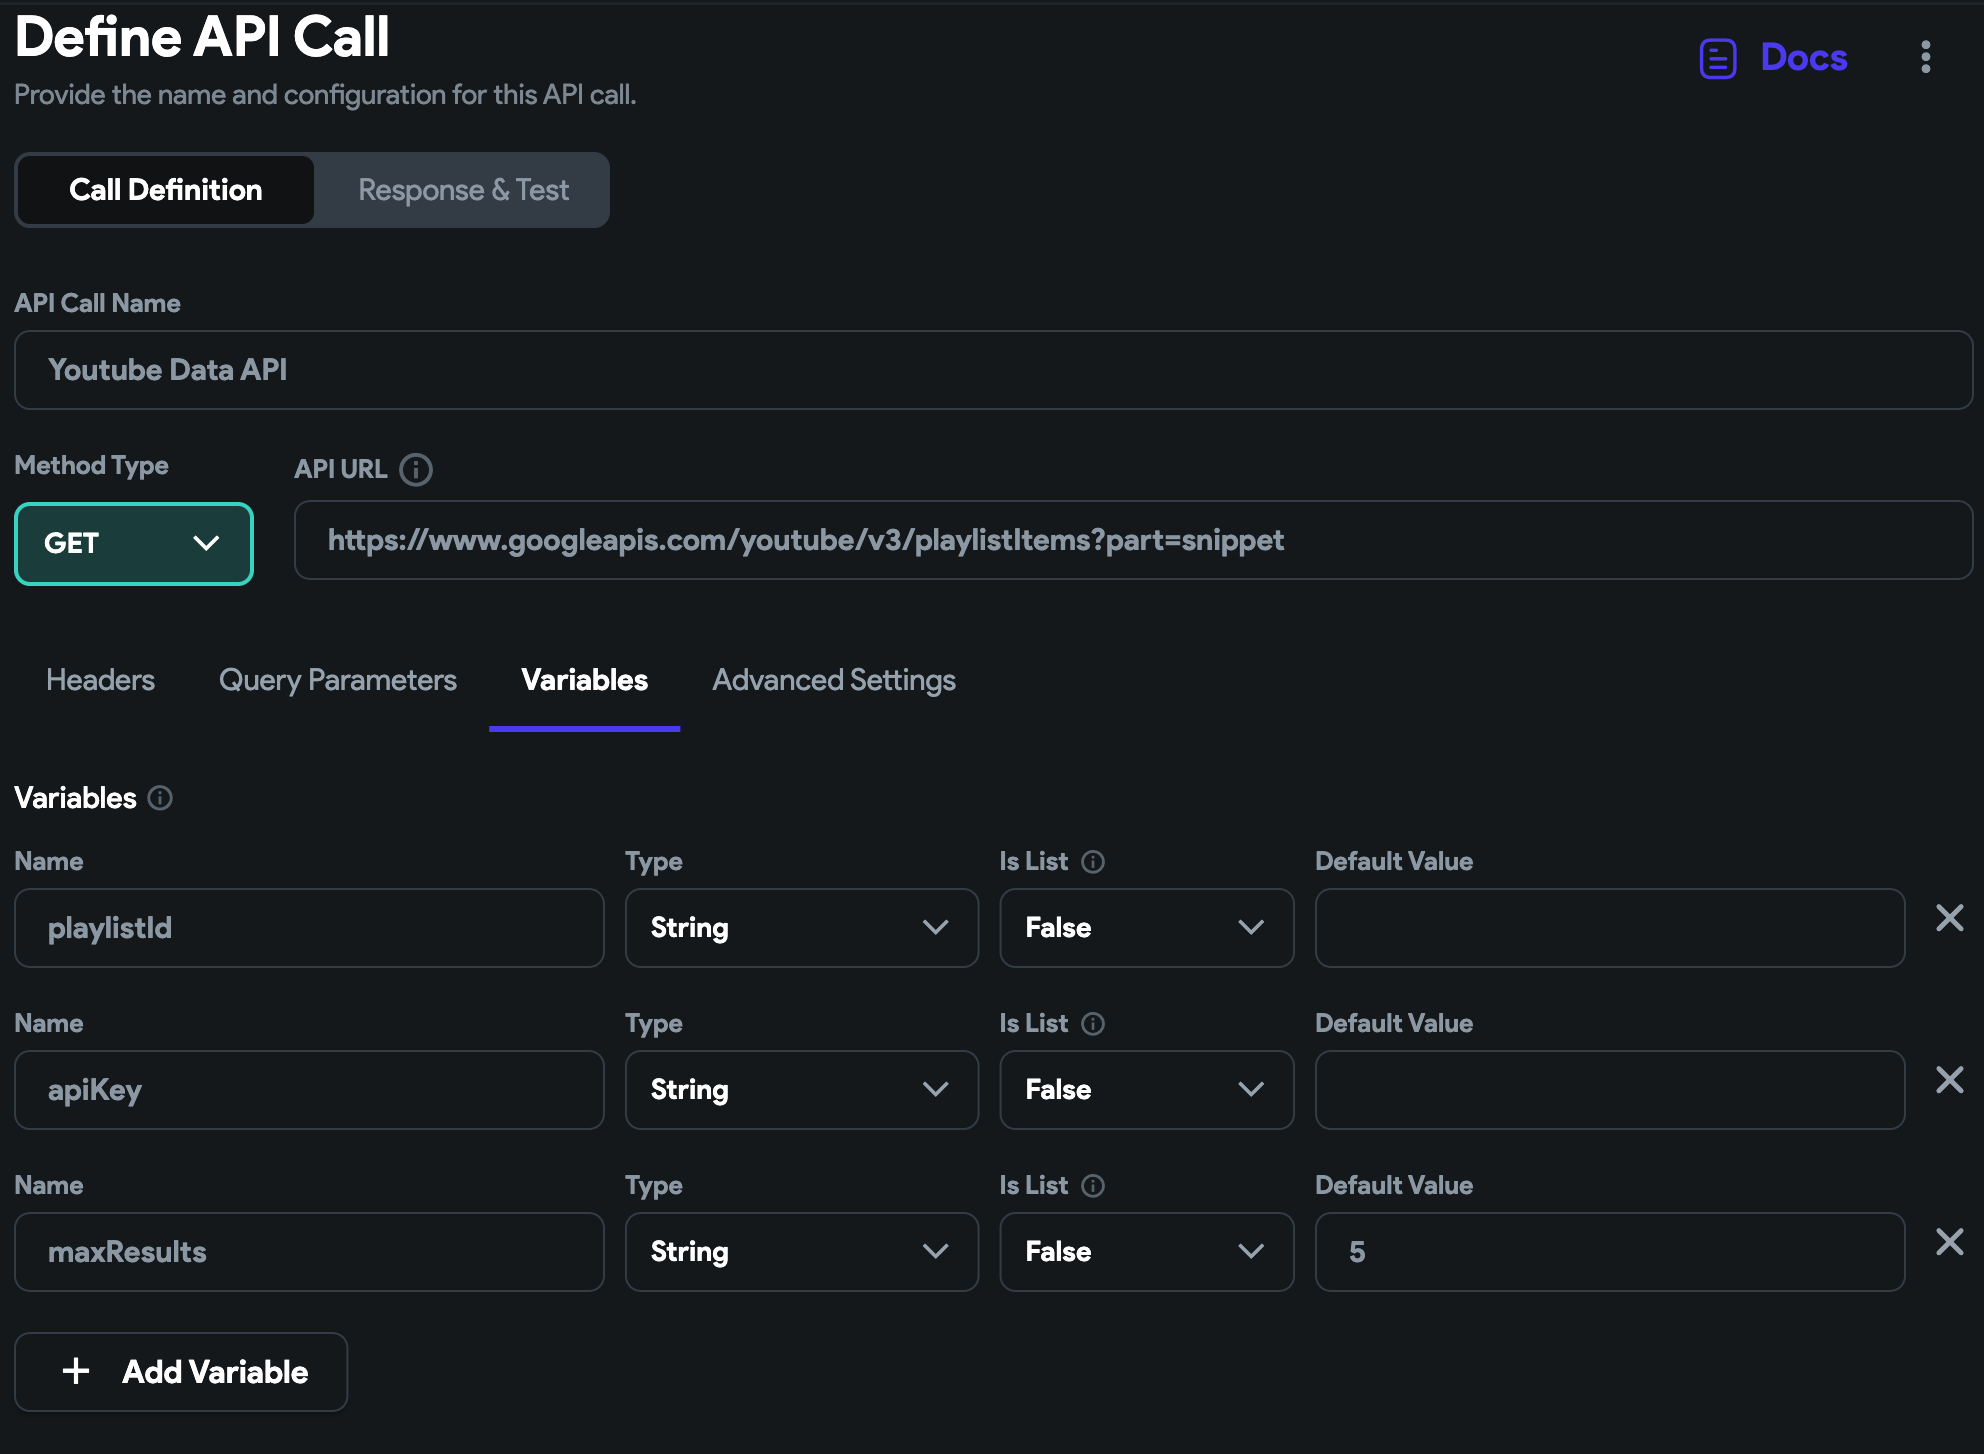
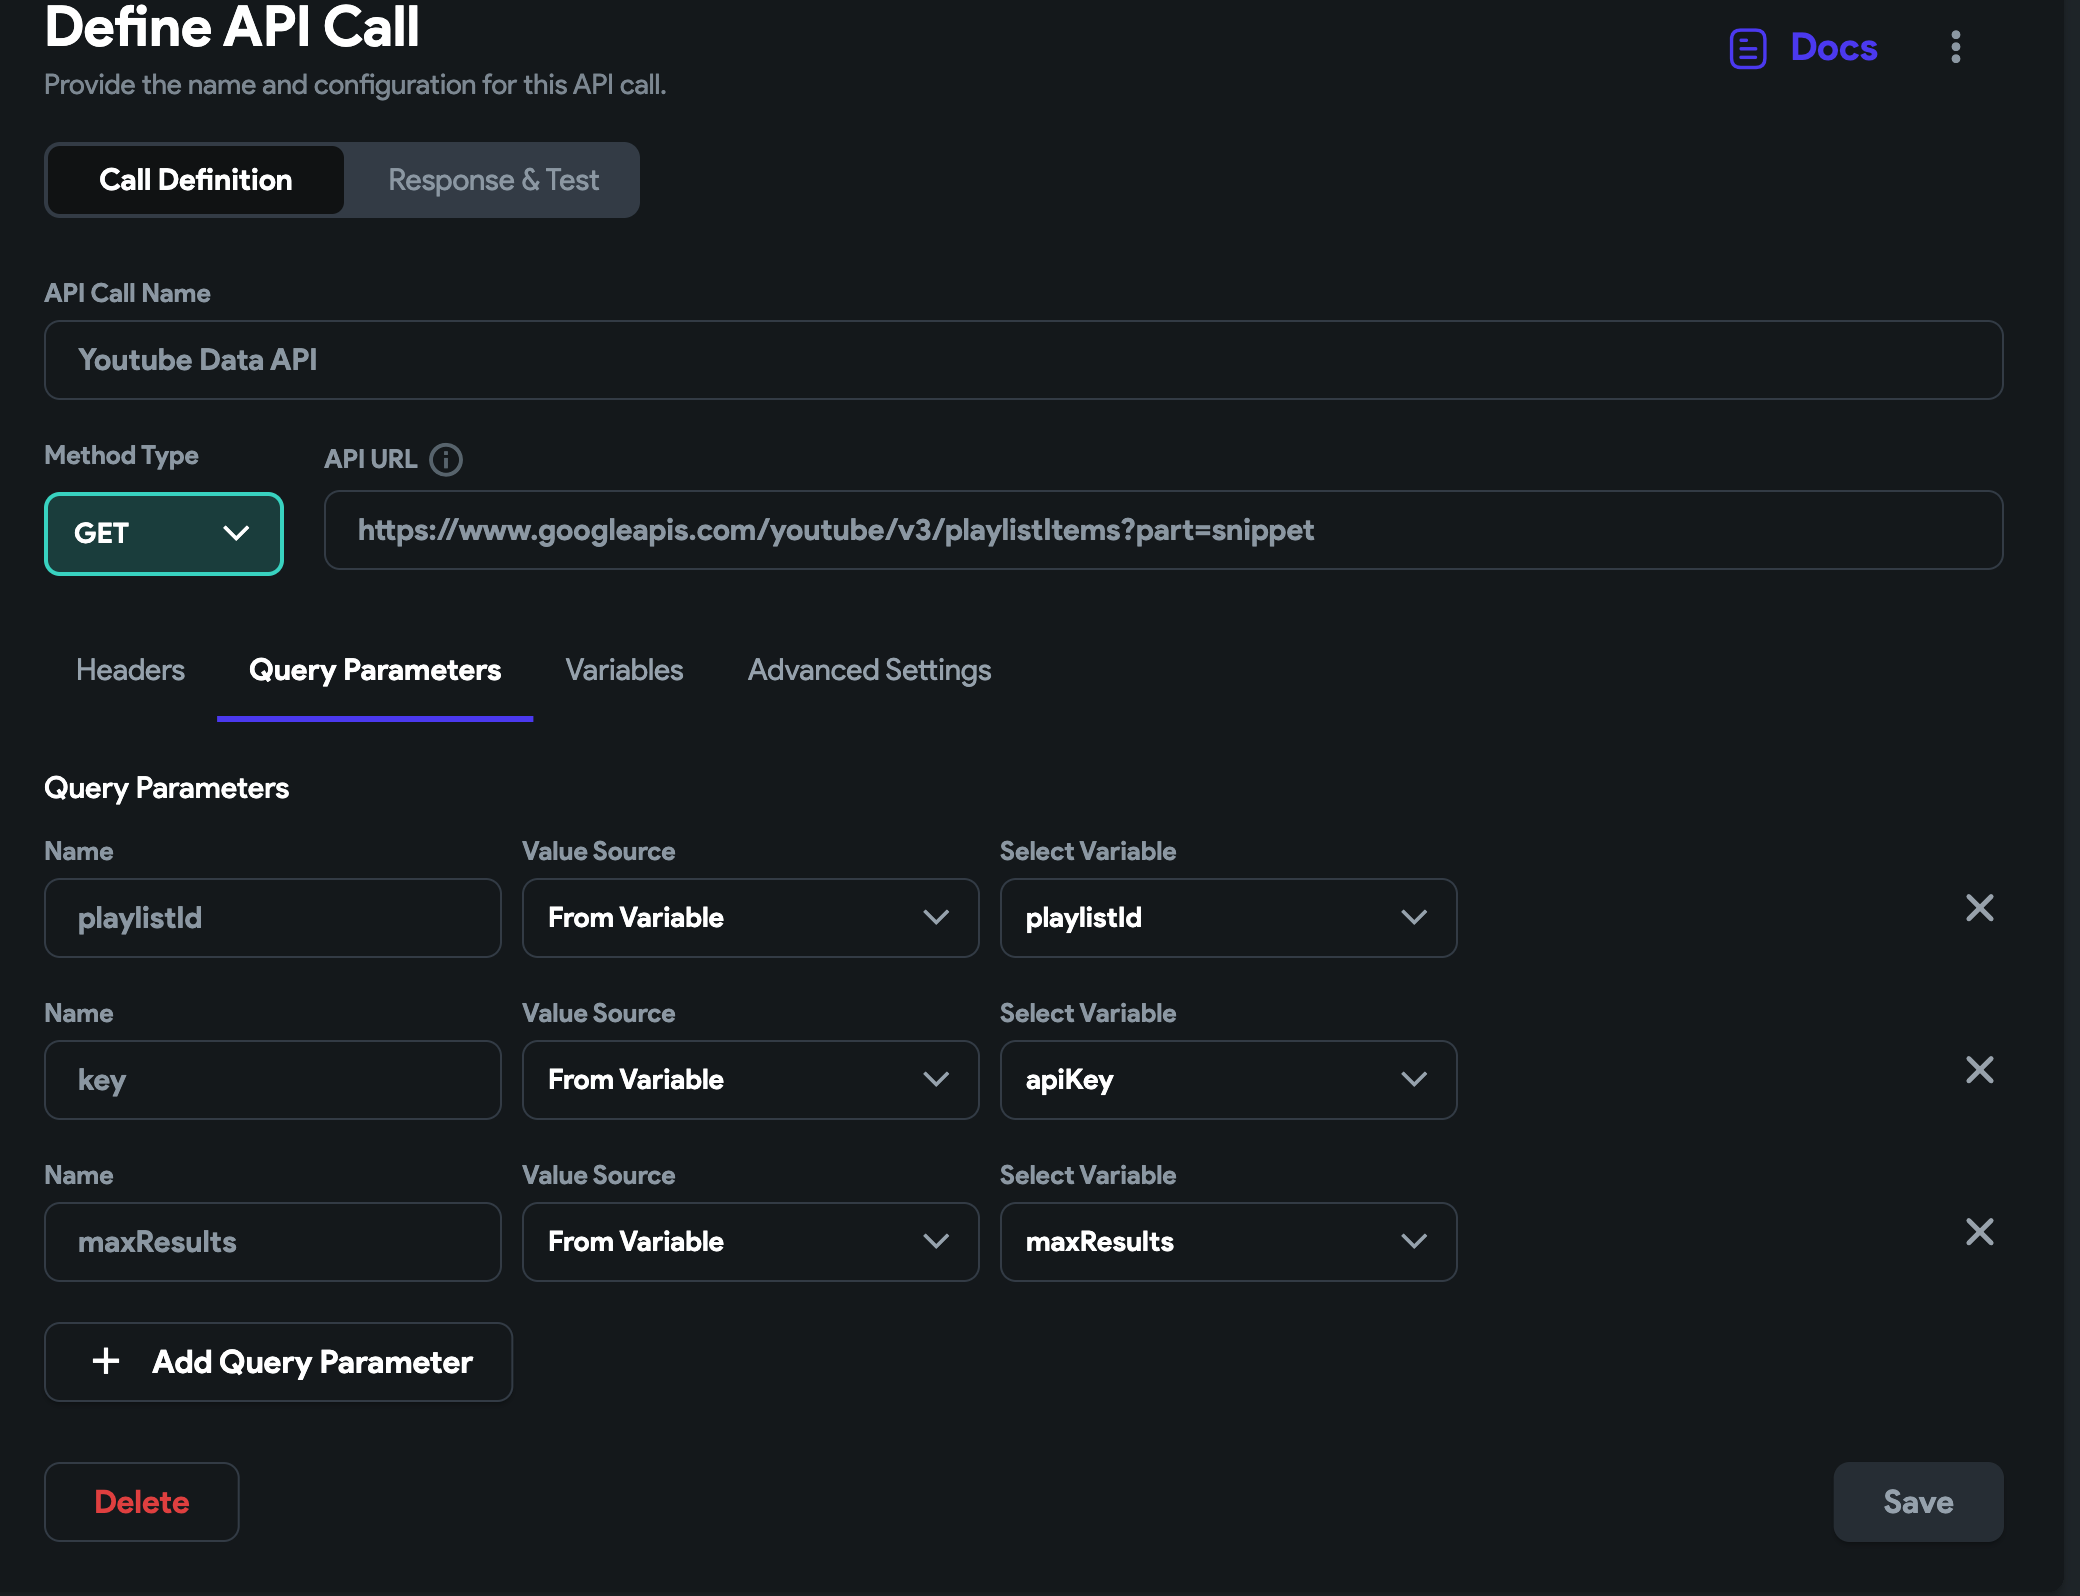
I have given similar names to the variables. The only difference here is key is used instead of apiKey, because that is what is defined in the API documentation.
Note since the page key works differently in the Youtube Data API than what Flutter Flow supports, we can’t currently use infinite scrolling. A workaround is to use a database to load the list. You can still follow this tutorial and use it as a tool to add data to your database.
Click the Save button
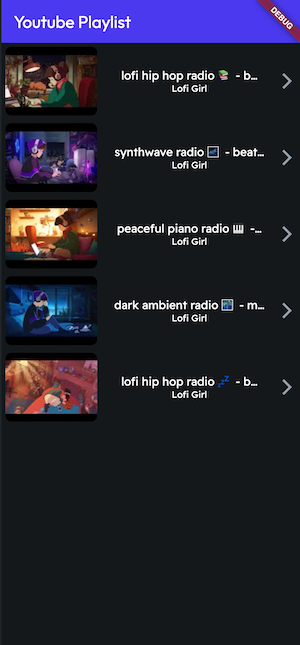
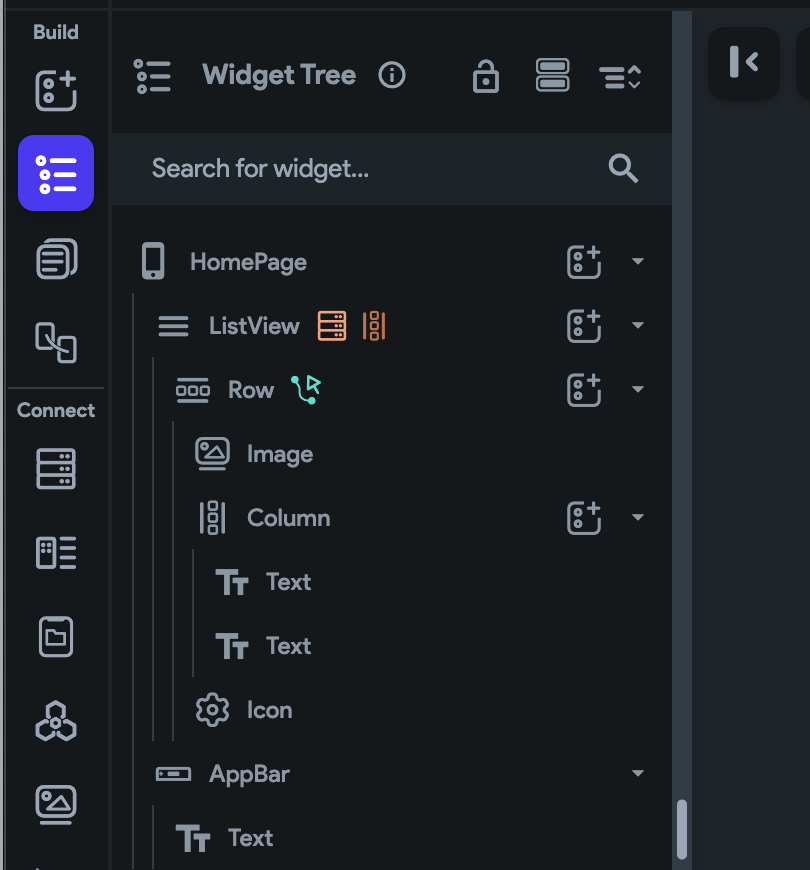
Create Flutter Flow Video List UI
For the UI that shows the list of videos, I have a ListView. Within the ListView I have a Row. The Row has an image for the thumbnail and a column to hold the title and description.
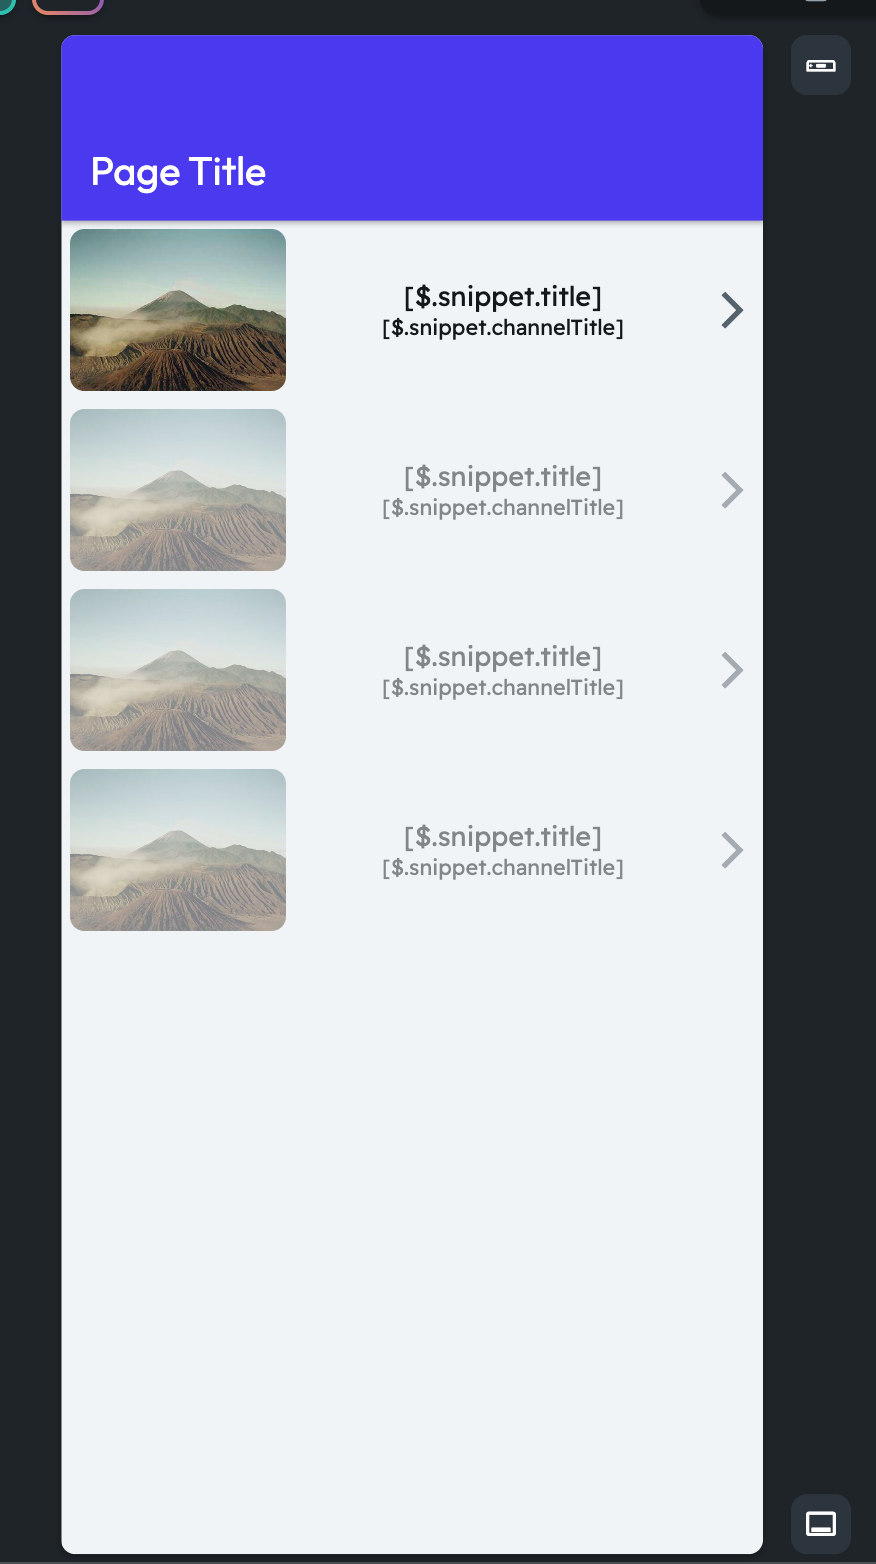
Here is an example of the UI. I will show you how to make the call and hook everything up.
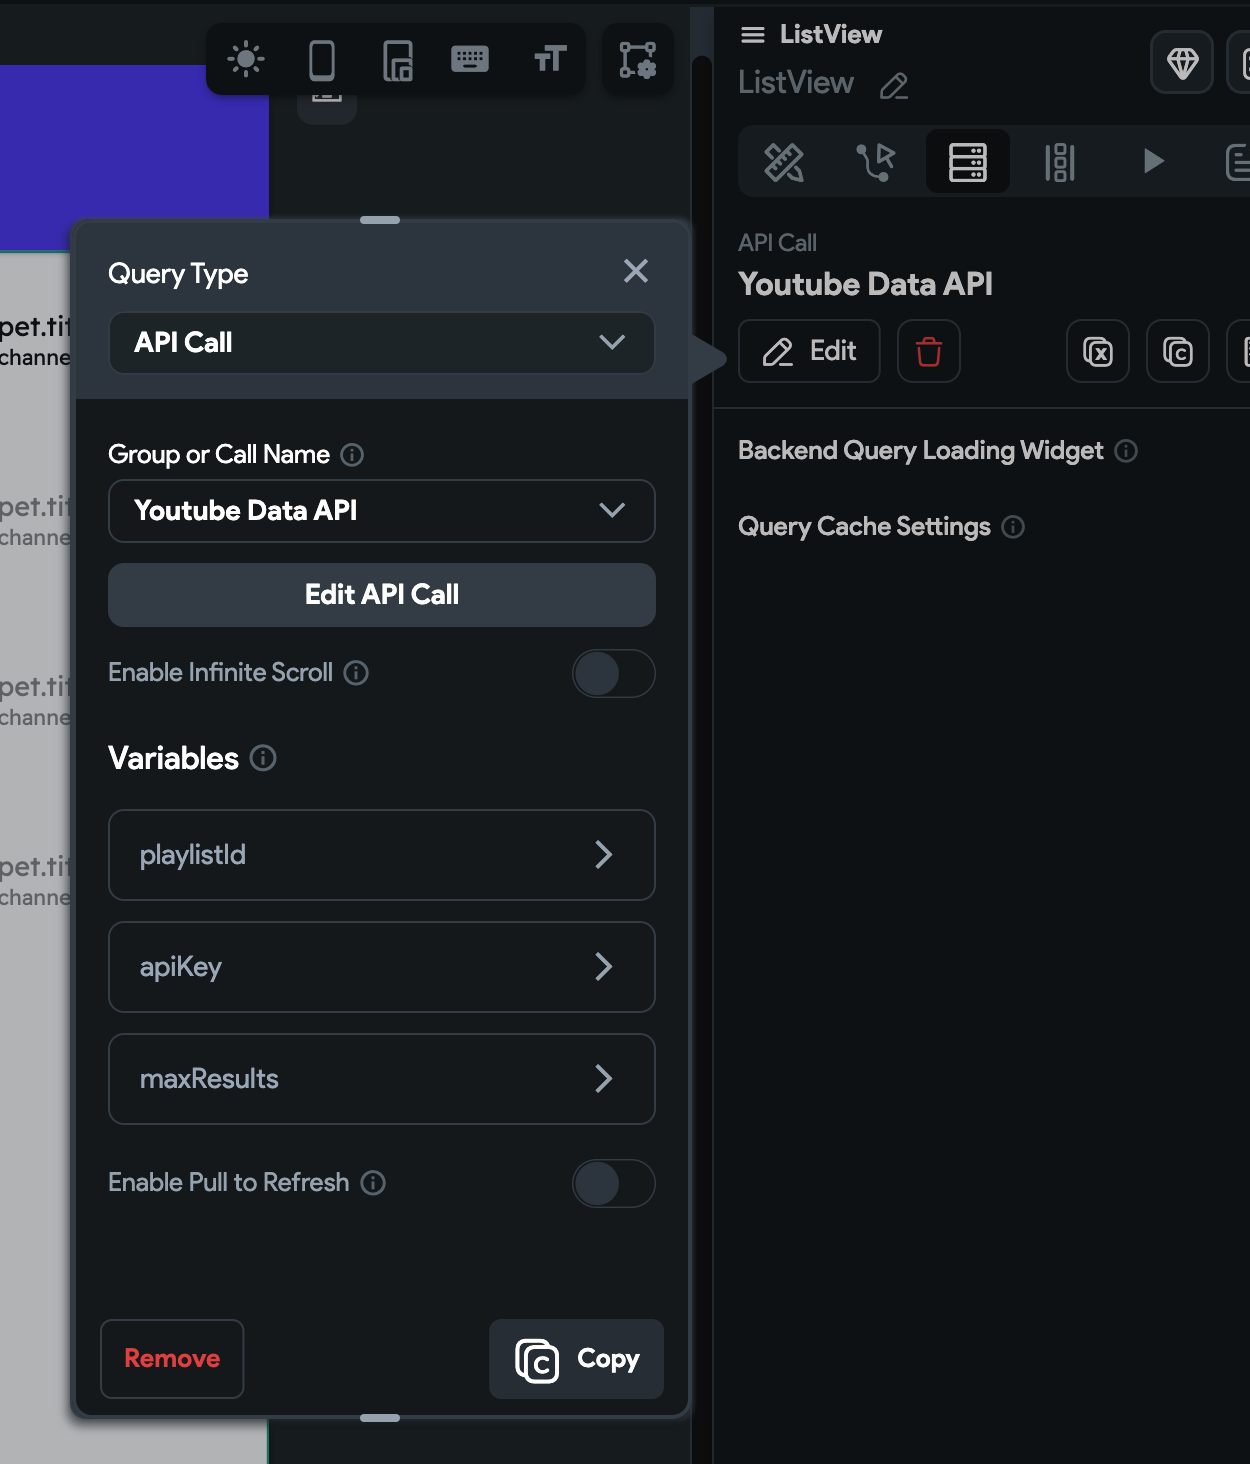
Click on the ListView, click on the Backend Query Tab, and add the following query. The Query Type is API Call. The Group or Call Name is the API we defined in Flutter Flow.
For the Variables, click each one and add your custom values. For the API key can have it as App State if you need to use it across multiple pages.
To get the playlistId, look for the list query parameter in the playlist url you want to use. For example in this playlist
PL6NdkXsPL07Il2hEQGcLI4dg_LTg7xA2L would be the playlistId
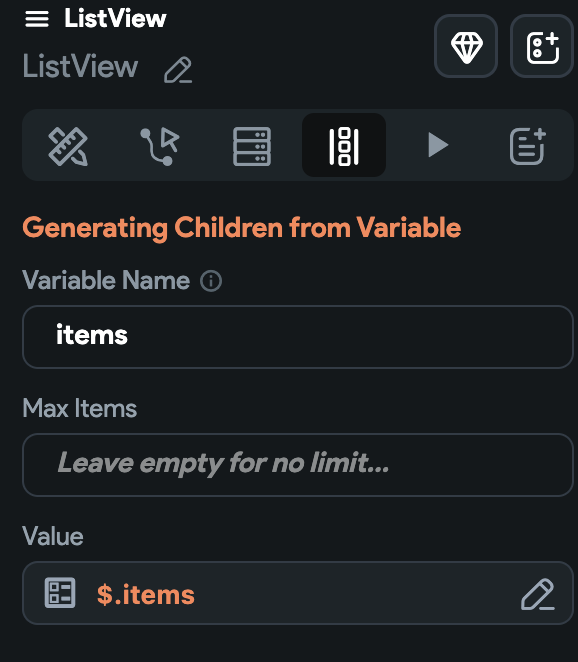
Click on the Generate Dynamic Children tab. This will give us the repeating rows for each video in the playlist.
Give a variable name such as items. We will refer to this variable to show the info in the row UI.
For the value use
$.items
This refers to the array of items in the JSON response of the API.
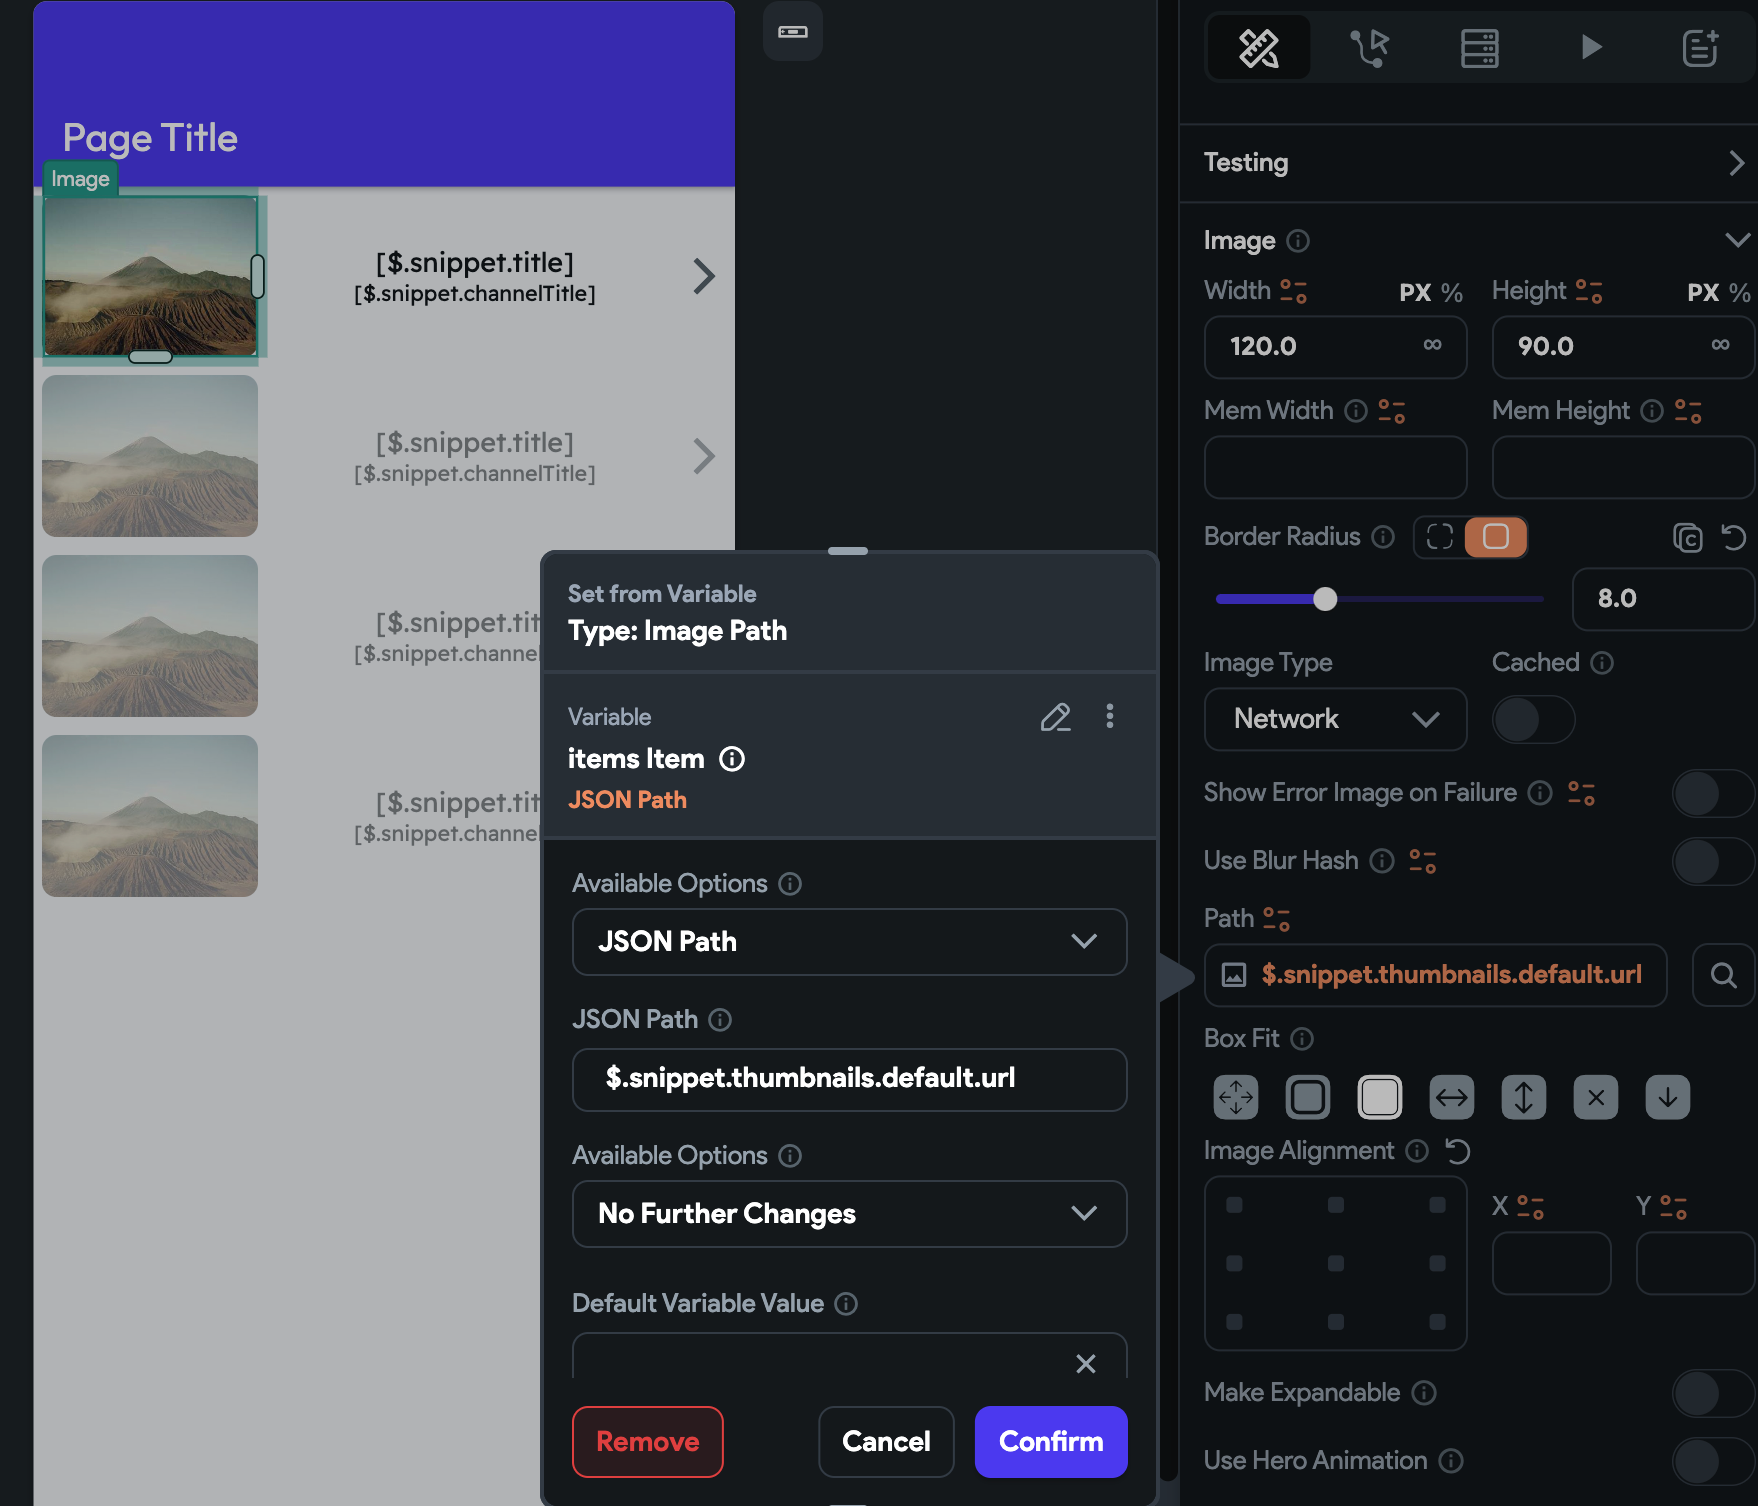
Click on the image and set the path to $.snippet.thumbnails.default.url
There are multiple sizes you can choose from, you would just need to reference the API documentation
For the text views I am using $.snippet.title for the top view and $.snippet.channelTitle as the bottom text view.
Video Player Page
We could have shown all the videos on one page, but that will cause all of the data to load for each video even when they are not played.
The best practice is to launch the native player or have a separate page with the video player. I’ll show you how to use the in-app video player approach.
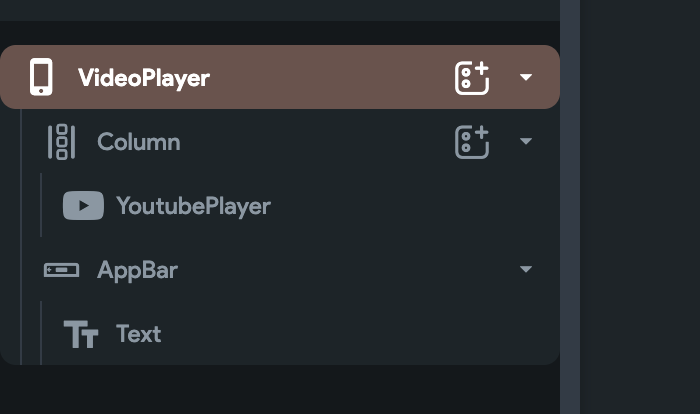
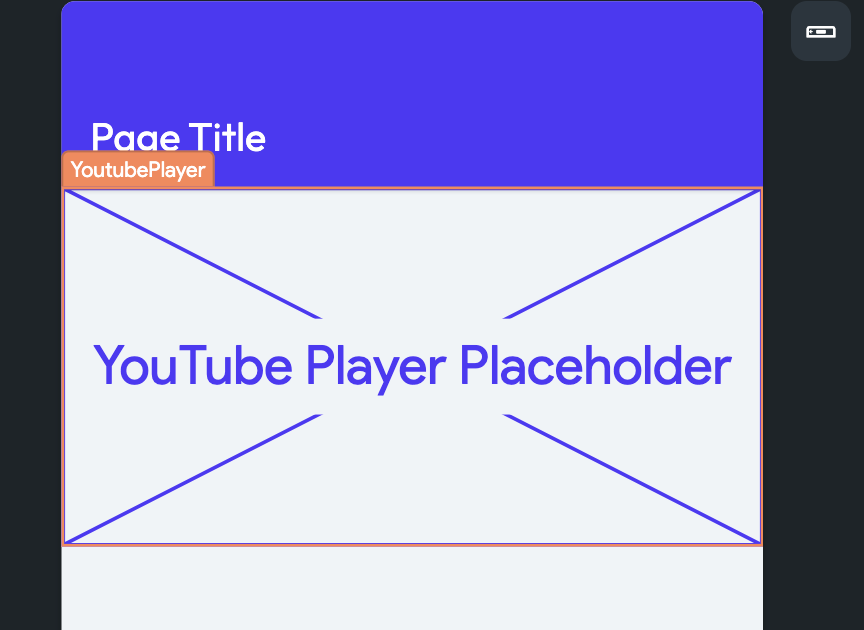
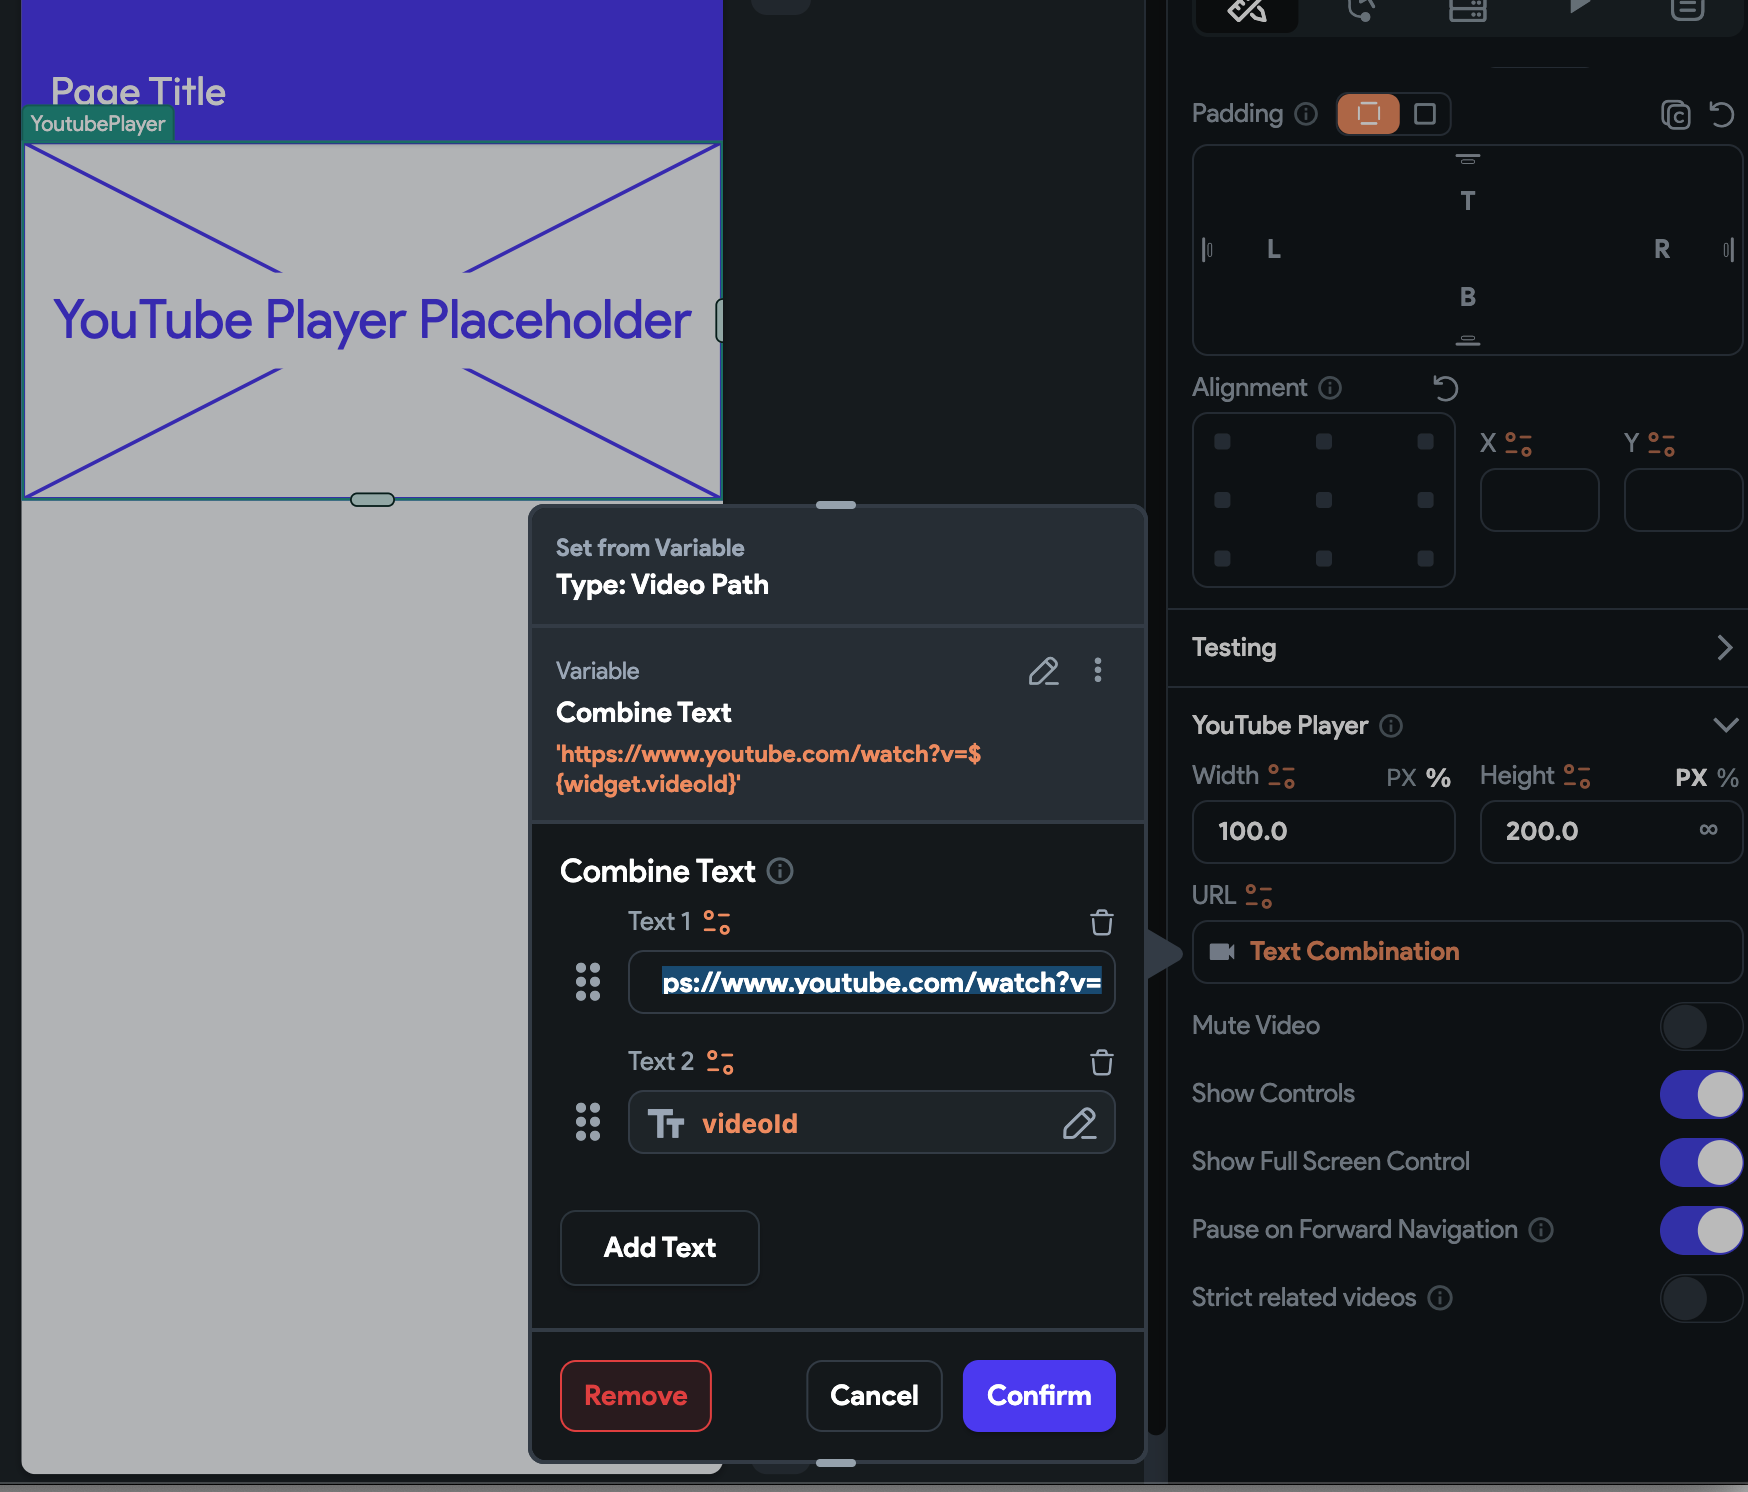
I’m keeping it simple and only have the Flutter Flow YoutubePlayer
For the Video Player page, add a page parameter videoId. We will pass the videoId from the previous page.
Click on the YoutubePlayer. We will use Text Combination to create the url from the passed videoId.
For Text 1 use
https://www.youtube.com/watch?v=
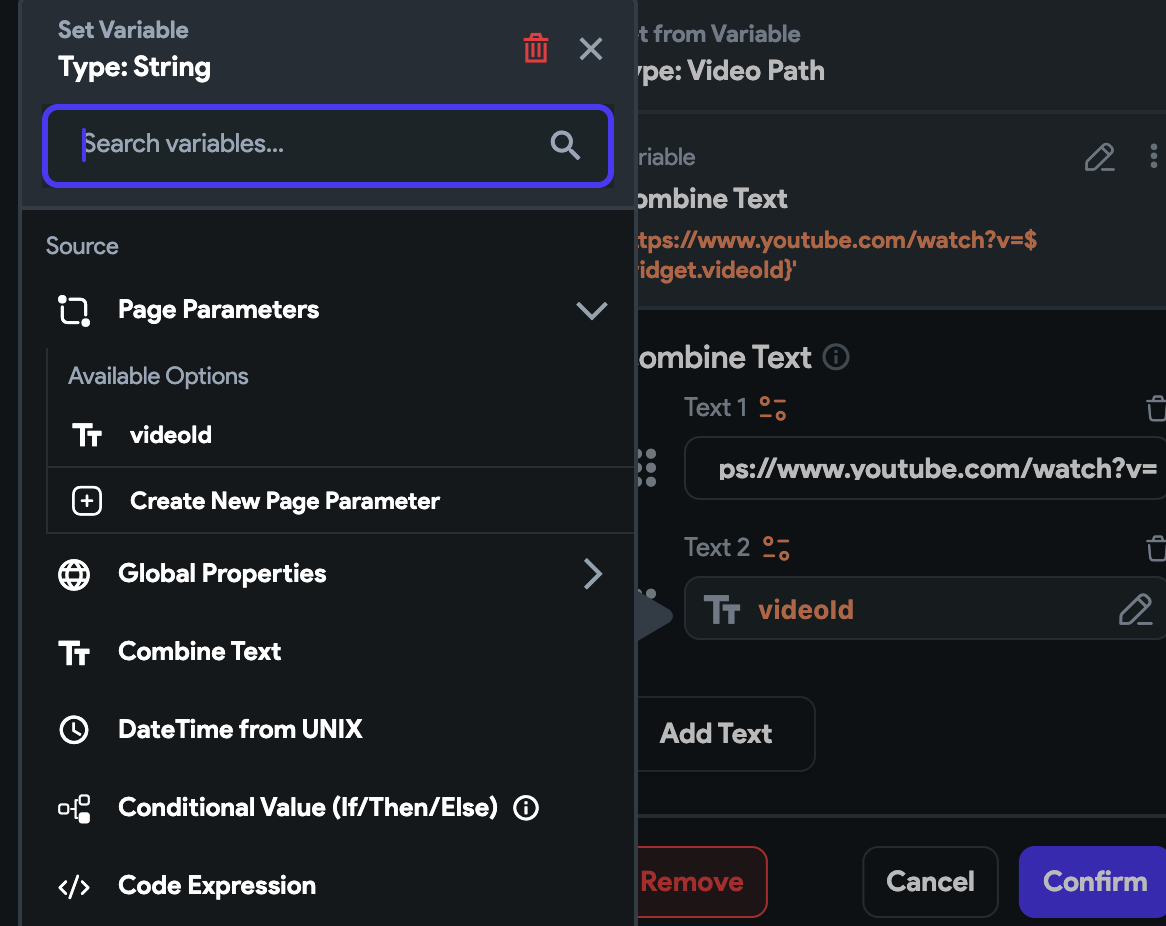
For Text 2 use the page parameter videoId
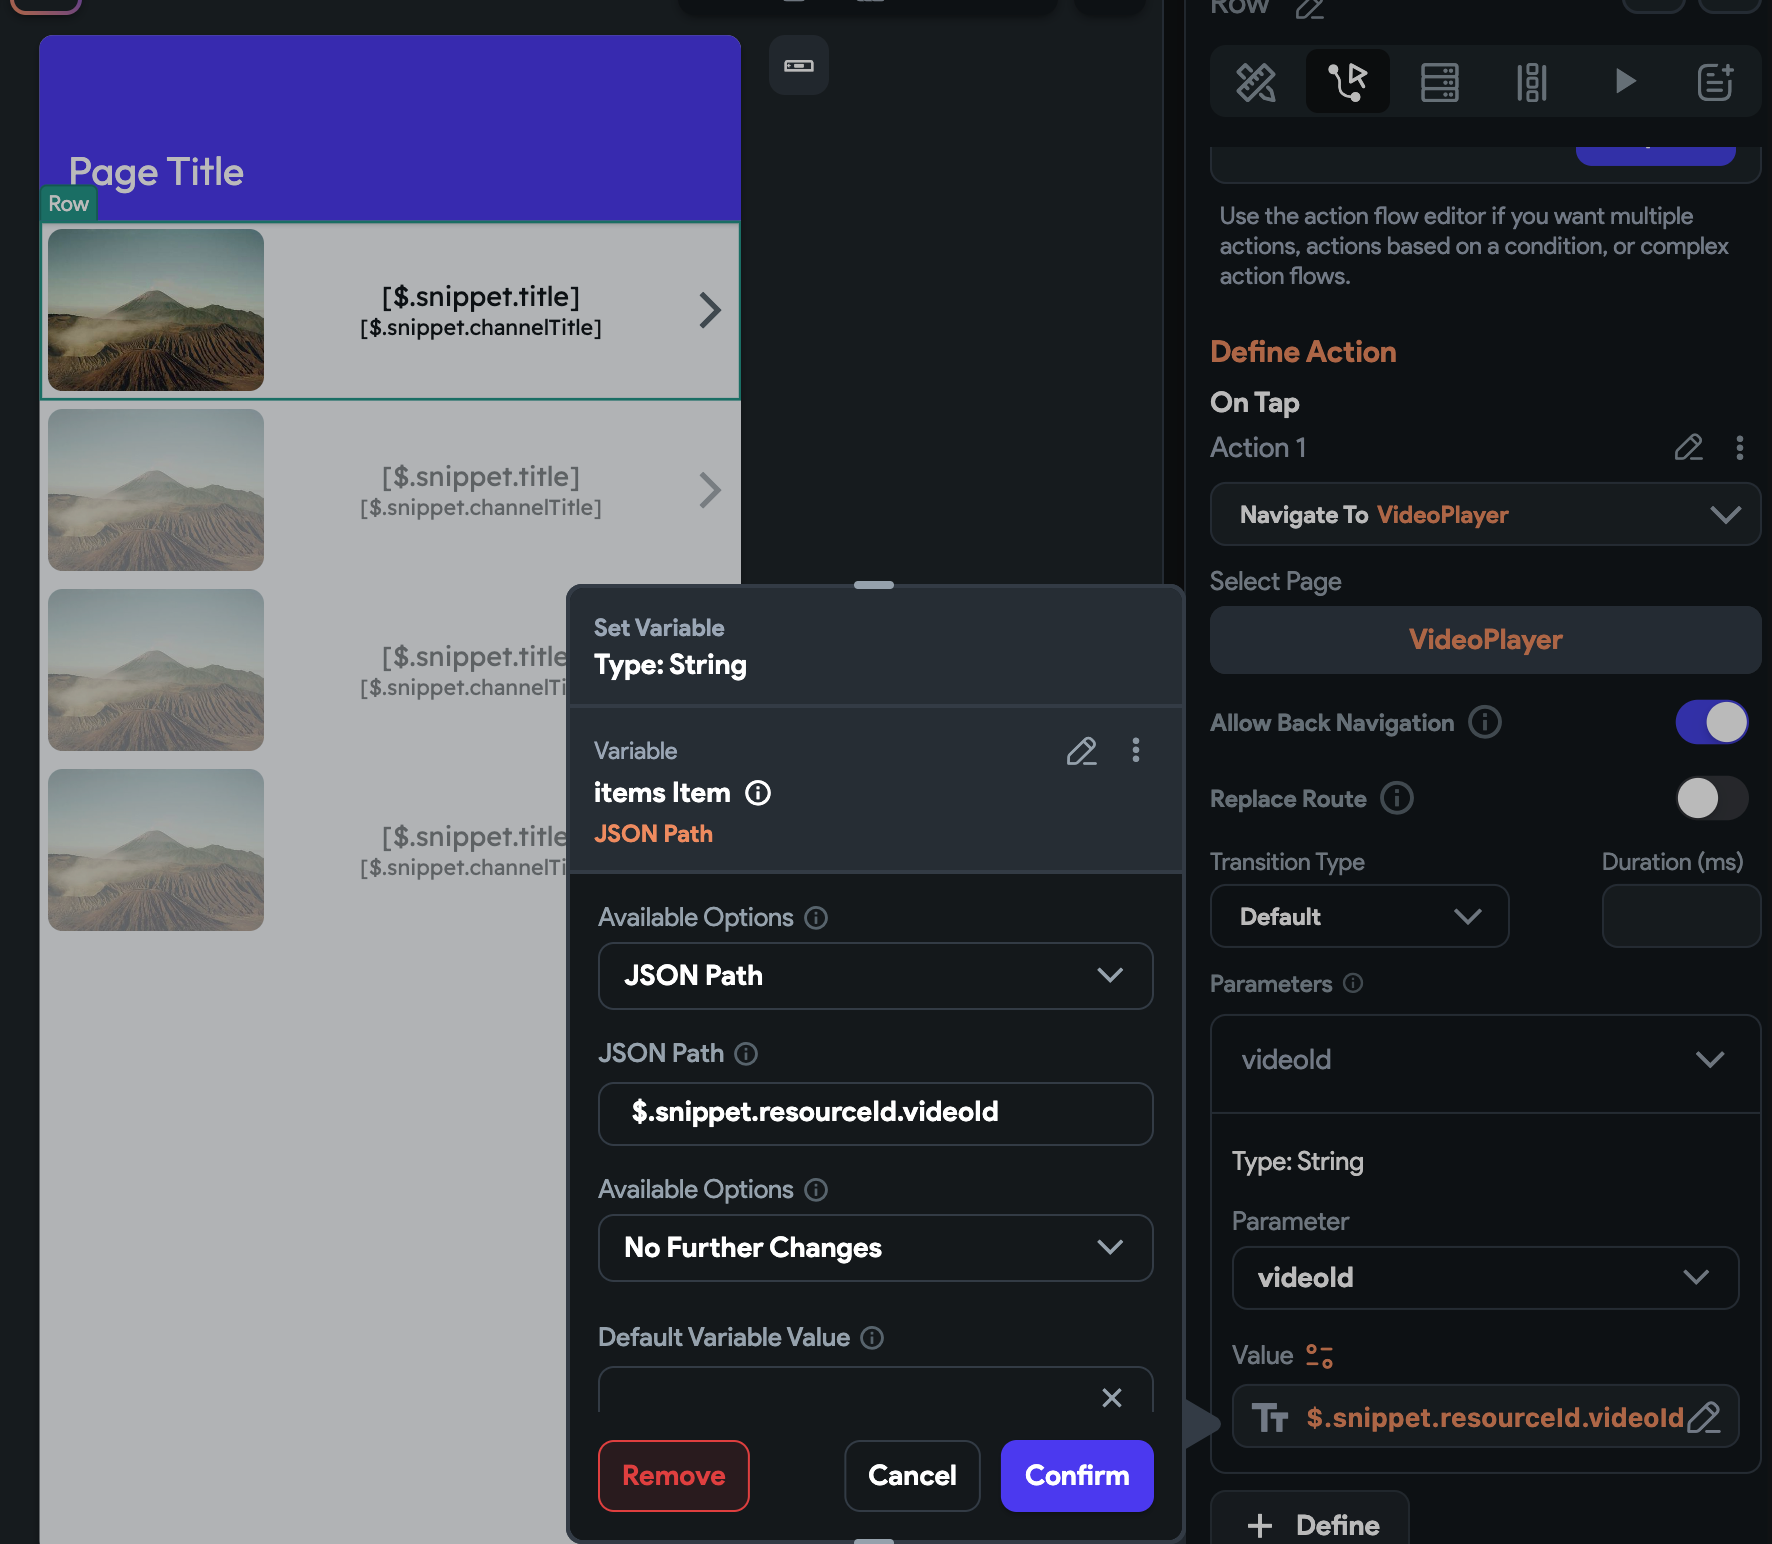
List Row Click Action
Go back to the ListView and click on the Row. Add an On Tap action that navigates to the VideoPlayer page and passes the videoId parameter.
In the same way we set the data in the row, we will pass the following JSON path
$.snippet.resourceId.videoId
Congratulations on adding a YouTube playlist to your Flutter Flow app!
Flutter Flow: Extracting Latitude and Longitude from LatLng
When dealing with Google Maps and Place Picker on Flutter Flow, there often arises a requirement to extract and store the latitude and longitude details.
These coordinates are essential for a variety of purposes, including populating your preferred database with separate columns for latitude and longitude. This process enables precise location tracking and management within your Flutter application.
Create a custom function
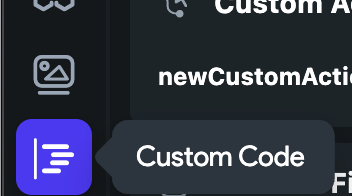
First, go to the Custom Code menu on the far left.
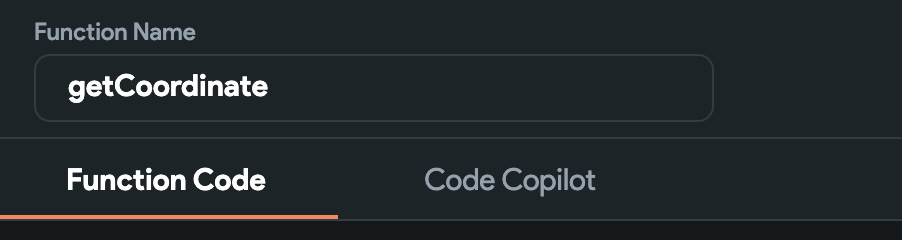
Update the function name to getCoordinate
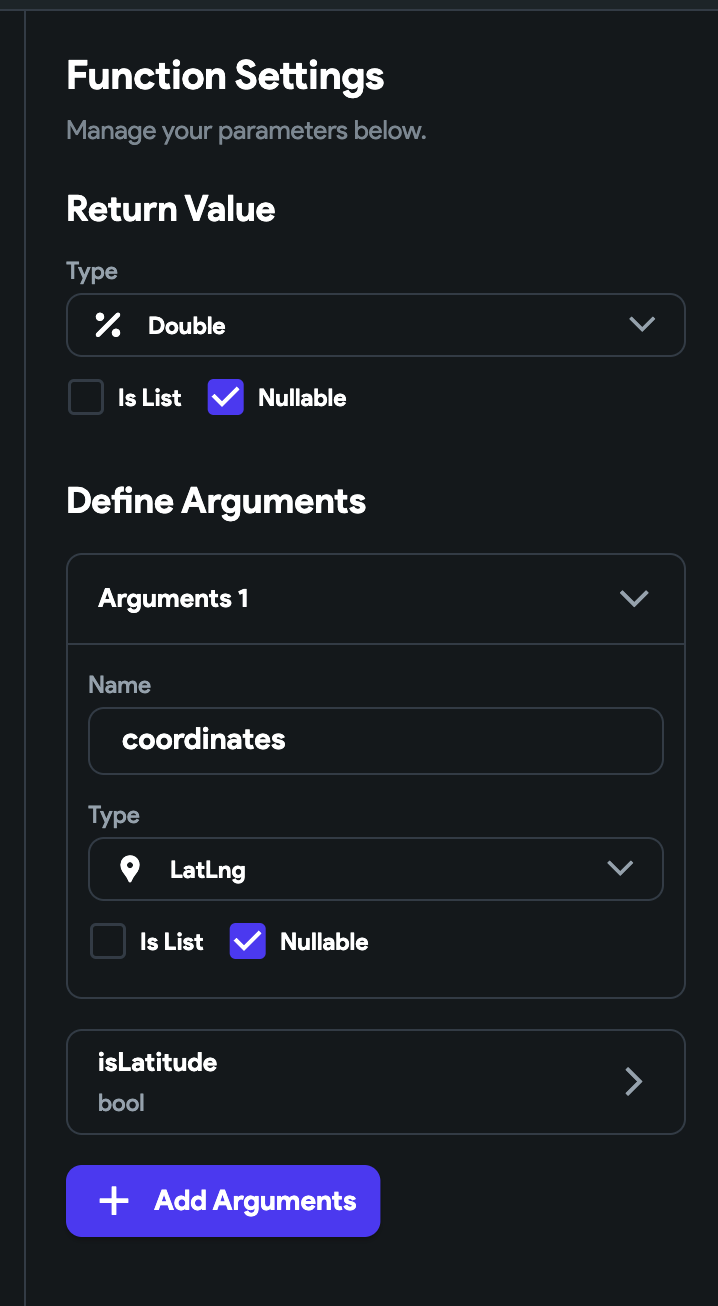
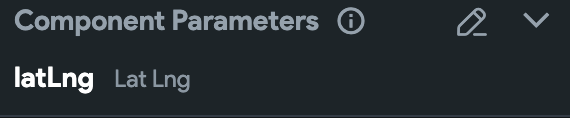
In the function settings set the return type to a Double. Now create two arguments, coordinates of type LatLng and isLatitude of type Boolean.
Our code is simple. If isLatitude is true, we will return the latitude from the LatLngcoordinates object. If isLatitude is false we will return longitude.
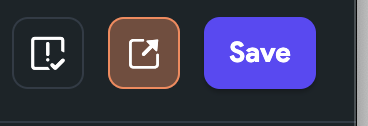
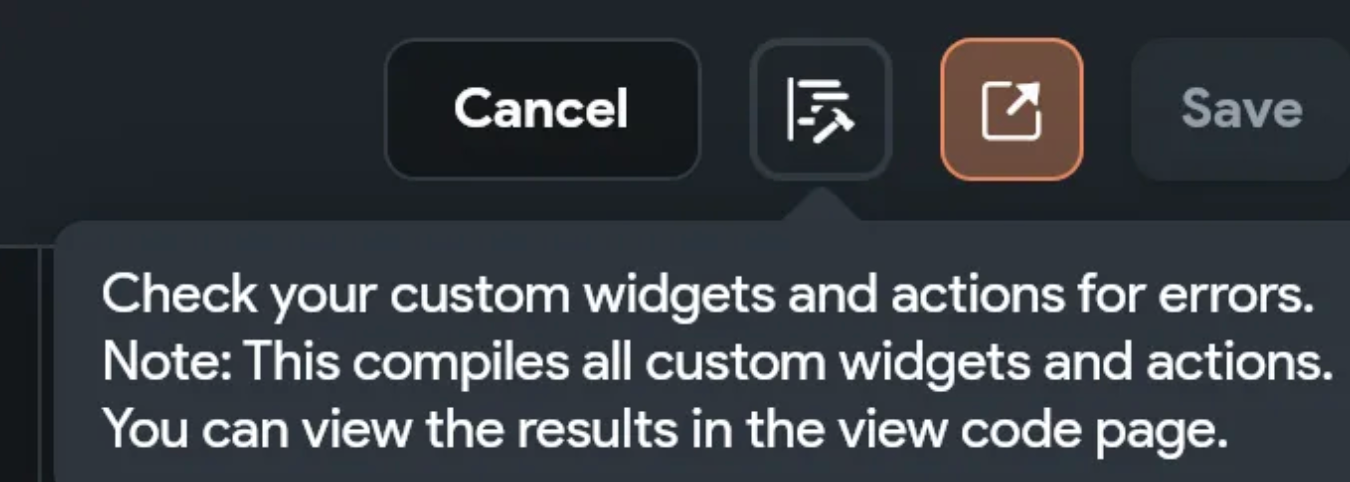
Now click Save, then go over two buttons to the box with the exclamation mark and check and click that button. It validates our code.
Here is the full code in case it helps. There are imports that Flutter Flow adds that we don’t need for our use case, but we can leave them alone for now.
import 'dart:convert';
import 'dart:math' as math;
import 'package:flutter/material.dart';
import 'package:google_fonts/google_fonts.dart';
import 'package:intl/intl.dart';
import 'package:timeago/timeago.dart' as timeago;
import '/flutter_flow/lat_lng.dart';
import '/flutter_flow/place.dart';
import '/flutter_flow/uploaded_file.dart';
import '/flutter_flow/custom_functions.dart';
import '/backend/schema/structs/index.dart';
import '/backend/supabase/supabase.dart';
import '/auth/supabase_auth/auth_util.dart';
double? getCoordinate(
LatLng? coordinates,
bool isLatitude,
) {
/// MODIFY CODE ONLY BELOW THIS LINE
if (isLatitude) {
    return coordinates?.latitude ?? 0.0;
}

return coordinates?.longitude ?? 0.0;
/// MODIFY CODE ONLY ABOVE THIS LINE
}
Using our custom function to populate a field
For this example, we want to add latitude and longitude in their respective columns in Supabase. I have a parameter for a page that I’m passing a latLng variable to.
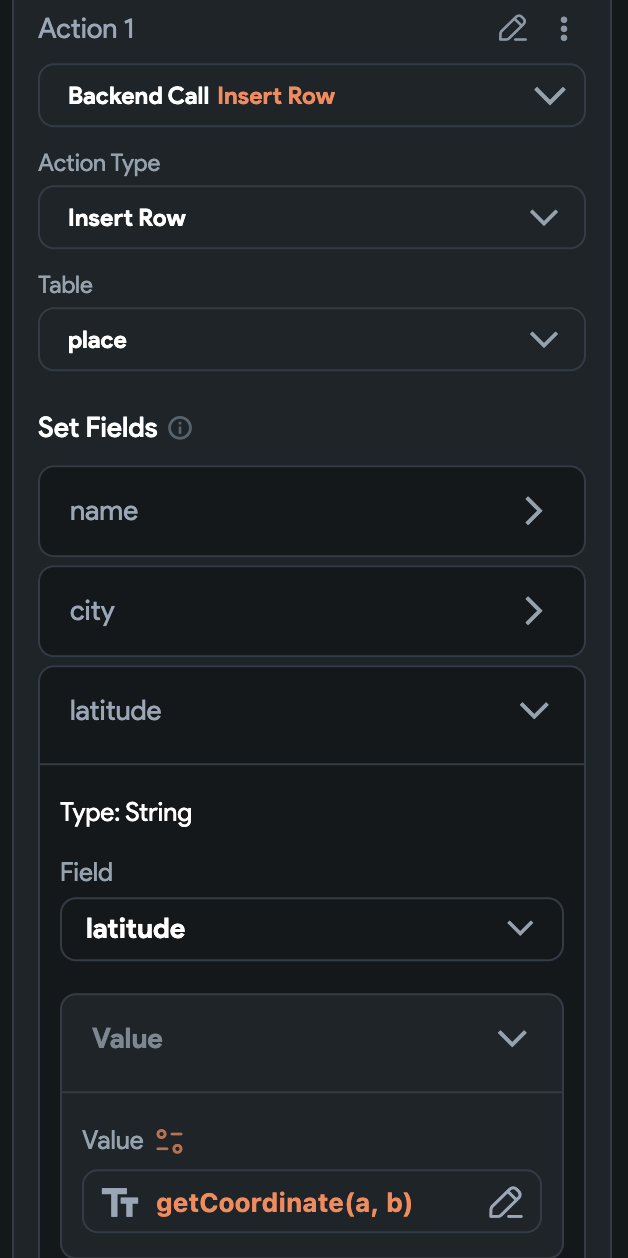
On the page that has this parameter, I have a button with an action to insert a row into my place table.
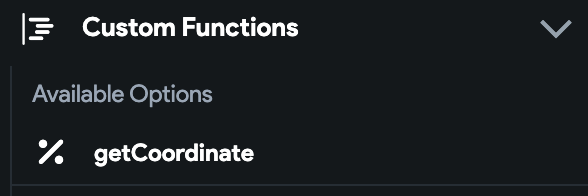
For the value of latitude select the orange, settings button to the right of the text Value. In the popup, find Custom Functions and choose our getCoordinate function.
for the coordinates field, choose our latLng parameter and set our isLatitude param to True. For longitude follow the same steps, except for isLatitude you want to set it to False.
Click confirm then save your changes. If all goes well you will see your latitude and longitude in your database of choice.
I have created a form to better understand everyone’s needs. You can also request custom Flutter Flow development and/or Flutter Flow training.
Flutter Flow: Set up your Mac for Flutter development
I’ll walk you through the steps to set up your Mac computer for Flutter development. You can install the Flutter and Dart SDK through your IDE, but you will need to install additional tools to run your Flutter project.
Prerequisites
If you are using a Silicon Mac, you will need the Rosetta Translation environment. Open your Terminal application on Mac, type the following, and press enter.
Tip: To search for an application on your Mac, use the shortcut: command + space
Use the following link to download the Flutter SDK. macOS install
In the terminal, enter the following commands:
mkdir ~/development
cd ~/development
unzip ~/Downloads/flutter_macos_3.3.8-stable.zip
Note: The flutter version may be different depending on when you are reading this. In that case, type everything up to flutter_macos_ , then press tab to autocomplete.
Set the Flutter PATH
Setting the Flutter Path in your zsh profile will make sure it sets the path every time it loads.
The cat command is optional. It is used to show the contents of the file. Note you may not see this file when using finder because it is a hidden file (any file name that starts with a period).
Install HomeBrew
Homebrew is an application manager for Mac. You may use it to install the rest of the tools. Enter the following command to install Homebrew.
You will need Xcode to build iOS apps. You may get it from the App Store on your Mac.
Install Cocoapods
You will need Cocoapods to build iOS apps. Enter this command in the terminal.
brew install cocoapods
Install the Android SDK Manager
Flutter requires you to install the Android SDK Manager to build Android apps. Enter the following command in your terminal to set this up, but change your username below.
If you have urgent specific requests, please leave your contact information in the survey.
Set Up Firebase
If you haven’t already, follow Flutter Flows docs on setting up a new Firebase Project with Flutter Flow. Firebase Setup | FlutterFlow Docs
Also, make sure to enable and configure your Firestore Database. These are different links, although the preview is the same. Firebase Setup | FlutterFlow Docs
Add Data to your Firestore Database
Next, let’s add data to a Firestore Database. For this example, I am going to manually add data.
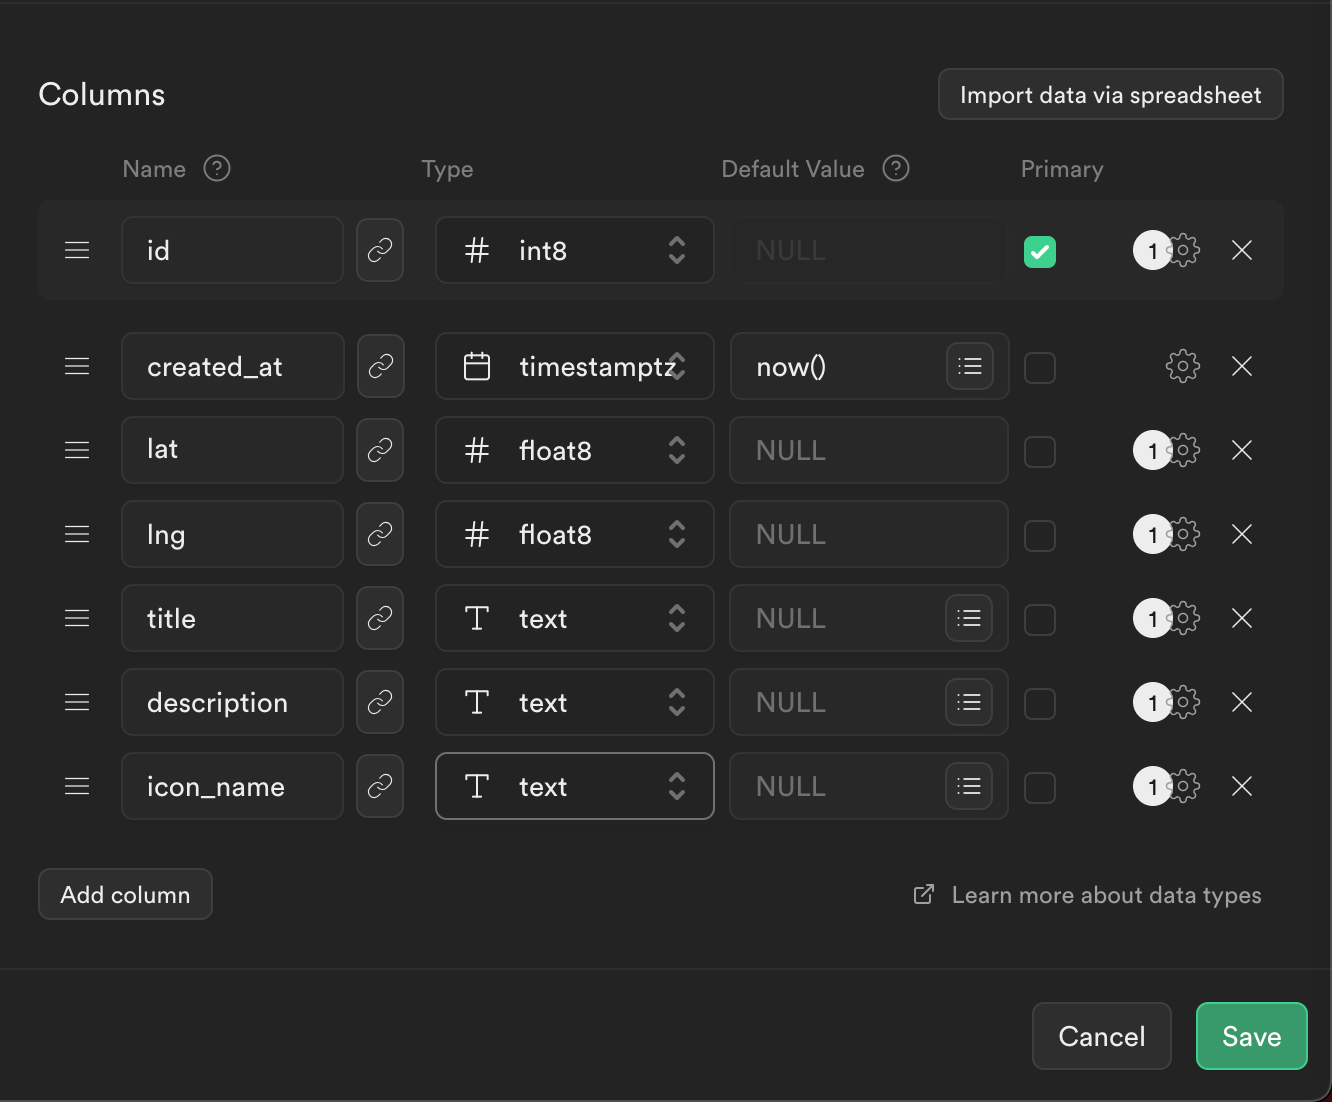
Create a collection called place, give it a unique Document ID, and add the following fields
title: This is the title that shows on the popup when clicking the marker. Give it the string data type
description: This is the description that shows on the popup when clicking the marker. Give it the string data type
latitude : This will hold our latitude for each marker. Give it the number data type
longitude : This will hold our longitude for each marker. Give it the number data type.
image_url: This will be our image name including the file extension. You can also specify an url for network images. Give it the string data type
Click Save
Create Firestore Schema in Flutter Flow
Next, in Flutter Flow, go to the Firestore menu on the far left.
Next, add a place schema with the same fields as our Firestore document in our Firestore place collection. The only difference here is we will use double as the data type for longitude and latitude.
Using Geopoint
This is optional, but probably the preferred way.
Firestore also has a geopoint field. So instead we can also set it in Firestore like that.
In the place schema, add another field as LatLng with the same name you used in Firestore. In this case, it’s geopoint.
Create a Custom Widget
Next we will create a new custom Widget in Flutter Flow.
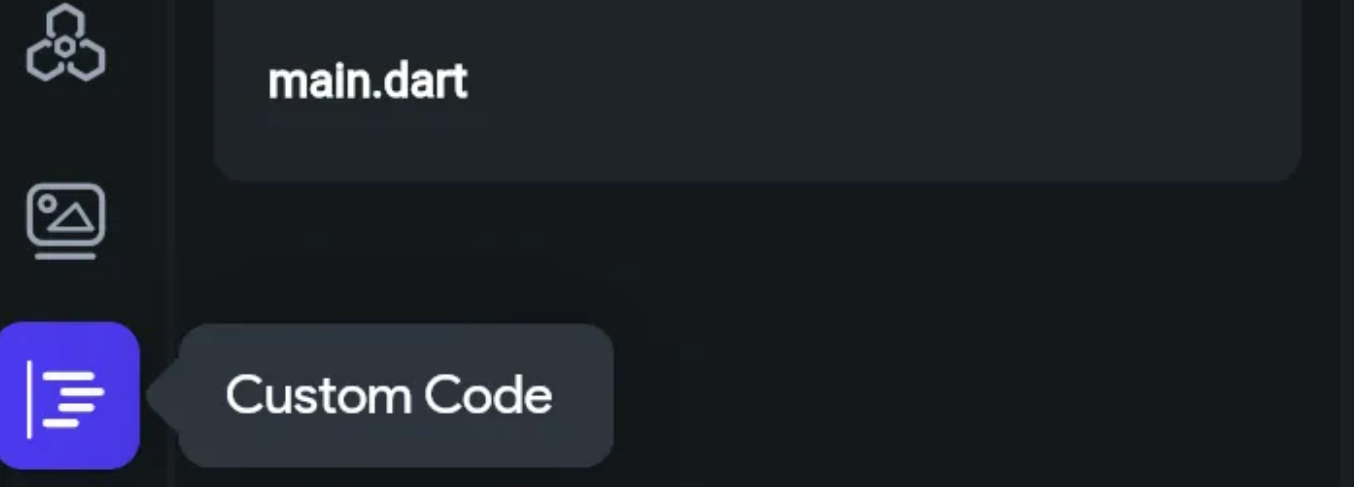
Click the Custom Code menu
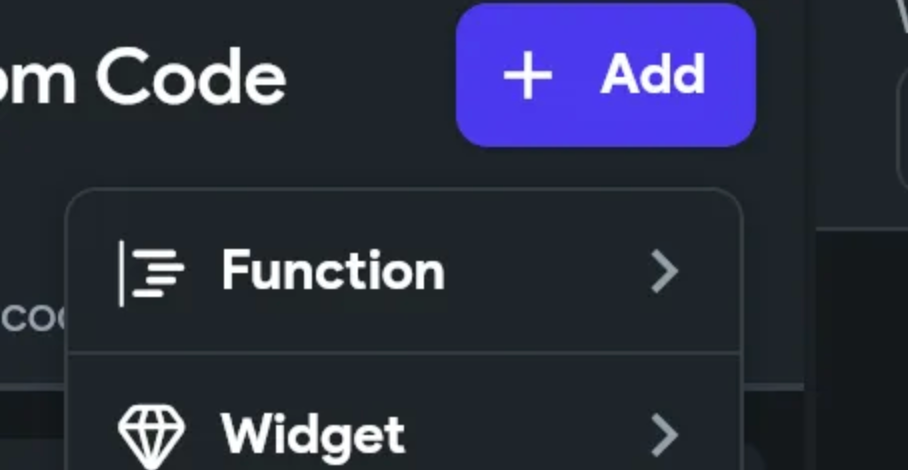
Click Add > Widget
Give the new widget a name such as Firestore Map
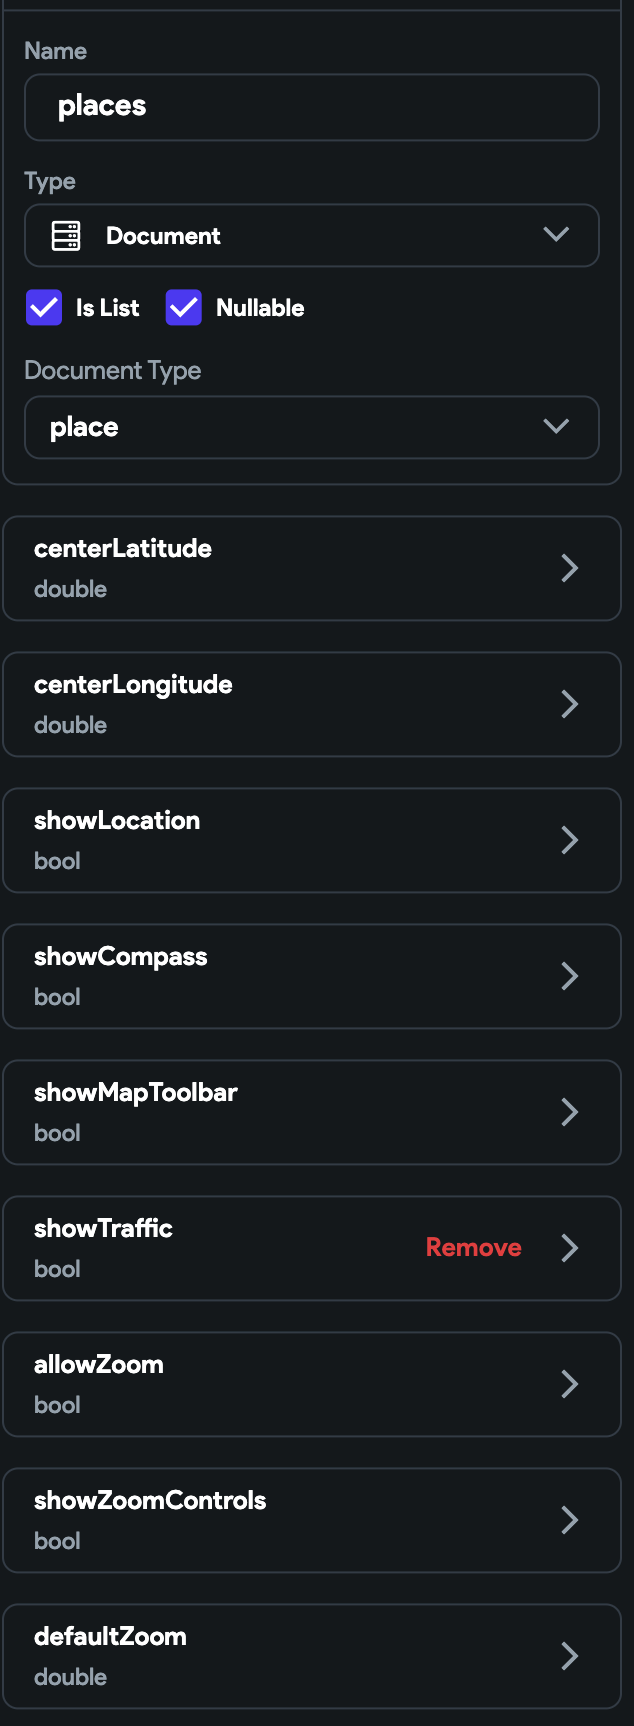
Now lets add some parameters. The first parameter is places, where we will pass a list of Firestore **Documents. **All of the other parameters are straight forward. For the double and bool parameters, make sure to uncheck Nullable
Now let’s add one lasts parameter, onClickMarker, which is an Action Type with an Action Parameter of Type Document. The Document Type is **place. **We will use this to save the Document to Page or Widget state whenever a Marker is clicked.
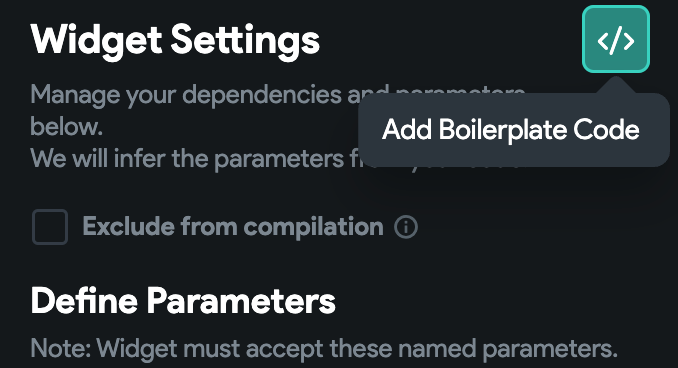
Now click the green Add Boilerplate button to add the default code for this Custom Widget.
Let’s use our new custom Widget. On the page I want to use my map on go to the widget tree menu and click the top level widget.
Also click on State Management to create a Local Page State Variable. Remember in our custom Widget we created a parameter to return a placeRow for the customer Marker that was clicked. We will be storing it here.
Click Add Field, set the Field name as place, of Type Document, and Collection Type place
Create another page state variable such as firebaseItems.
Now click Add Query
Choose Query Collection, choose the place Collection, and set Query Type as List of Documents. Click Confirm
Chain an action to the Firestore Query to update the page state using the firebaseList action output.
Define the Update Page State action
Find your custom Widget in the Widget Pallete.
I have a new project, so by default I have a column in my page. I dropped my custom widget here.
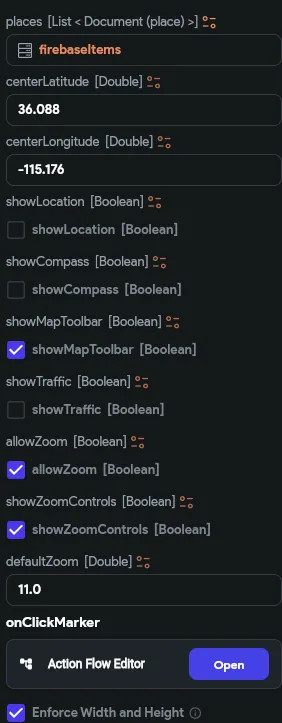
Now click on your custom Widget and update the parameters.
For the places parameter, you can click the orange icon setting and you will see firebaseItems Documents from Page State. This is from our Firestore Collection query we created earlier.
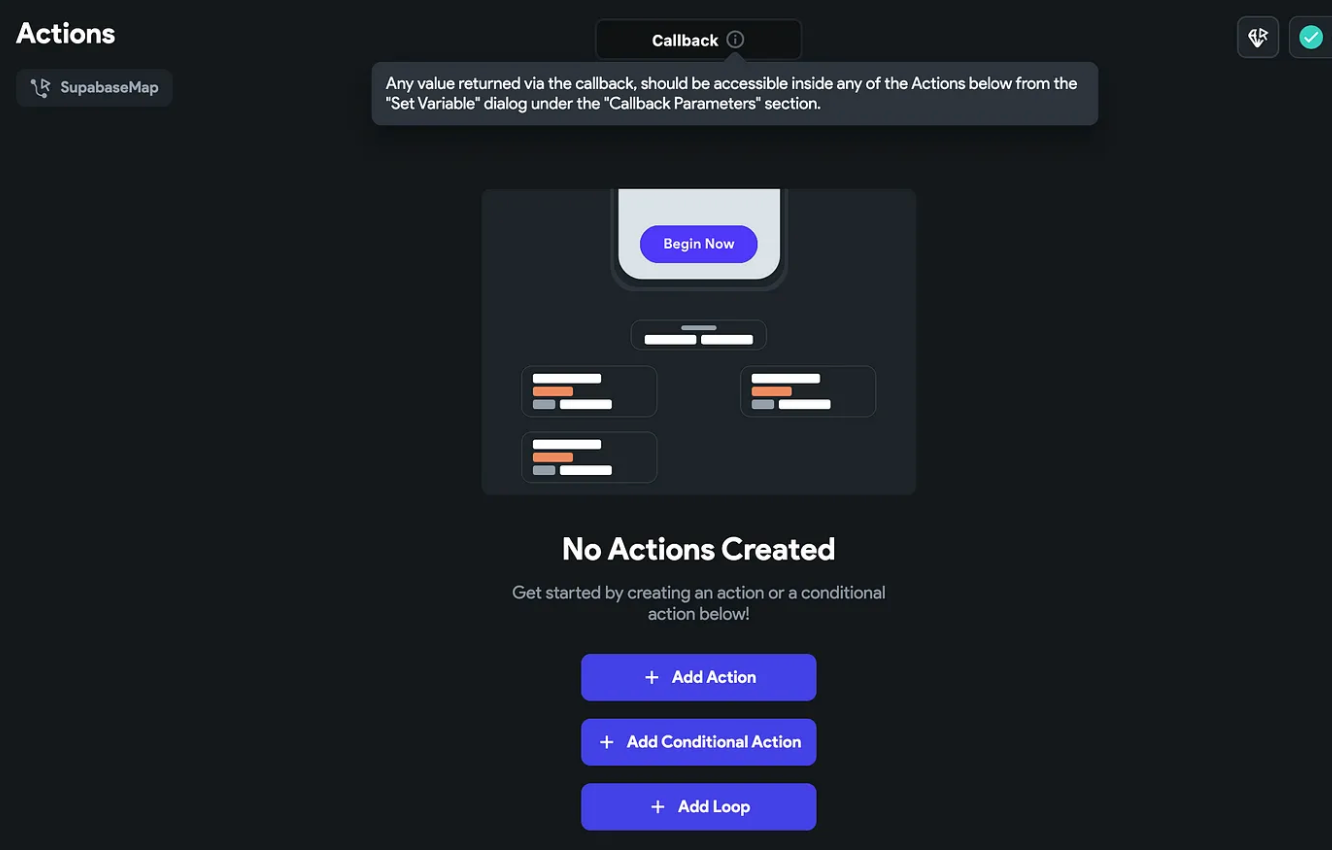
I also have defaultZoom and an action to set our page parameter when a custom marker is clicked. Click the Open button to create your action
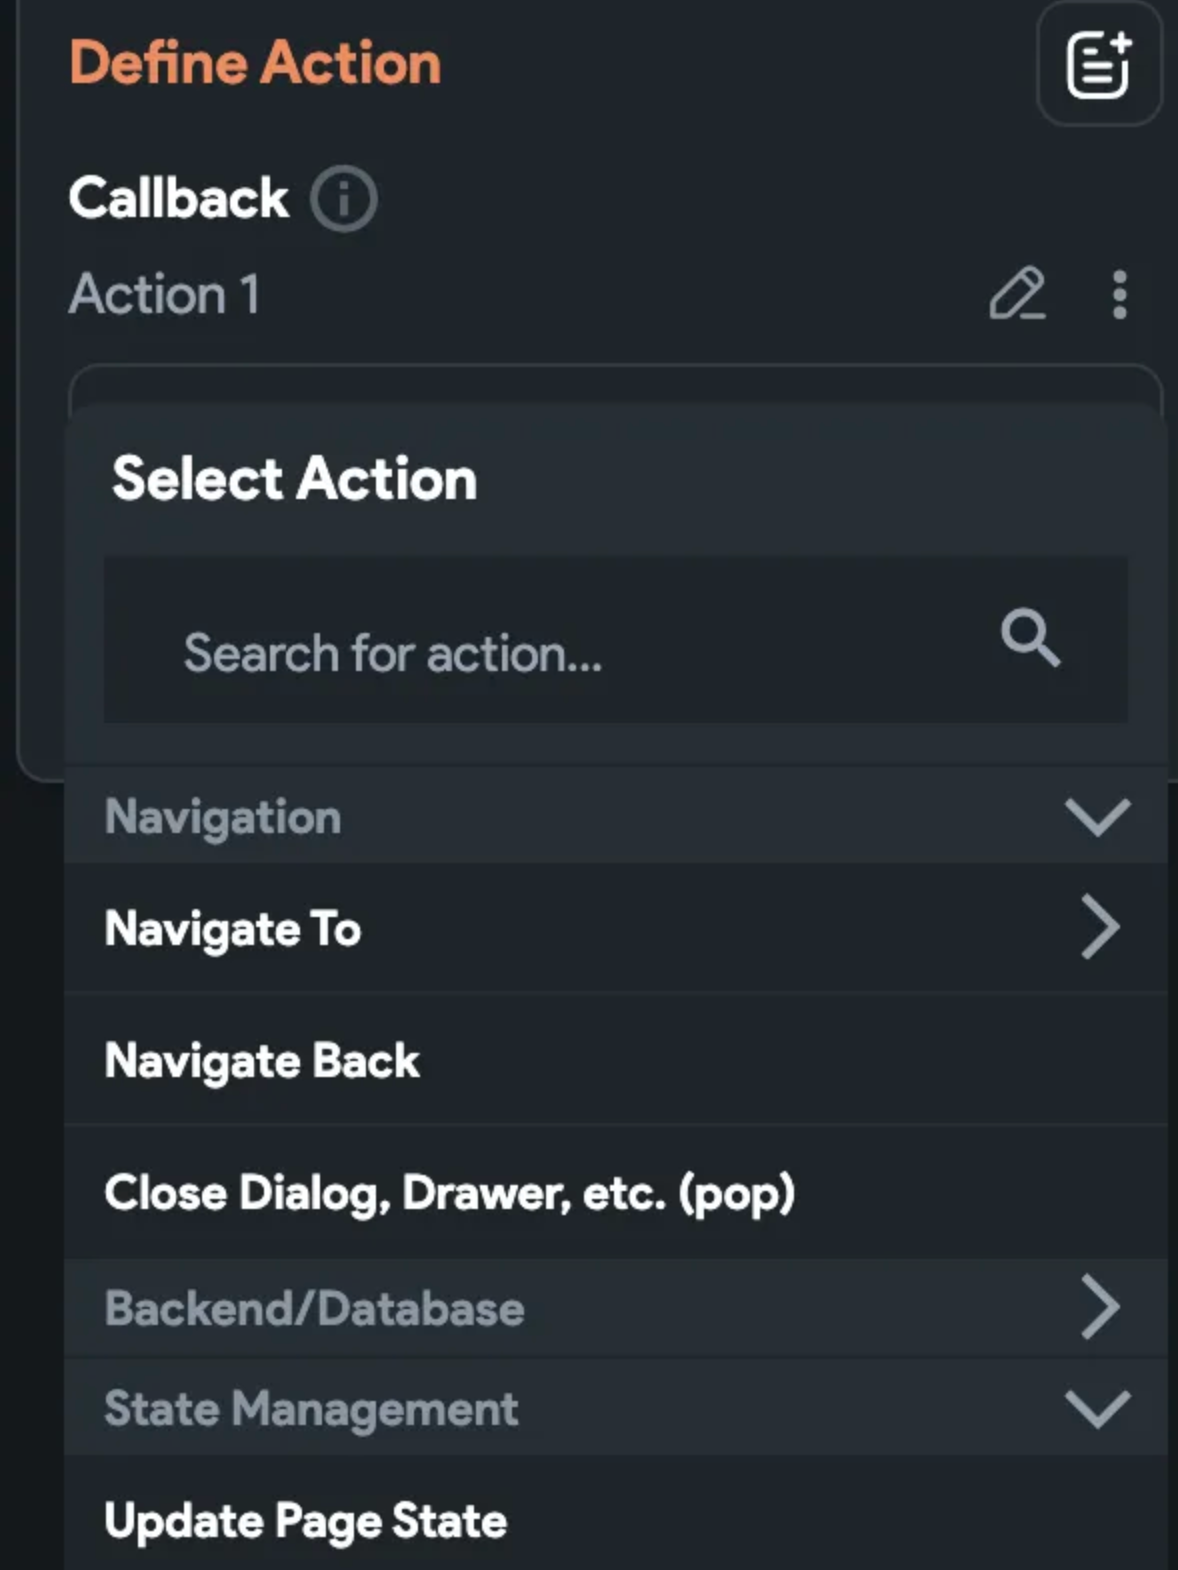
Notice at the top of the popup it mentions it’s a callback. This simply means we are able to get an value back from any action. Click Add Action
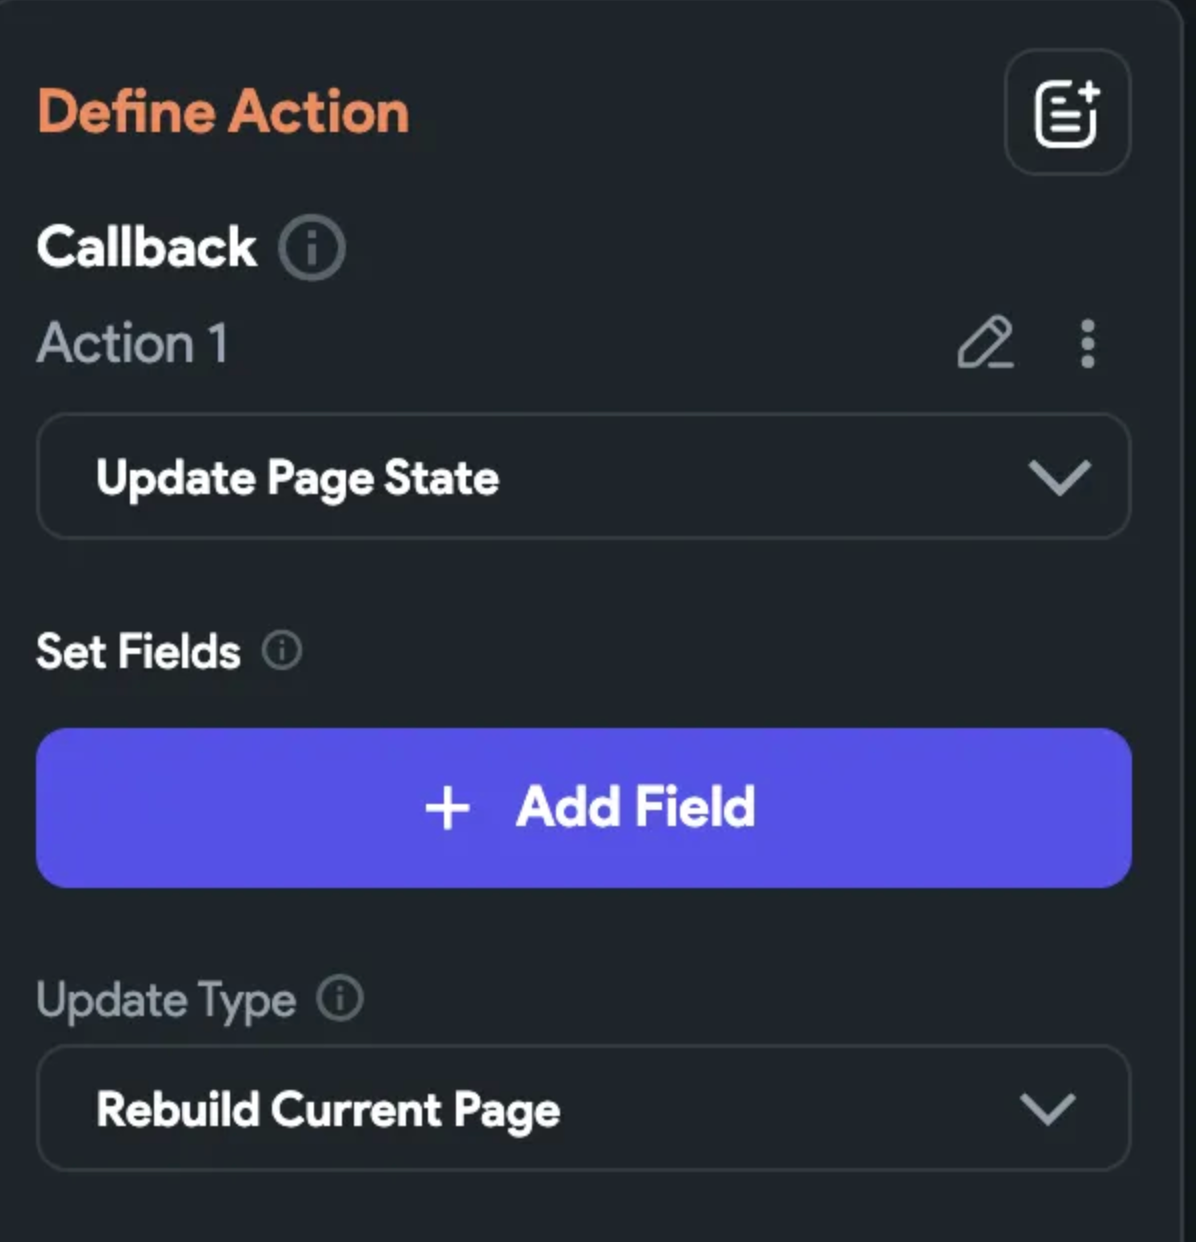
Under State Management choose Update Page State
Click Add Field
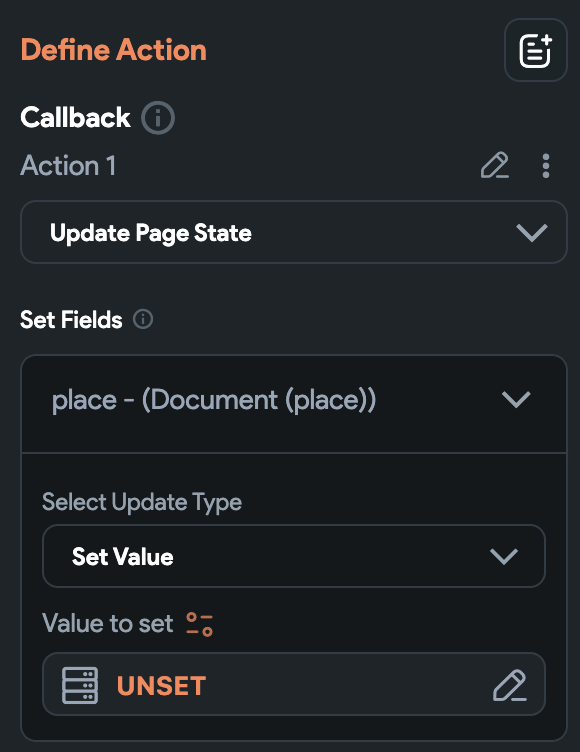
Click our page state place from the popup.
Set update type to Set Value
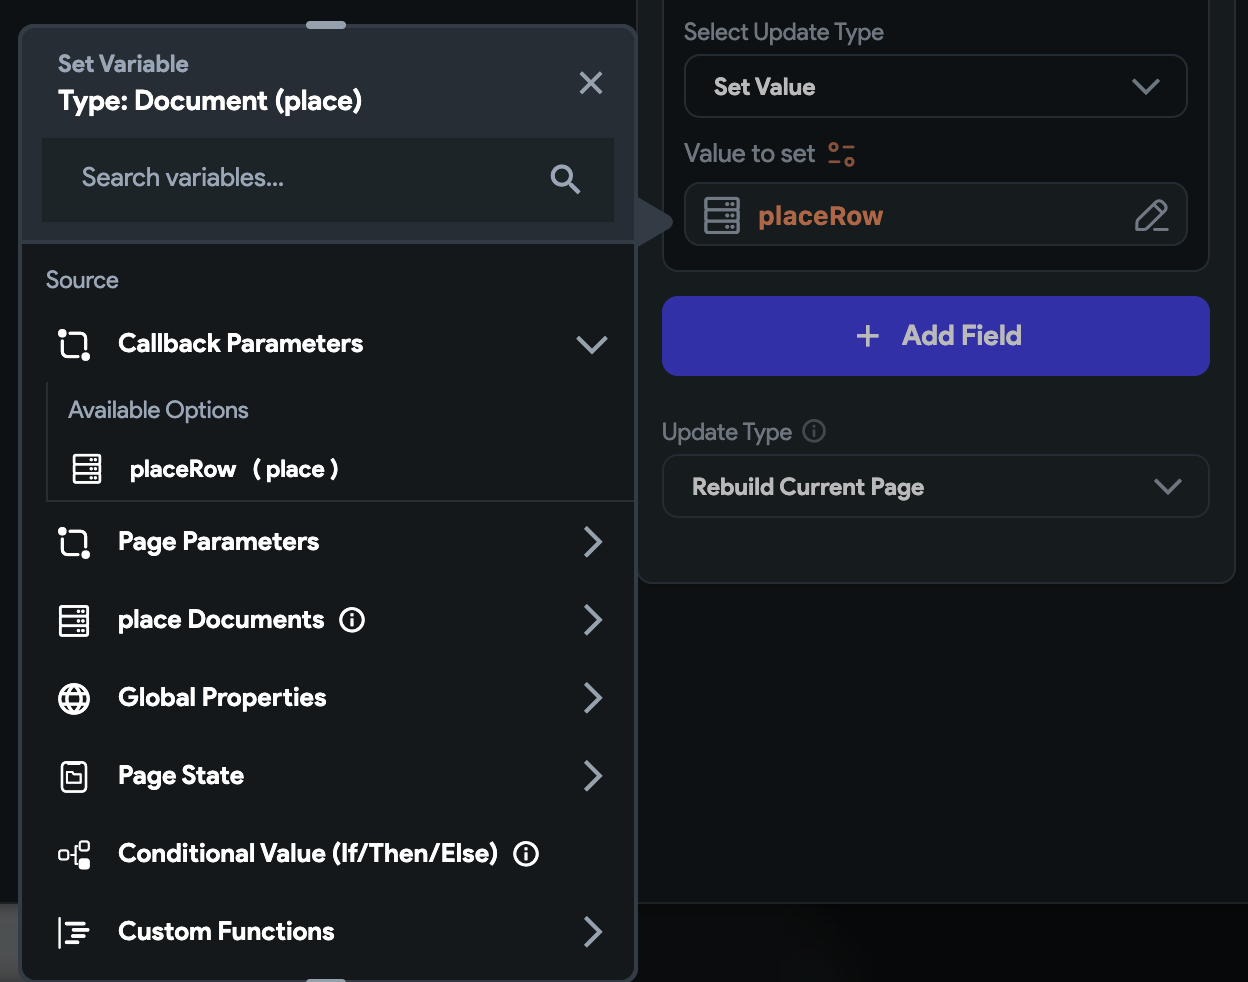
For Value to set, under Callback Parameters choose placeRow. This is our Action parameter in our custom Widget.
Close and save the action.
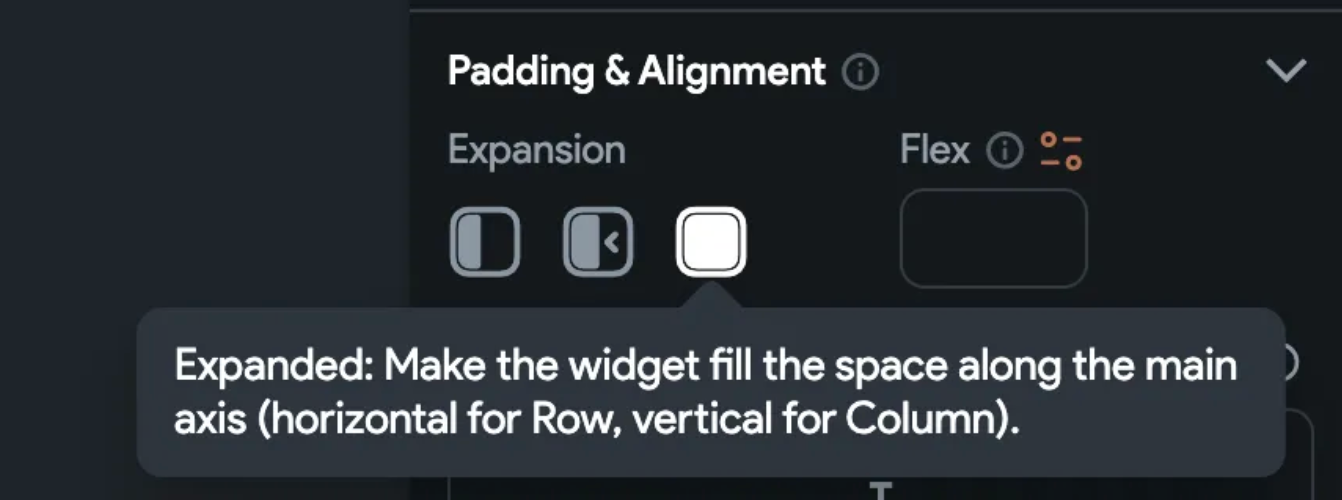
For our custom Widget, under Padding & Alignment, I also chose Expanded .
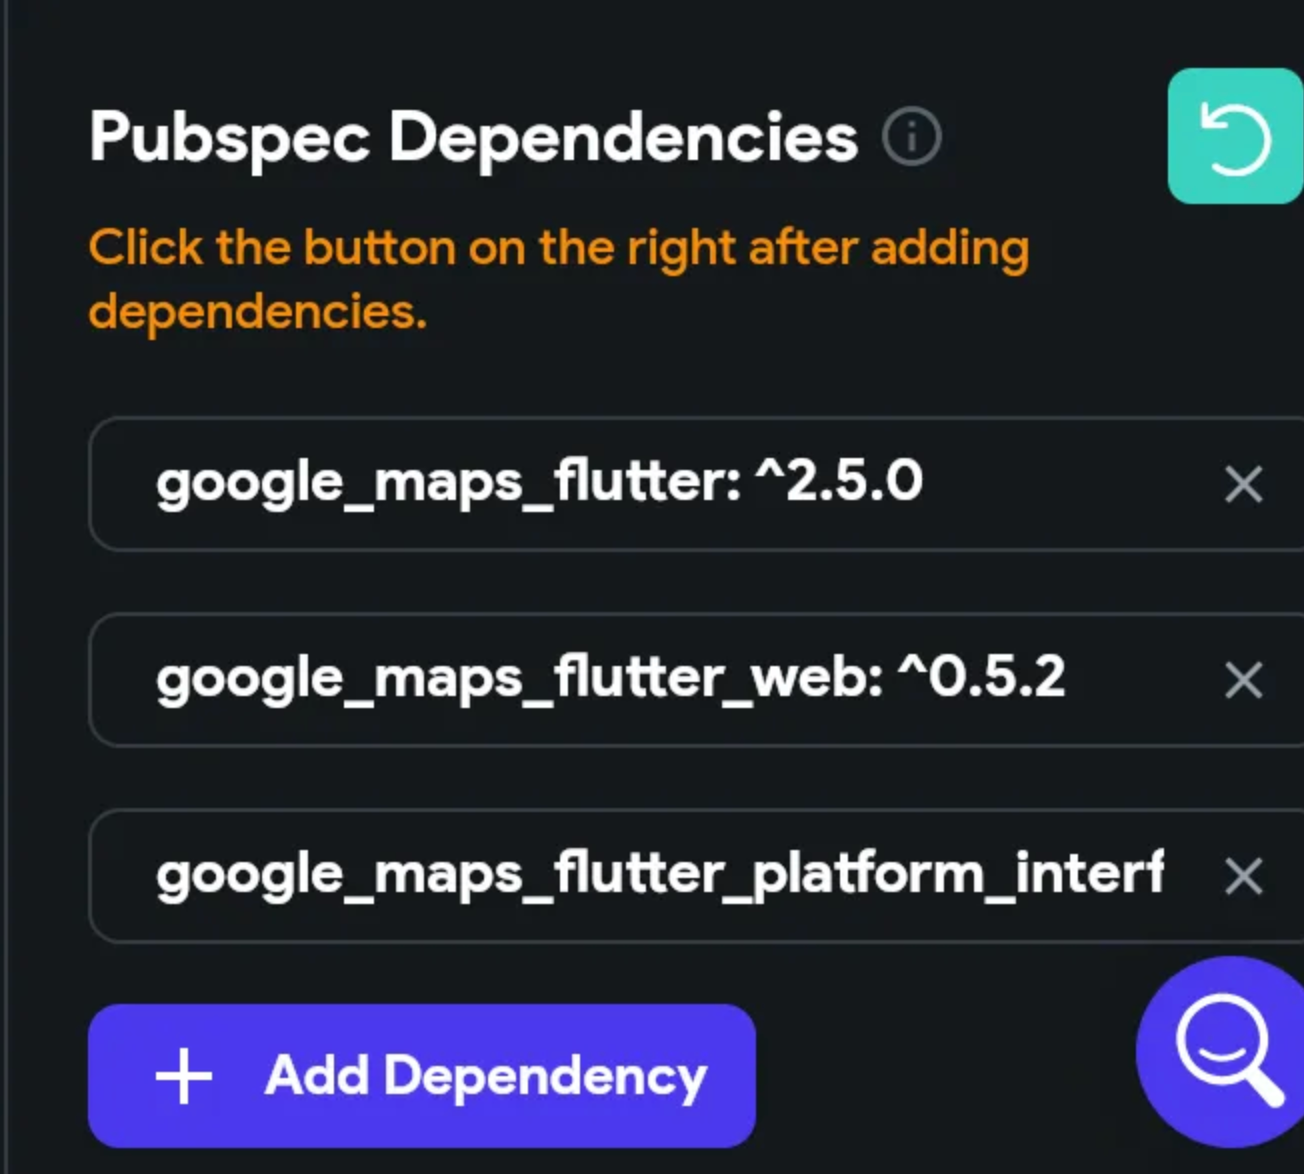
Including Google Map API Key and local images for our Custom Widget
There are some minor limitations when using Google Maps and images in Flutter Flow. They won’t include the Google Map API key and local images if it does not see the Flutter Flow Google Map and Flutter Flow ImageView on any page.
In our case we might want to load a local asset image by specifying the name in the database.
To get around this create a blank page and drop Flutter Flows Google Map and ImageViews with the images you want to be included. You don’t have to have any navigation to these pages.
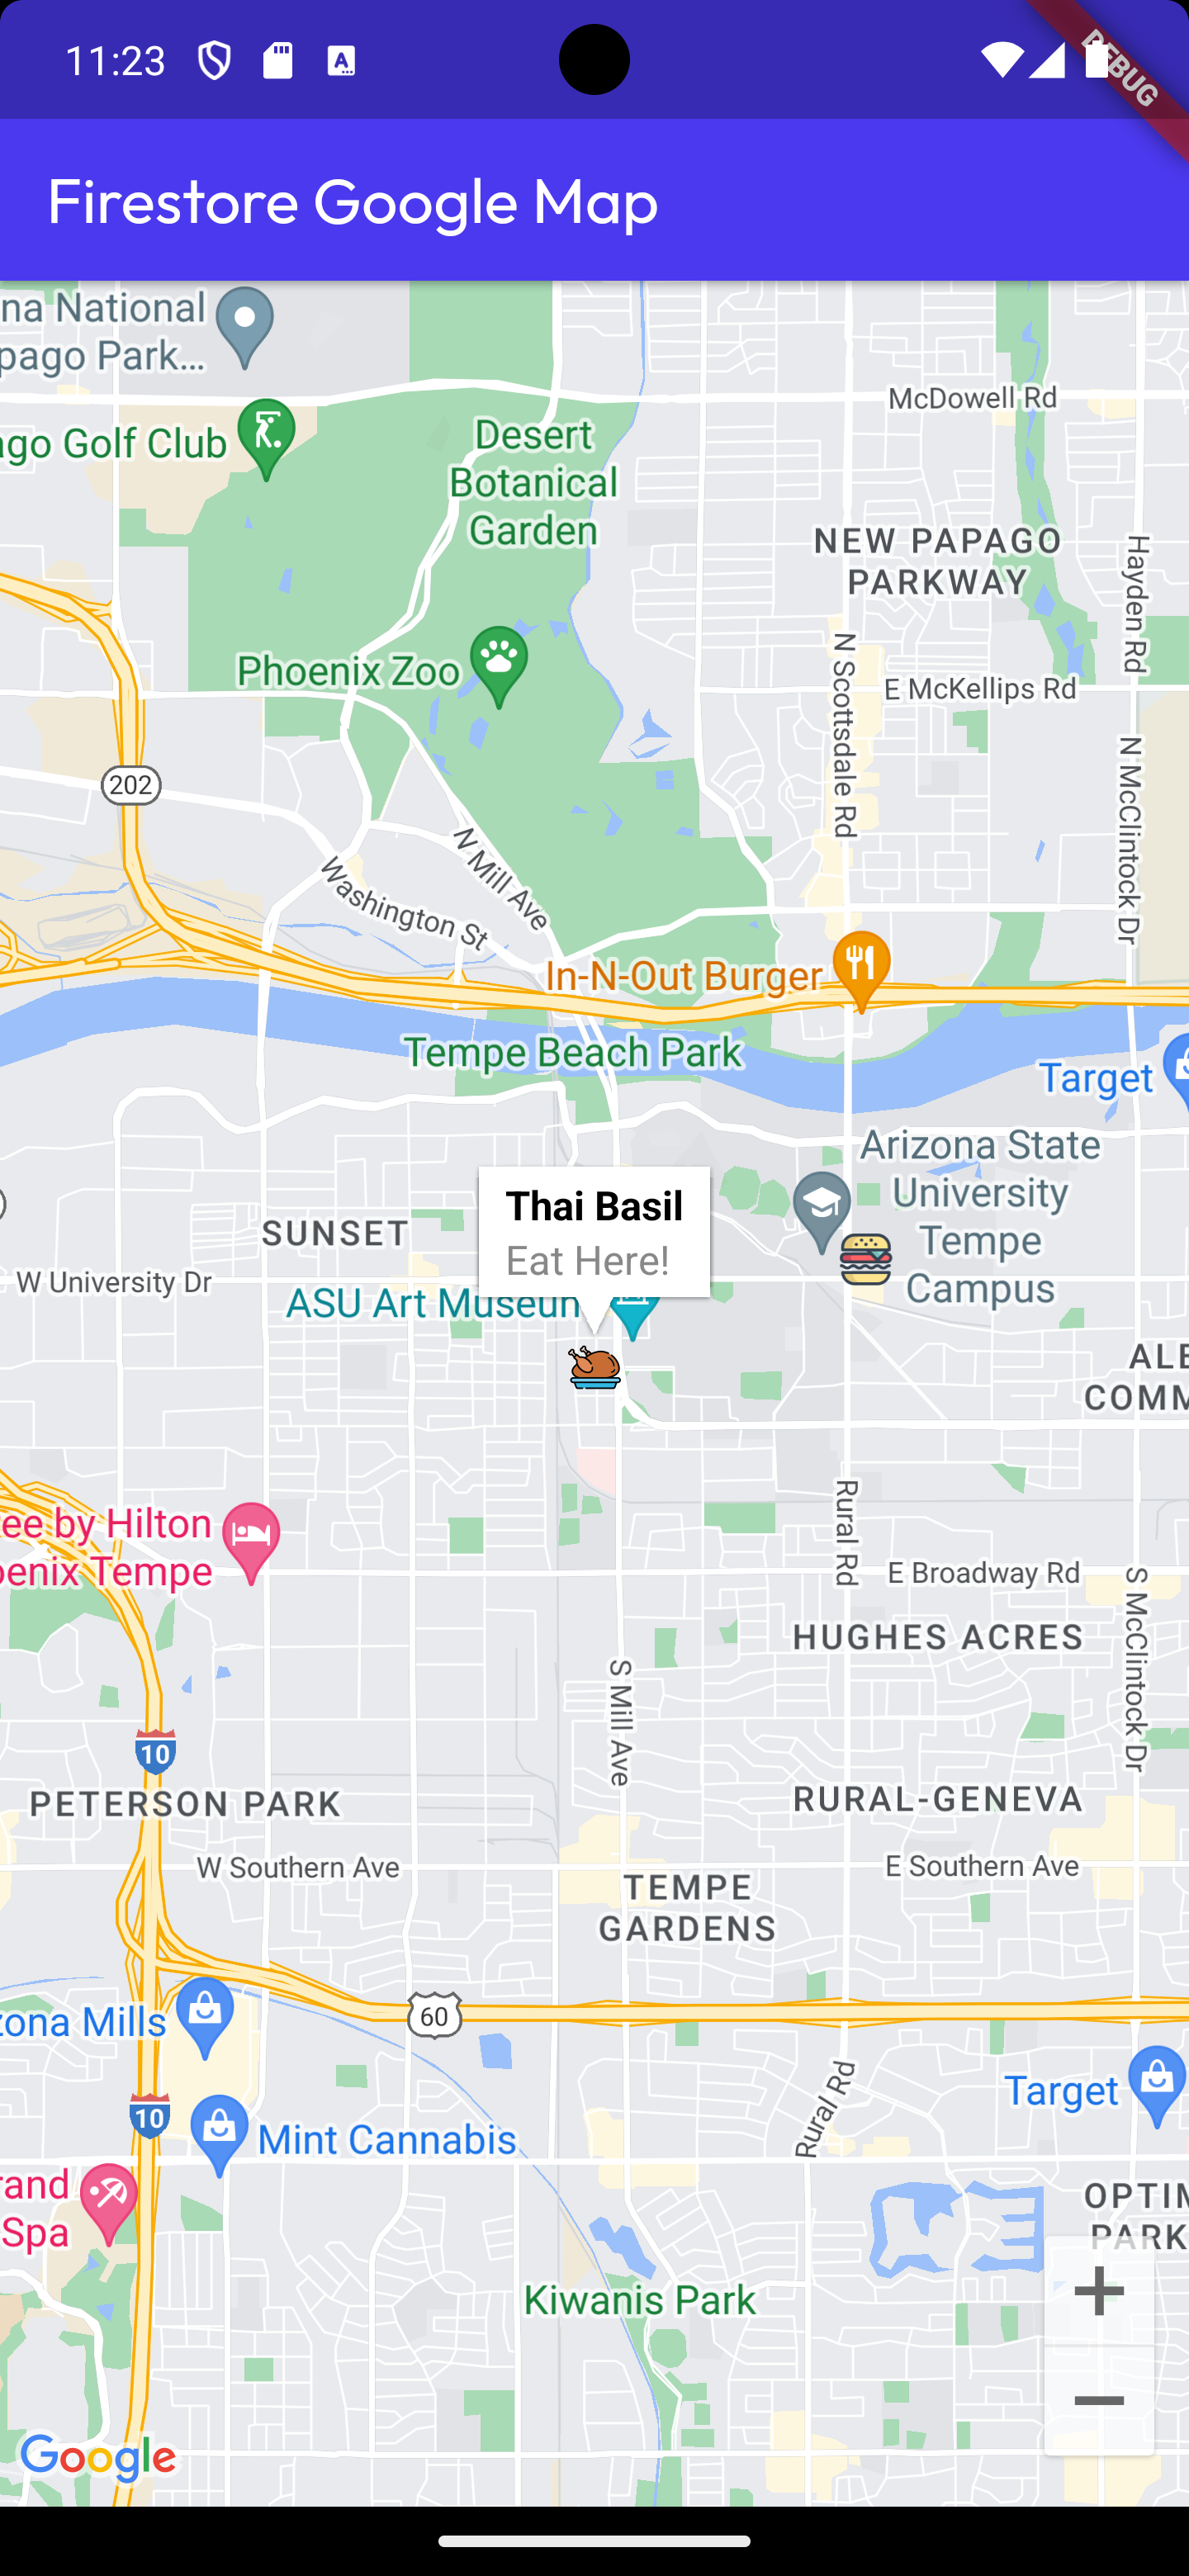
Test the custom Google Map with custom Markers
In my previous articles, at the time the custom Google Map wouldn’t render in Test Mode. With Flutter Flow’s latest updates it now loads our custom Google Map!
There is still one downside, the custom markers still don’t load in Test Mode. In all other modes it should work, I always download the project anyway.
What’s Next?
If you want to get better at custom Flutter development I recommend this book
Congratulations on implementing your new custom Google Map!
I will enhance this by scanning a VIN barcode and automatically fetching the vehicle information.
Add a new button for scanning
I added a button titled Scan Vin.
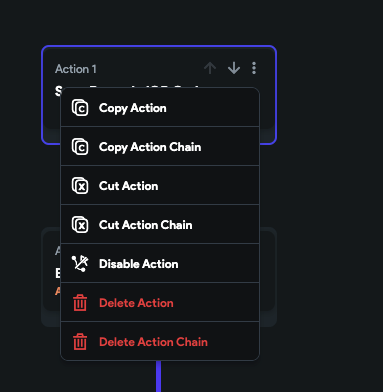
For the action, you can open the Action Flow Editor on the Get Vehicle Info button, click on the three dots of the first action, and click Copy Action Chain.
You can then open the Action Flow Editor of the Scan Vin button and click Paste Actions.
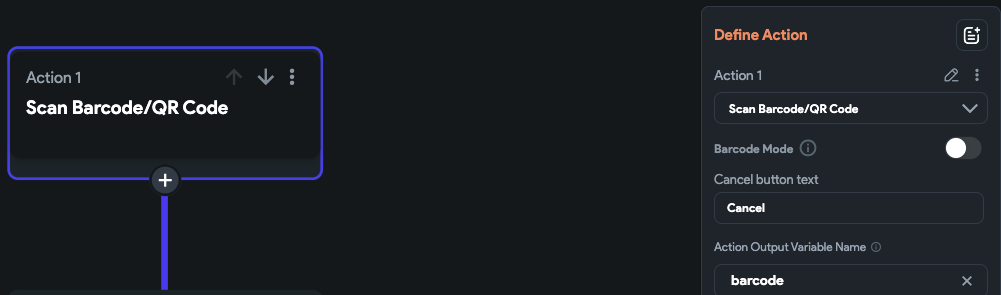
Add one action above the action variable that uses the Flutter Flow Scan Barcode/QR Code (under Widget/UI interactions)
I set the action output as barcode
In Action 2, update the vin value in the API call to use the Action Output barcode
I also updated the Action Output for the API call to vinResults
Update this in the Conditional Action.
The next 2 actions are the same as before.
If all goes well you should get the following result, Congratulations!
I have created a form to better understand everyone’s needs. You can also request custom Flutter Flow development and/or Flutter Flow training.
This might not be the most scalable solution. I’m going to discuss a better approach on how to read the data from Supabase to show custom markers in Google Maps.
Update : The Supabase Community posted this article on their Twitter/X account. To celebrate I have updated this article with improvements to the code. Most notably adding the ability to load network images as icons.
If you don’t have another means of adding data yet, you can add it manually by clicking Insert > Insert Row
Also, make sure to set a read policy on the place table. You can do this by going to the Authentication menu tab on the left.
For this example, I’m allowing read access to everyone.
Click New Policy > Get started quickly
You can use the first template given
Querying Supabase from our Custom Widget
Note: Flutter Flow now has the option to pass a list of Supabase Rows as a parameter and allows you have callbacks as parameters. I have submitted the new approach to the Flutter Flow Marketplace. The new approach is in the article below. Flutter Flow: Google Maps Custom Marker Actions
We could query and then set it to app state and add a listener to FFAppState since it extends ChangeNotifier. The problem with this is that it will listen to every state change, even unrelated state changes.
Another approach is to directly query the table in Supabase. I chose to go with this approach for this example.
Let’s create another custom widget, this time naming it GoogleMapsSupabase.
The main changes I’ve made here are instead of creating the BitmapDescriptor in initState, I am first loading the data from Supabase from the place table.
Notice we are still using the custom data type from the previous example. We are mapping the results from Supabase to the custom data type GoogleMapDataStruct. We have also changed _createMarkers to use the **_fetchedMapData **variable.
Next, create the same parameters we used in the last example except for the mapData parameter. Notice we have also removed that from the example.
Note: Make sure to keep your images small
// Automatic FlutterFlow imports
import '/backend/schema/structs/index.dart';
import '/backend/supabase/supabase.dart';
import '/flutter_flow/flutter_flow_theme.dart';
import '/flutter_flow/flutter_flow_util.dart';
import '/custom_code/widgets/index.dart'; // Imports other custom widgets
import '/custom_code/actions/index.dart'; // Imports custom actions
import '/flutter_flow/custom_functions.dart'; // Imports custom functions
import 'package:flutter/material.dart';
// Begin custom widget code
// DO NOT REMOVE OR MODIFY THE CODE ABOVE!

import 'index.dart'; // Imports other custom widgets

import 'package:google_maps_flutter/google_maps_flutter.dart'
    as google_maps_flutter;
import '/flutter_flow/lat_lng.dart' as latlng;
import 'dart:async';
export 'dart:async' show Completer;
export 'package:google_maps_flutter/google_maps_flutter.dart' hide LatLng;
export '/flutter_flow/lat_lng.dart' show LatLng;
import 'package:google_maps_flutter_platform_interface/google_maps_flutter_platform_interface.dart';
import 'dart:ui';

// Set your widget name, define your parameter, and then add the
// boilerplate code using the green button on the right!

class GoogleMapsSupabase extends StatefulWidget {
  const GoogleMapsSupabase({
    Key? key,
    this.width,
    this.height,
    this.allowZoom = true,
    this.showZoomControls = true,
    this.showLocation = true,
    this.showCompass = false,
    this.showMapToolbar = false,
    this.showTraffic = false,
    this.centerLat = 0.0,
    this.centerLng = 0.0,
  }) : super(key: key);

  final double? width;
  final double? height;
  final bool allowZoom;
  final bool showZoomControls;
  final bool showLocation;
  final bool showCompass;
  final bool showMapToolbar;
  final bool showTraffic;
  final double centerLat;
  final double centerLng;

  @override
  _GoogleMapsSupabaseState createState() => _GoogleMapsSupabaseState();
}

class _GoogleMapsSupabaseState extends State<GoogleMapsSupabase> {
  Completer<google_maps_flutter.GoogleMapController> _controller = Completer();
  Map<String, google_maps_flutter.BitmapDescriptor> _customIcons = {};
  Set<google_maps_flutter.Marker> _markers = {};
  List<GoogleMapDataStruct> _fetchedMapData = [];

  late google_maps_flutter.LatLng _center;

  @override
  void initState() {
    super.initState();

    _center = google_maps_flutter.LatLng(widget.centerLat, widget.centerLng);

    _loadData();
  }

  void _loadData() async {
    final supabase = SupaFlow.client;
    final response = await supabase.from('place').select().limit(10).execute();
    final data = response.data;

    if (data != null) {
      setState(() {
        _fetchedMapData = List<GoogleMapDataStruct>.from(
          data.map(
            (item) => GoogleMapDataStruct(
              latLng: latlng.LatLng(item['lat'], item['lng']),
              iconPath: item['icon_name'],
              title: item['title'],
              description: item['description'],
            ),
          ),
        );
      });

      _loadMarkerIcons();
    }
  }

  Future<void> _loadMarkerIcons() async {
    Set<String> uniqueIconPaths =
        _fetchedMapData.map((data) => data.iconPath).toSet() ??
            {}; // Extract unique icon paths

    for (String path in uniqueIconPaths) {
      if (path.isNotEmpty) {
        if (path.contains("https")) {
          Uint8List? imageData = await loadNetworkImage(path);
          if (imageData != null) {
            google_maps_flutter.BitmapDescriptor descriptor =
                google_maps_flutter.BitmapDescriptor.fromBytes(imageData);
            _customIcons[path] = descriptor;
          }
        } else {
          google_maps_flutter.BitmapDescriptor descriptor =
              await google_maps_flutter.BitmapDescriptor.fromAssetImage(
            const ImageConfiguration(devicePixelRatio: 2.5),
            "assets/images/$path",
          );
          _customIcons[path] = descriptor;
        }
      }
    }

    _updateMarkers(); // Update markers once icons are loaded
  }

  Future<Uint8List?> loadNetworkImage(String path) async {
    final completer = Completer<ImageInfo>();
    var image = NetworkImage(path);
    image.resolve(const ImageConfiguration()).addListener(ImageStreamListener(
        (ImageInfo info, bool _) => completer.complete(info)));
    final imageInfo = await completer.future;
    final byteData =
        await imageInfo.image.toByteData(format: ImageByteFormat.png);
    return byteData?.buffer.asUint8List();
  }

  void _updateMarkers() {
    setState(() {
      _markers = _createMarkers();
    });
  }

  .....

  Set<google_maps_flutter.Marker> _createMarkers() {
    var tmp = <google_maps_flutter.Marker>{};

    _fetchedMapData.forEach((mapData) {
      // Directly use the latlng.LatLng object
      final latlng.LatLng coordinates = mapData.latLng as latlng.LatLng;

      // Convert to google_maps_flutter.LatLng
      final google_maps_flutter.LatLng googleMapsLatLng =
          google_maps_flutter.LatLng(
              coordinates.latitude, coordinates.longitude);

      google_maps_flutter.BitmapDescriptor icon =
          _customIcons[mapData.iconPath] ??
              google_maps_flutter.BitmapDescriptor.defaultMarker;

      // Create and add the marker
      final google_maps_flutter.Marker marker = google_maps_flutter.Marker(
        markerId: google_maps_flutter.MarkerId(mapData.title),
        position: googleMapsLatLng,
        icon: icon,
        infoWindow: google_maps_flutter.InfoWindow(
            title: mapData.title, snippet: mapData.description),
      );

      tmp.add(marker);
    });

    return tmp;
  }
}