Migrating away from Firebase, to Netlify and Supabase

Migrating away from Firebase, to Netlify and Supabase

Latest Keith Lee app updates

In my previous article, I showed you how to create a Keith Lee food app using ReactJS, ChatGPT, and Firebase.

However, as time passed, I found that Supabase for the backend and Netlify for hosting are more cost-efficient solutions.

Supabase is also open-source; you don’t have to deal with vendor lock-in as you would with Firebase. This means I can migrate to any hosting provider freely if I want to.

You also don’t have to host and maintain the entire Supabase project. You can connect to any database as a service platform.

Latest Keith Lee app updates

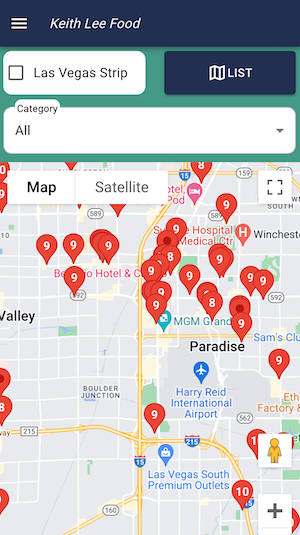
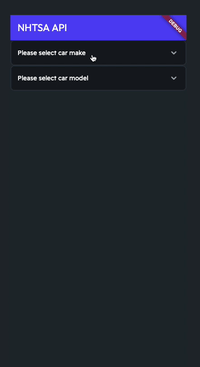
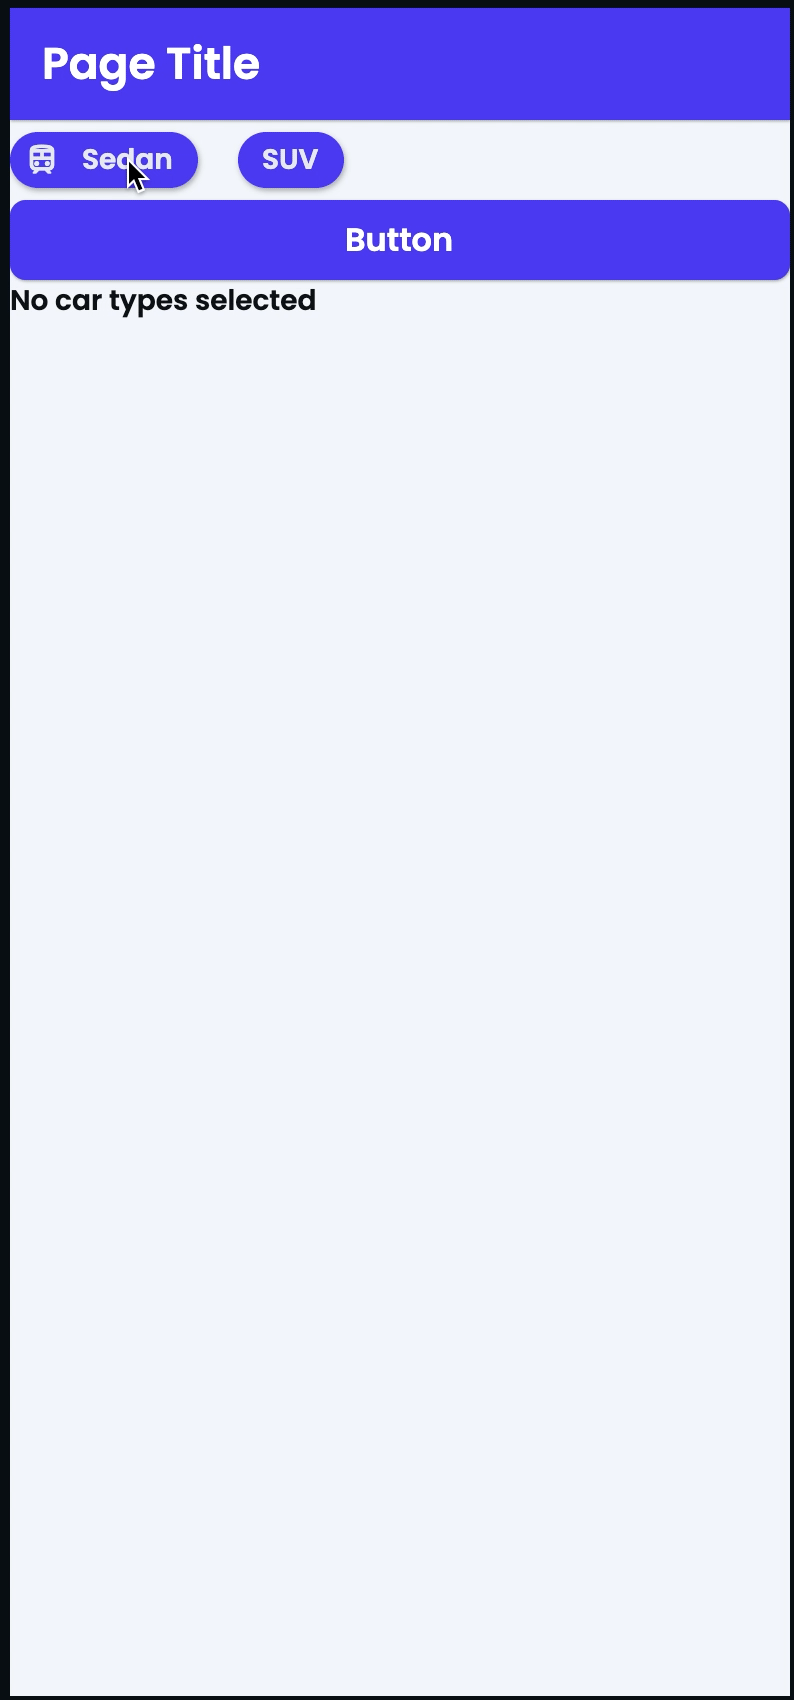
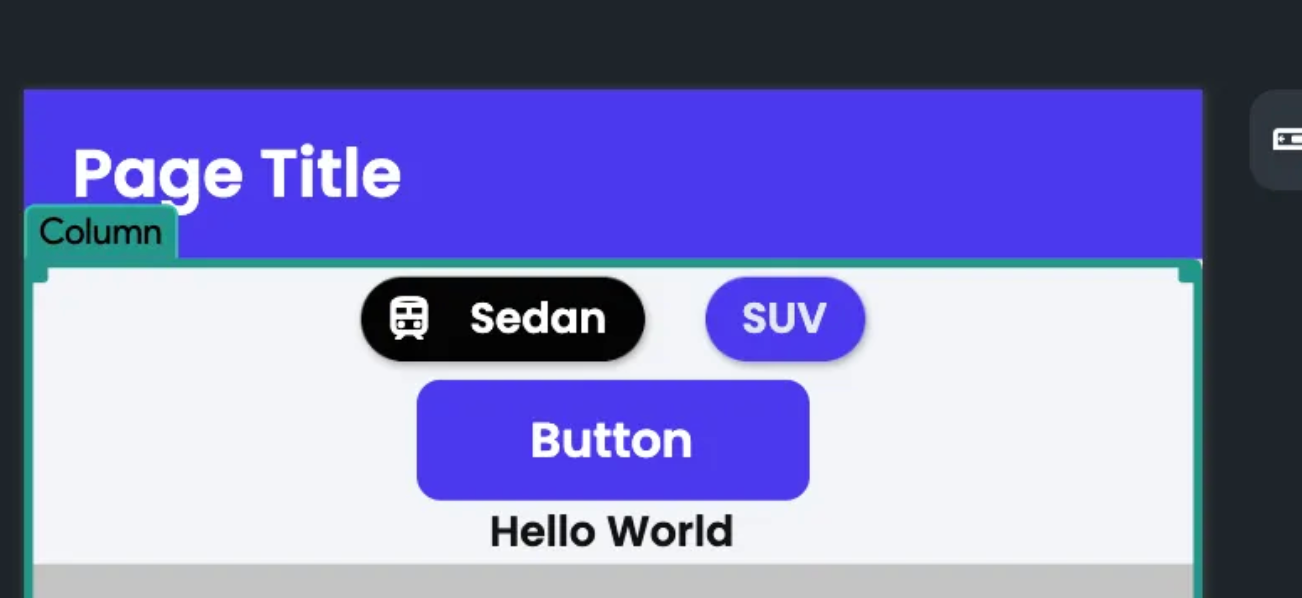
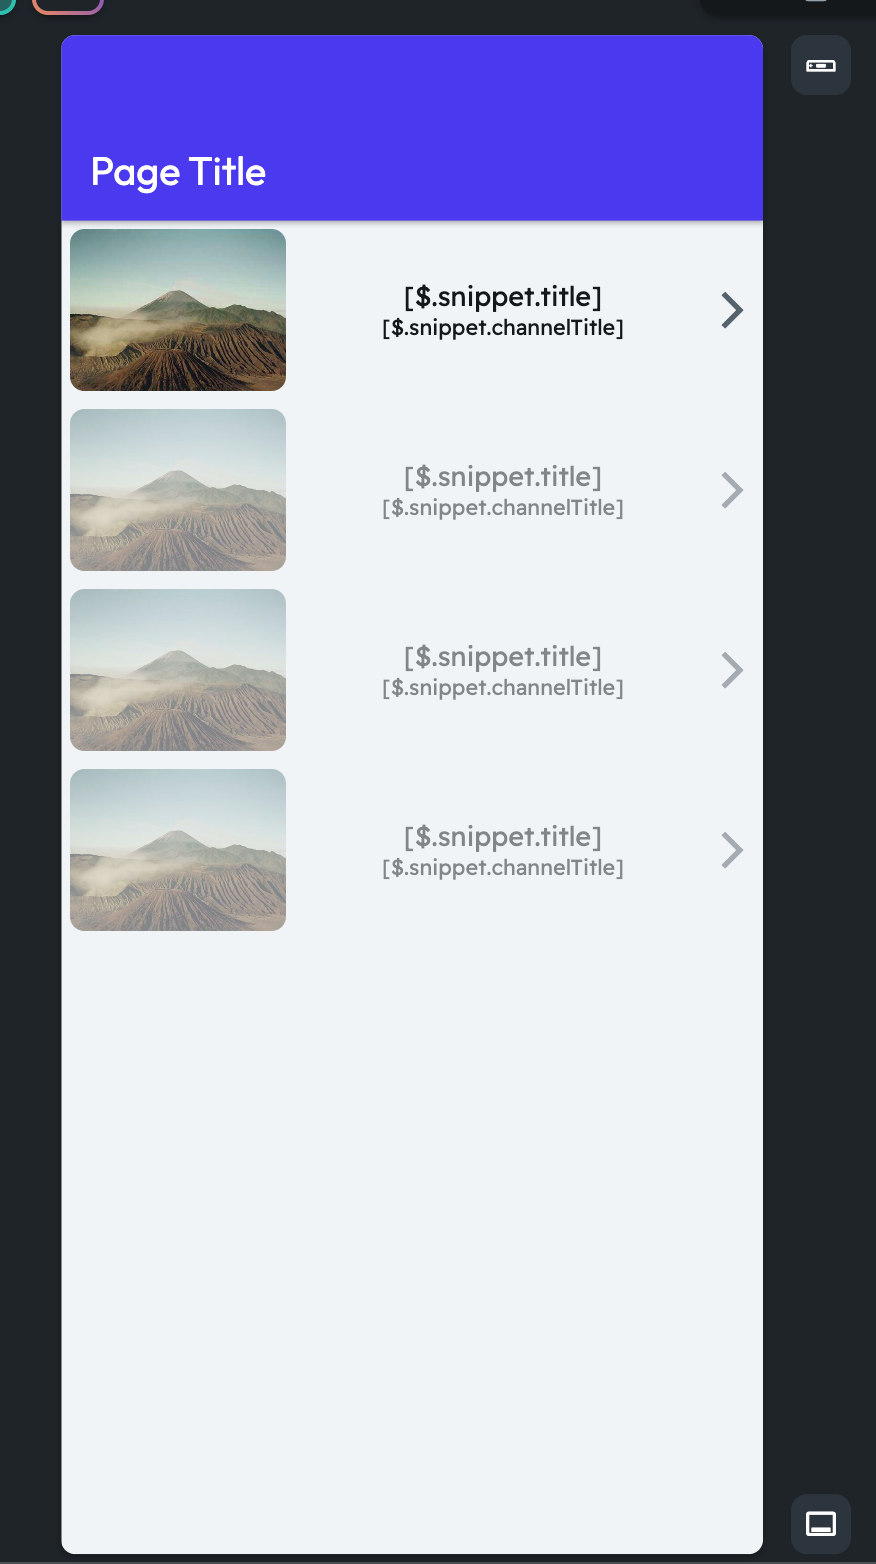
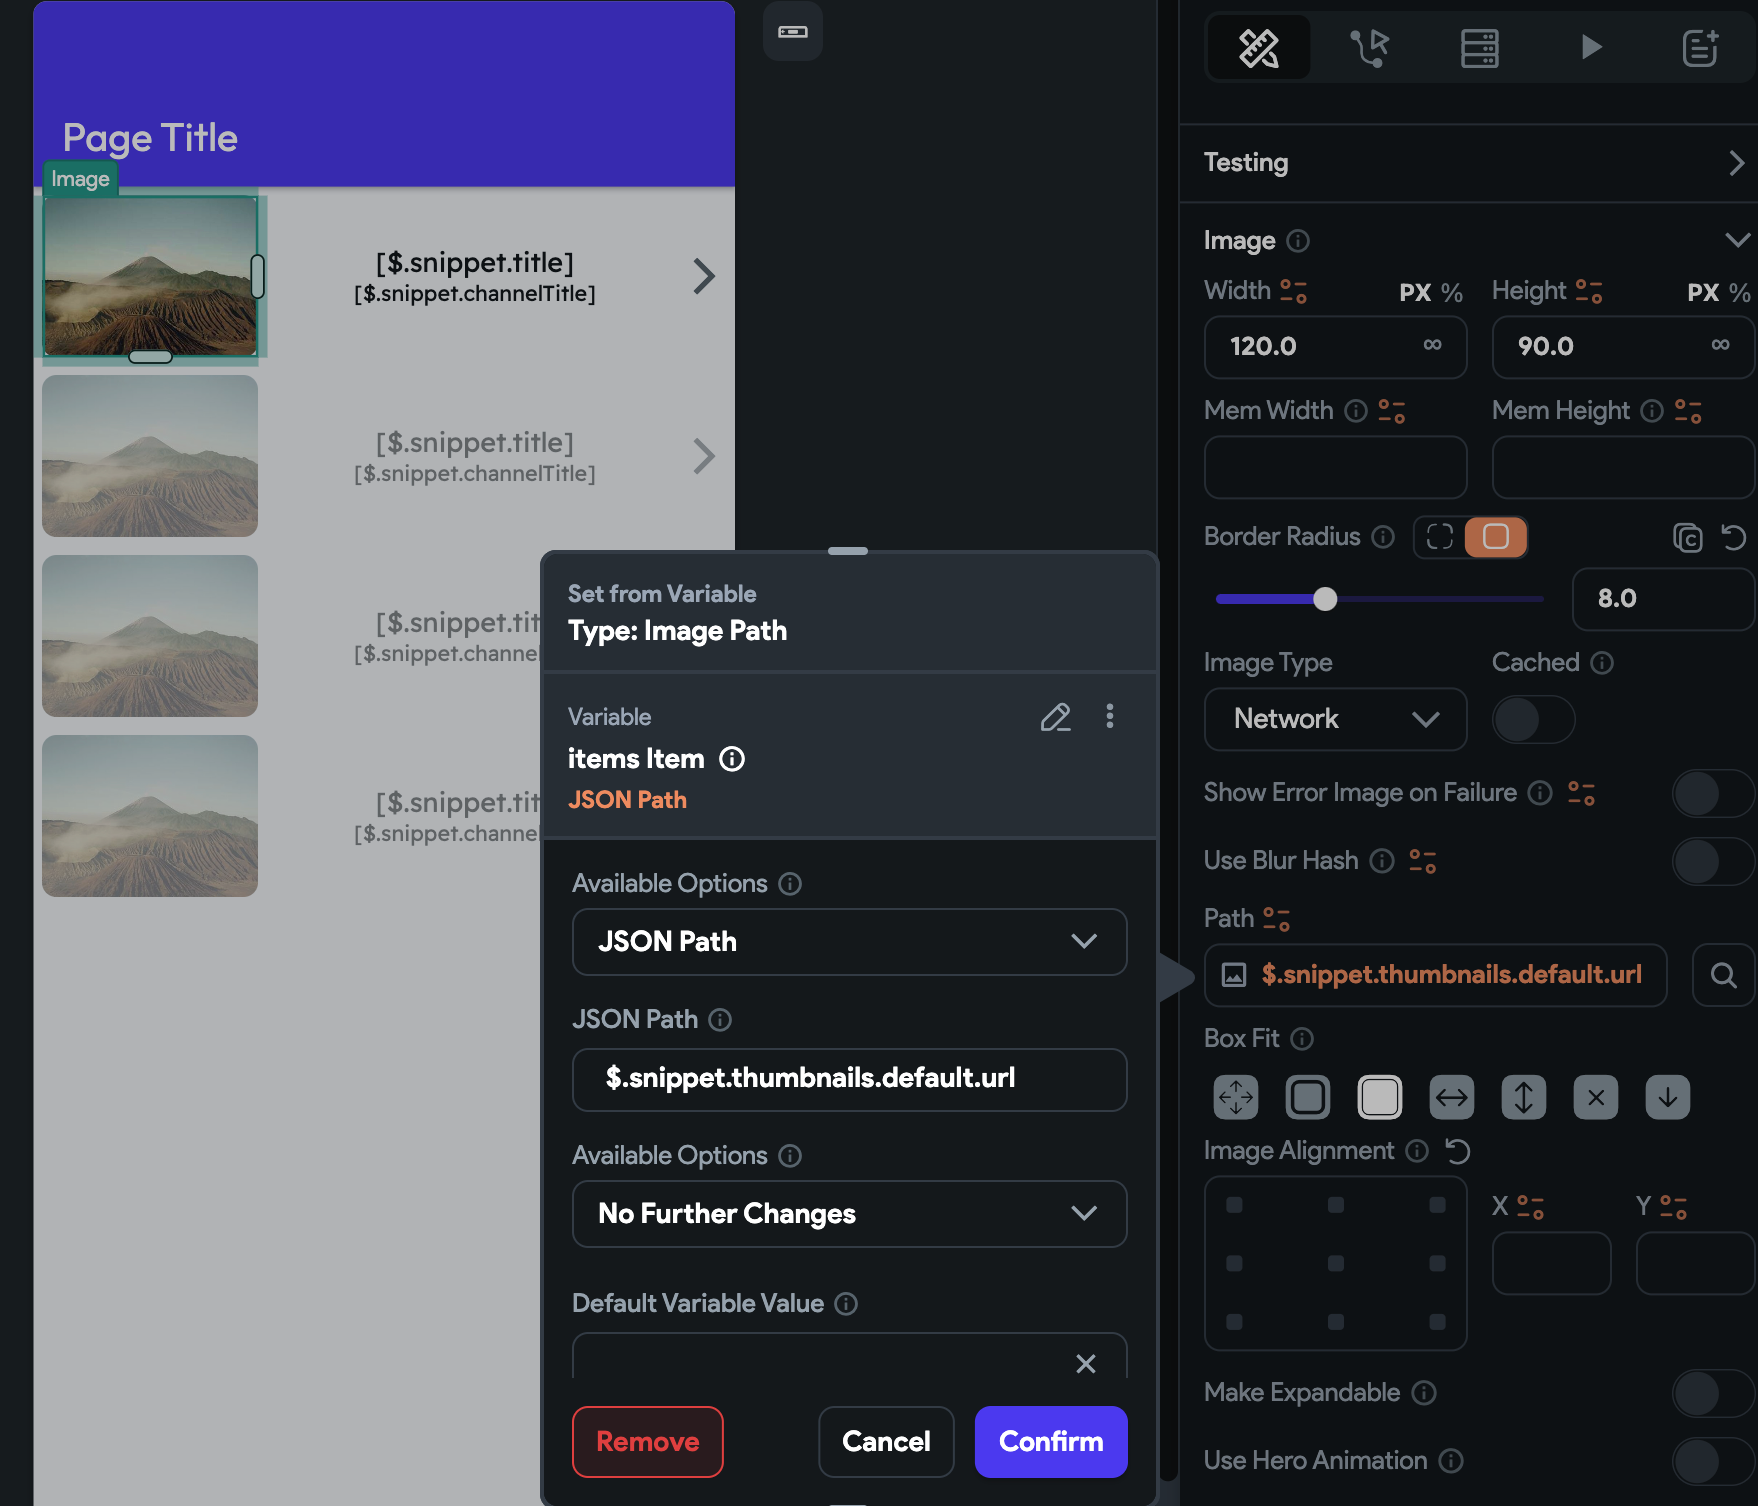
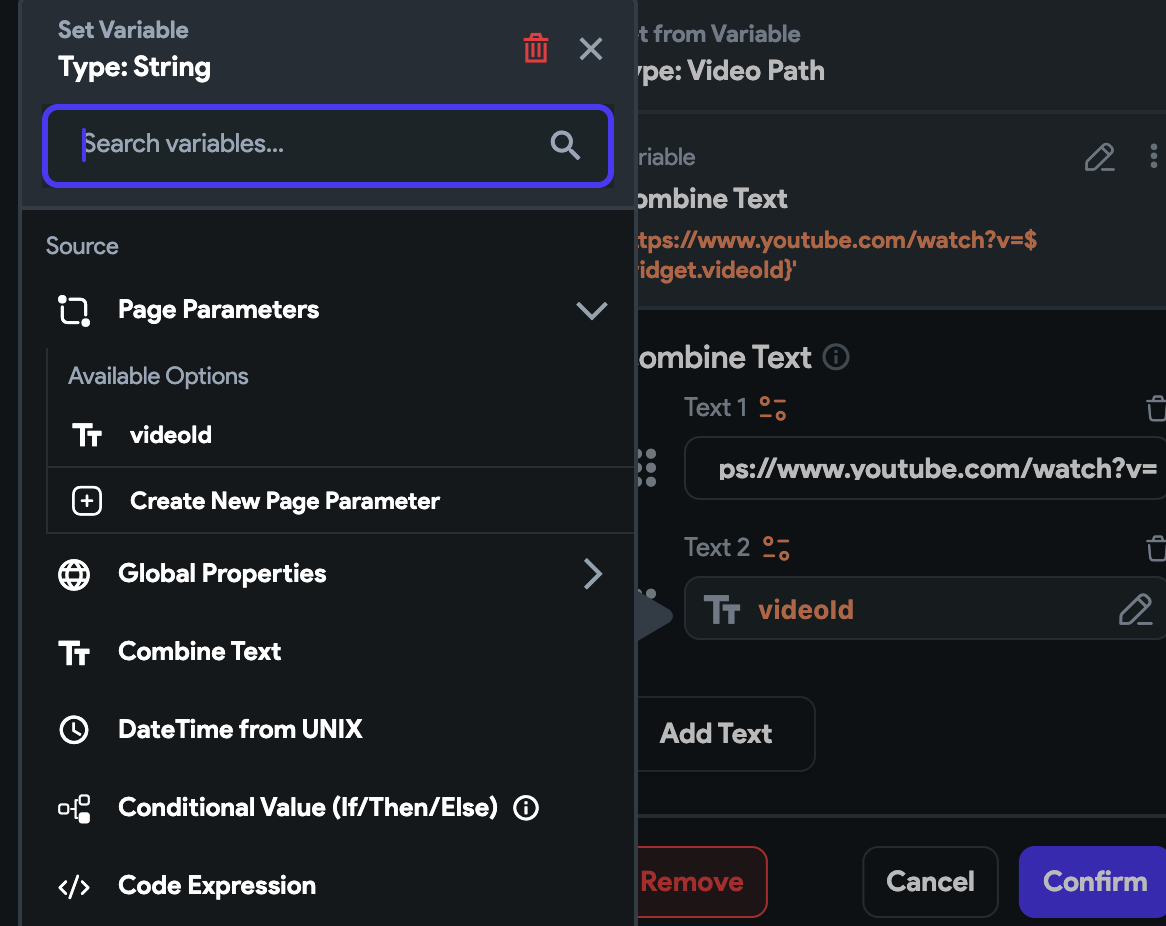
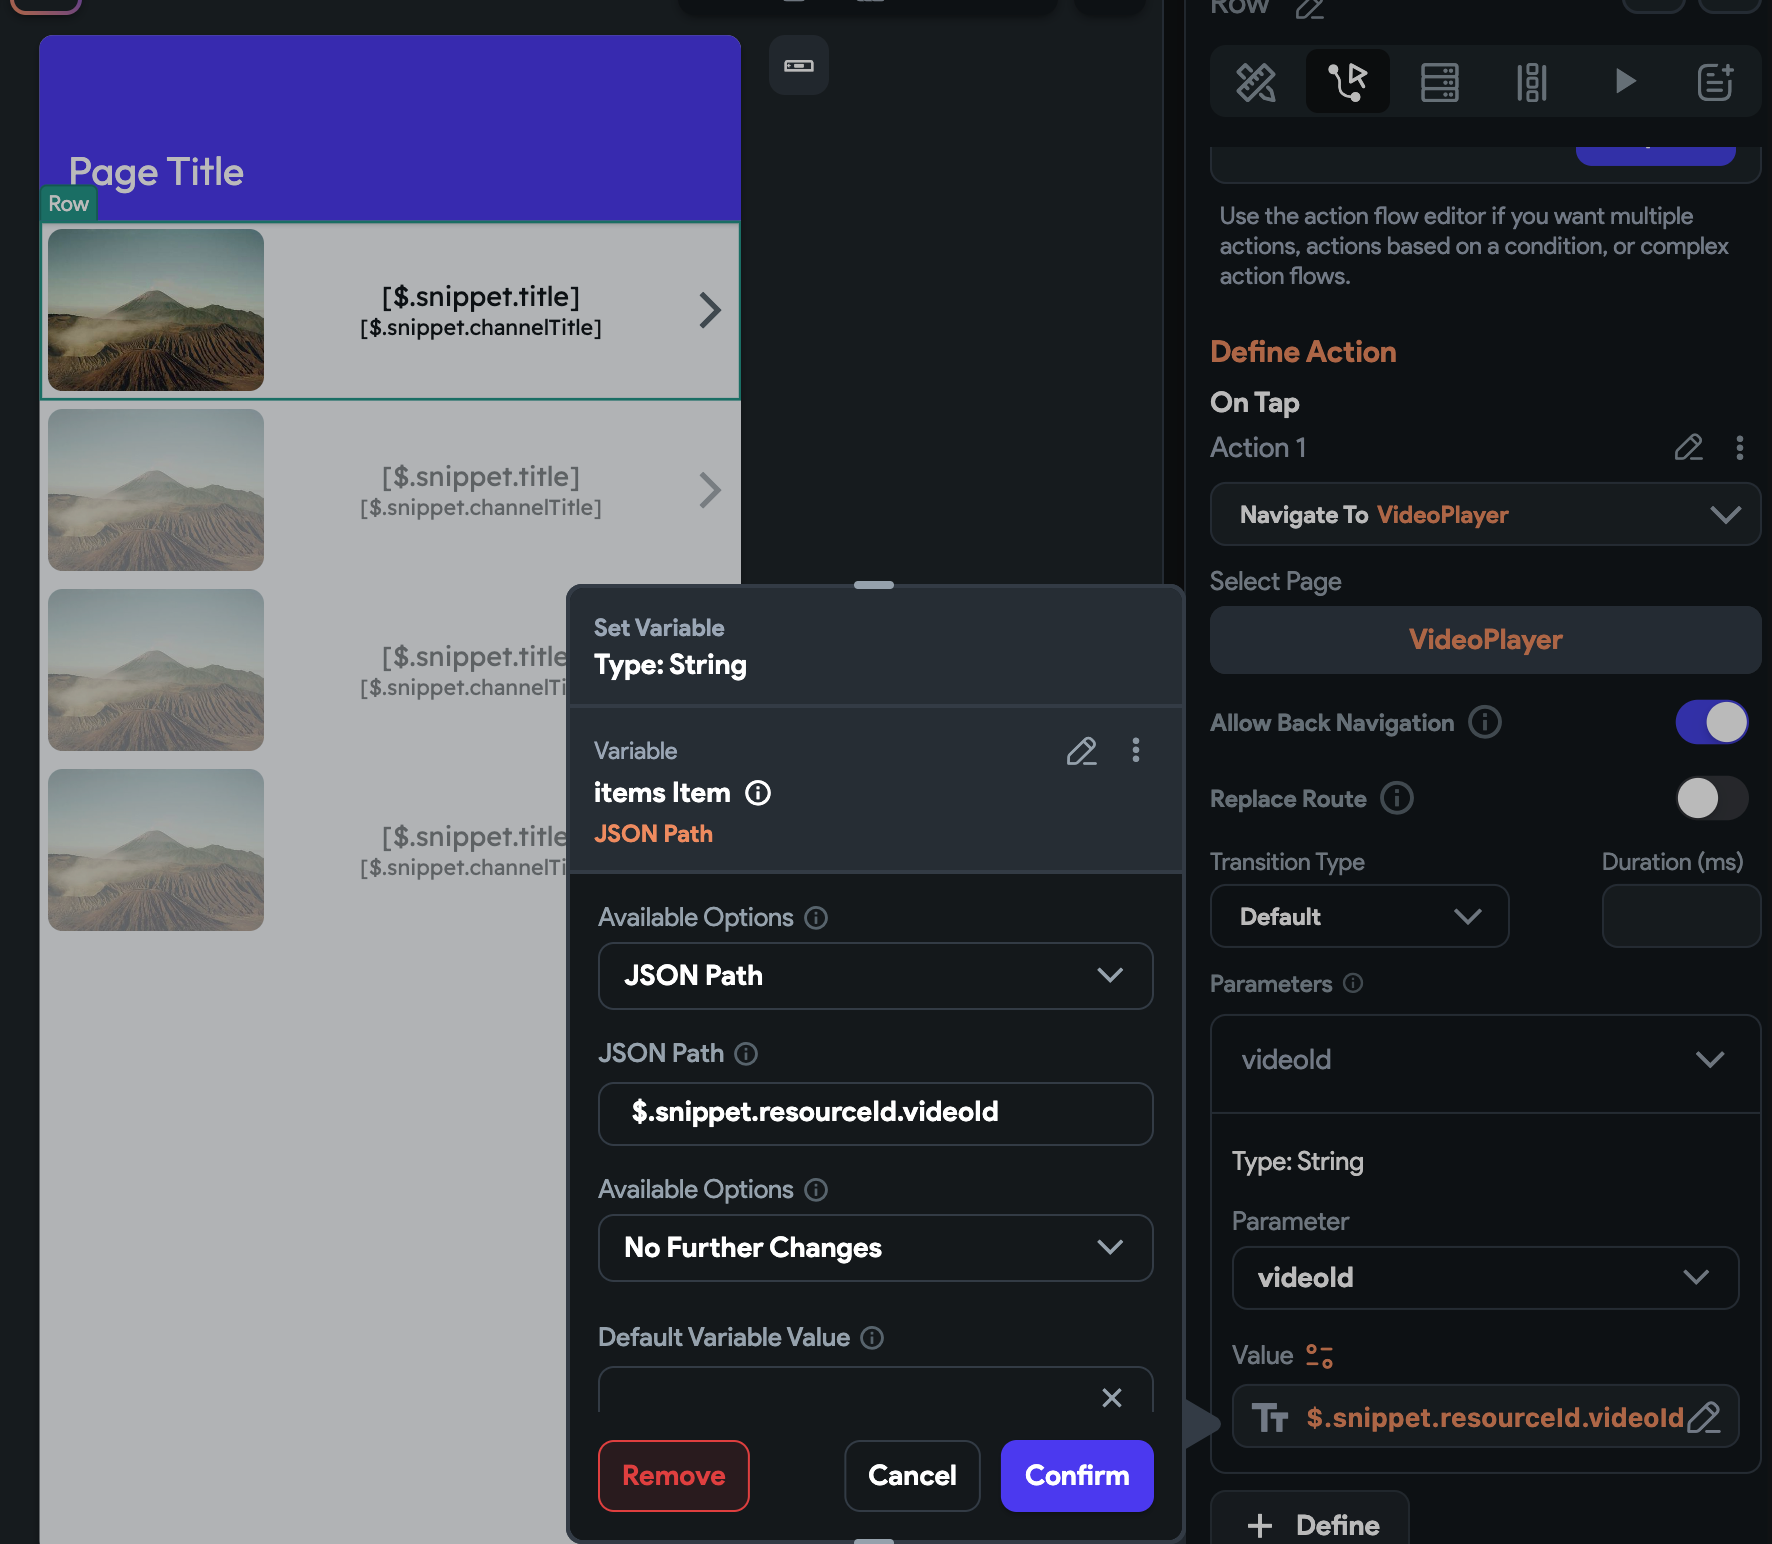
As you can tell from the screenshot, I have added more features, such as authentication, saving places, a new UI, filters, a guided tour, and a new “profile” page for each place.

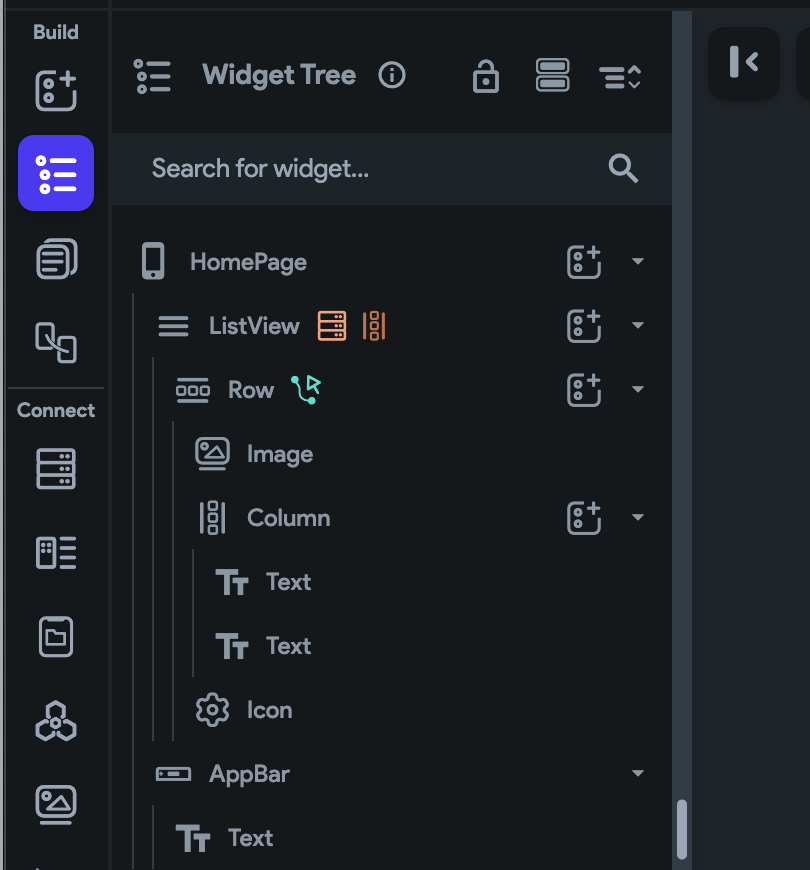
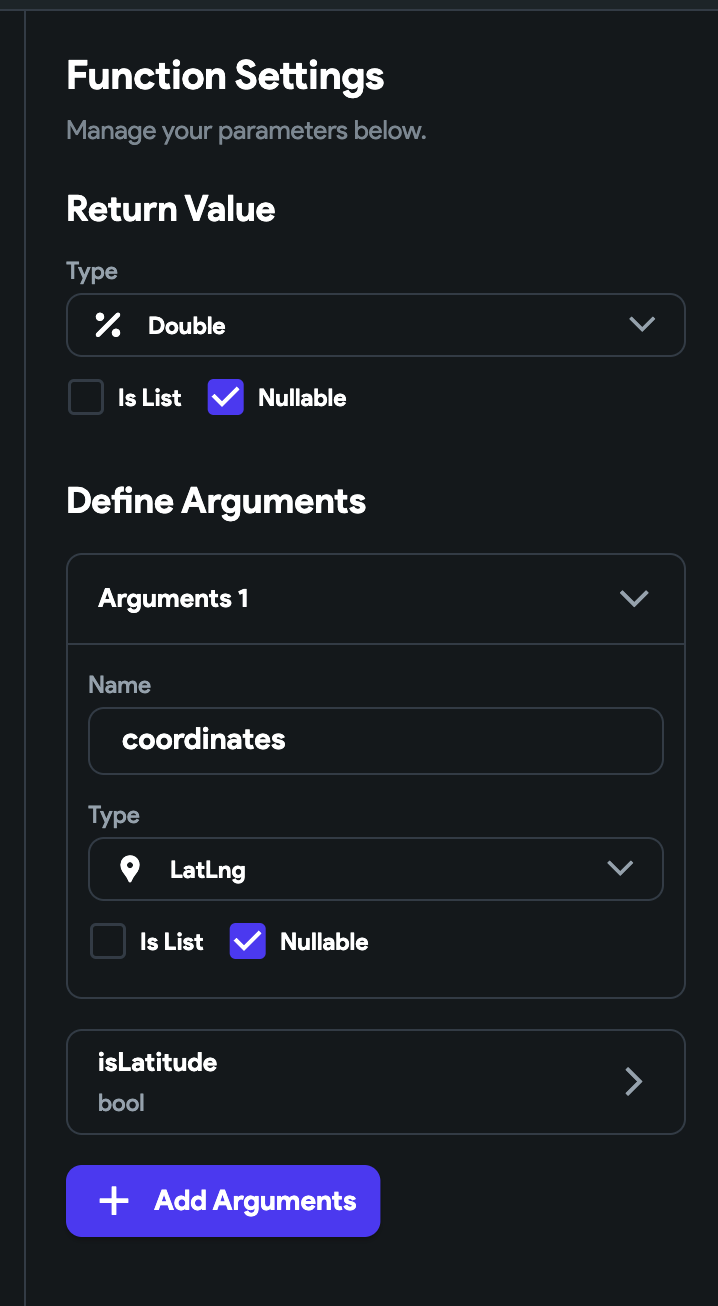
Due to the complexity of the new features, I have also utilized redux-toolkit. I will write separate articles on my approaches to implementing these new features.

I also have created native iOS and Android apps using SwiftUI and Jetpack Compose. I will go over their implementation in the future as well.

Setting Up Supabase

Supabase is an open-source alternative to Firebase that offers different services, including database, authentication, storage, and real-time subscriptions. To start using Supabase, you need to create an account and a new project.

  1. Head over to https://supabase.com/ and sign up for a free account.
  2. Create a new project and fill in the required details.

Once your project is created, you’ll receive a unique project URL and API key. Save these for later use.

Migrating Data from Firestore to Supabase

Before migrating data from Firestore to Supabase, we need to export data from Firestore.

Supabase has a Firebase migration tool. I’ll list the relevant steps from the documentation so you don’t have to jump between tabs.
Firestore Data Migration

Exporting Firebase data

First, we must clone the firebase-to-supabase repo

git clone https://github.com/supabase-community/firebase-to-supabase.git

In the /firestore directory, create a file named supabase-service.json with the following contents:

{
  "host": "database.server.com",
  "password": "secretpassword",
  "user": "postgres",
  "database": "postgres",
  "port": 5432
}
  1. Go to the Database settings for your project in the Supabase Dashboard.
  2. Under Connection Info, copy the Host string and replace the entry in your supabase-service.json file.
  3. Enter the password you used when you created your Supabase project in the password entry in the supabase-service.json file.

Generate a Firebase private key

  1. Log in to your Firebase Console and open your project.
  2. Click the gear icon next to Project Overview in the sidebar and select Project Settings.
  3. Click Service Accounts and select Firebase Admin SDK.
  4. Click Generate new private key.
  5. Rename the downloaded file to firebase-service.json.

Now we need to export the data to json. Run the following command with your collection name.

node firestore2json.js <collection-name>

In my case, the command will look like the following:

node firestore2json.js places

Import the JSON file into Supabase using the following command

node json2supabase.js <path_to_json_file>

Updating React App to Use Supabase

Now, we need to update our React app to use Supabase instead of Firestore. First, install the Supabase JavaScript client:

npm install @supabase/supabase-js

Also, check out the Supabase Quick Start documentation for React:
Use Supabase with React

The Supabase Javascript docs mention creating the following file to initialize the Supabase client. I’ve slightly changed it to allow using React environment variables.

import {createClient} from "@supabase/supabase-js";

export const supabase = createClient(
    process.env.REACT_APP_SUPABASE_URL,
    process.env.REACT_APP_SUPABASE_KEY,
)
// supabaseClient.js

Now create a file called .env at the root of your project. Each env variable must begin with the prefix REACT_APP_

Add the following to the .env file. Note you can find these under Settings > API.

REACT_APP_SUPABASE_URL=<your-supabase-url>
REACT_APP_SUPABASE_KEY=<your-supabase-key>

You can read more about React env vars in their official documentation:
Adding Custom Environment Variables | Create React App

Now let’s update our code to retrieve the data from Supabase.

 useEffect(() => {
    getPlaces
  }, []);

 const getPlaces = async() =>{
    const { data, error } = await supabase.from("places").select().order('title');
    setData(data);
 }

Migrating from Firebase Hosting to Netlify

Using Netlify is easier to set up than Firebase.

Head over to https://www.netlify.com/ and create a new account. I signed up using Github.

After signing up, Netlify guides you on creating a new project. After creating your project, you can deploy it.

First, before deploying your project, you will need to add a _redirects file to the project directory of your React project.

/*    /index.html   200

Check out the Netlify documentation for more configuration options:
Redirects and rewrites

The easiest way to deploy it depends on your experience.

You can allow Netlify to read your projects from Github, build them, and deploy them.
A Step-by-Step Guide: Deploying on Netlify

You can also create a production build and upload the build folder directly.

npm run build --production

Check out the latest updates to the Keith Lee food app:
Keith Lee Food App

Thank you for taking the time to read this article!

Adding Google Maps to React.js

Adding Google Maps to React.js

In the previous article, I wrote about creating a Keith Lee food app using React.js and Firebase.
Creating a Keith Lee Food App w/ React.js & ChatGPT

In this article, I will show you how I used the Google Maps Javascript SDK to display the list of restaurants on a map.
Google Maps Platform Documentation | Maps JavaScript API | Google Developers

I have discontinued using Firebase and moved to Netlify for hosting and Supabase for the backend. I will create an article on my steps to migrate away from Firebase to Supabase.
Develop and deploy websites and apps in record time | Netlify
The Open Source Firebase Alternative | Supabase

Enabling the Google Maps Javascript SDK

We are going to follow along with the documentation from Google.
Set up your Google Cloud project | Maps JavaScript API | Google Developers

Create a Google Project. Click on the blue Create new project button.

Fill out the form and click Create.

Now we need to enable Google Maps for our project. Go to the following link and click Enable the Maps Javascript API
Set up your Google Cloud project | Maps JavaScript API | Google Developers

The button below will initially state Enable. Click it then it will say **Manage. **Now click Manage

Click Credentials on the left hand side.

You will see your Google Maps API key. We will need this soon. You may also restrict the API key to localhost:3000. When you get a domain, you may add it to the list.

Implementing the Google Maps SDK

We will first need to load the Javascript API in our React project. Go to the following link. We will follow along with this documentation.
Load the Maps JavaScript API | Google Developers

I am going to use the recommended Dynamic Library Import. Add the following Javascript code before the closing body tag in index.html

<script>
  (g=>{var h,a,k,p="The Google Maps JavaScript API",c="google",l="importLibrary",q="__ib__",m=document,b=window;b=b[c]||(b[c]={});var d=b.maps||(b.maps={}),r=new Set,e=new URLSearchParams,u=()=>h||(h=new Promise(async(f,n)=>{await (a=m.createElement("script"));e.set("libraries",[...r]+"");for(k in g)e.set(k.replace(/[A-Z]/g,t=>"_"+t[0].toLowerCase()),g[k]);e.set("callback",c+".maps."+q);a.src=`https://maps.${c}apis.com/maps/api/js?`+e;d[q]=f;a.onerror=()=>h=n(Error(p+" could not load."));a.nonce=m.querySelector("script[nonce]")?.nonce||"";m.head.append(a)}));d[l]?console.warn(p+" only loads once. Ignoring:",g):d[l]=(f,...n)=>r.add(f)&&u().then(()=>d[l](f,...n))})({
    key: "YOUR_API_KEY_HERE",
    v: "weekly",
    libraries: ["marker", "maps"]
    // Add other bootstrap parameters as needed, using camel case.
    // Use the 'v' parameter to indicate the version to load (alpha, beta, weekly, etc.)
  });
</script>

Notice we are adding the marker and maps libraries. Make sure to add your API key here.

Now let’s create a new React functional component. We can also copy the Firebase code from the previous article.

import {Box} from "@mui/material";


const config = {
  // Your Firebase project's config object goes here
};

firebase.initializeApp(config);
const db = firebase.firestore();

const RestaurantMap = () => {

    return <Box
        sx={{
            height: '100vh',
            width: '100%'
        }}
        id="map"
    >

    </Box>


}

export default RestaurantMap;

You can run the code, and it will show a blank Google map.

We will then load the markers on the google map. Add this right above the return. Note I have comments of numbers, which represent the steps I took to add google map markers. I will detail those steps under the code.

Also, we are querying Firebase again. We could use redux-toolkit to load and save the data only when needed. For now, we will load it again. In the future, I may add redux-toolkit. It would only take a few mins to implement.
Quick Start | Redux Toolkit

useEffect(() => {
    // Get data from the 'tiktoks' collection in Firestore
   const google = window.google; // 1
   const {Map} = await google.maps.importLibrary("maps"); // 2
   const map = new Map(document.getElementById("map"), {  
                    center: {lat: 36.188110, lng: -115.176468},
                    zoom: 12,
               });
   db.collection('tiktoks').get() // 3
      .then(snapshot => {
            const data = snapshot.docs.map(doc => doc.data()); // Each item in firebase

            const position = {lat: place.lat, lng: place.lng};


            const marker = new google.maps.Marker({ // 4
                 map: map,
                 position: position,
                 title: place.name,
            });

            // ...Retrieve variables below depending on what you want to do 

            const information = new google.maps.InfoWindow({ // 5
                content: `
                         <h4>${place.name}</h4>
                         <div>
                             ${address}
                         </div>
                         ${dir}
                         ${callDiv}
                         <hr>
                         <div>
                             <a href="${shareHref}" target="_blank"/>Share</a>
                         </div>
                         <hr>
                          <div>
                             <a href="${tiktokUrl}" target="_blank"/>Watch Review</a>
                         </div>
                         ${orderUrl}
                         `
            });

            marker.addListener('click', function () { // 6
                information.open(map, marker);
            });


      })
      .catch(error => {
        console.log(error);
      });
  }, []);
  1. Add the google library
  2. Import the maps library from google and create Map object. I have this centered in Las Vegas, since this is where most of the food reviews happen.
  3. Get the list of items from Firebase
  4. Add the Google Marker for the current item
  5. Add the InfoWindow to the Google Marker. This is the popup that shows when you click the Google Marker.
  6. Add a click listener to the marker to make the InfoWindow popup when you show it.

You can refer to the documentation for further customization:
Add a Google Map with a Marker to Your Website | Maps JavaScript API | Google Developers

A few days after creating this map with the list of items, I found someone created a Google MyMaps on Reddit.
{% gist %}
I liked it so much I decided to add it to the web app on a separate page.

Thanks for reading. Let me know if any clarification is needed. You can find the Keith Lee food app at the following link:
Keith Lee Food Reviews

Flutter Flow: Migrating the Carousel Menu to use data types

Flutter Flow: Migrating the Carousel Menu to use data types

Previously I walked through the process of adding a Carousel Menu in Flutter using a custom widget
Flutter Flow: Carousel Menu

If you remember, we used a JSON array of objects for each item. Since then, Flutter Flow has added the ability to create custom data types. This approach is also more user-friendly for Flutter Flow beginners.

Custom development

I get a lot of requests for custom tweaks of Google Maps with Flutter.

I have created a form to capture these requests to better understand everyone’s needs. You can also request custom Flutter Flow development and/or Flutter Flow training.

https://coffeebytez.com/contact-me/

I will focus on the most highly requested items first, which will be available on my substack. I will also post exclusive in-depth tutorials there.

Please subscribe to my substack here:

https://coffeebytez.substack.com/?r=gdmkm&utm_campaign=pub-share-checklist

If you have urgent specific requests, please leave your contact information in the survey.

Creating a Carousel Menu Item data type

First, let’s create a data type by clicking on the Data Types menu item on the left.

Next, click the orange plus button to create a new data type. Let’s give it the name CarouselMenuItem

Now let’s add three String fields title, route, and imageUrl

Creating a list of CarouselMenuItem

Now let’s create a list of items to use in our new custom widget.

Click on the App values menu item

Click Add App State Variable

Let’s name the field carouselMenuItems. Next, choose **Data Type **and use our new Carousel Menu Item data type. Make sure to set Is List as well. Click Create

You should now see your new app state.

Let’s add our list of items. I’ll provide the previous JSON, so it’s easier to follow along.
{% gist https://gist.github.com/cmcoffeedev/48cf66c91b930840df767d1abbd6968e.js %}
For each item, you will click Add Item > Tap To Edit Fields

Creating a new custom carousel widget

Click the Custom Code menu item

Click Add > Widget. I gave it the name CarouselMenuEnhanced

Now let’s add the carousel dependency. It’s probably a newer version, but I will stick with the previous version we used for now.

carousel_slider: ^4.2.1

Click Add Dependency, then paste the dependency. Click the green button after pasting the dependency. Click Save.

Now let’s define the new parameters.

Name it carouselMenuItems, choose Data Type as the Type, and check Is List. Choose the Type of Data Type as **CarouselMenuItem. **If you click the green button shown at the top left of the screenshot below, you can get the default code generated. This is optional, I will provide the code as well.

Here is the final code. Let’s walk through the differences

  • First notice the carousel slider package import is the same
  • We have a List of CarouselMenuItemStruct. Previously we had a dynamic type for the json menu items.
  • We don’t need initState or custom class now that we have data types. We just have to change how we reference the items shown
  • We are using GoRouter to navigate. Usually, you wouldn’t do it like this, instead you would use context.pushNamed(route). The Flutter Flow online editor doesn’t compile when using context.pushNamed(route). // Automatic FlutterFlow imports
    import ‘/backend/backend.dart’;
    import ‘/backend/schema/structs/index.dart’;
    import ‘/flutter_flow/flutter_flow_theme.dart’;
    import ‘/flutter_flow/flutter_flow_util.dart’;
    import ‘/custom_code/widgets/index.dart’; // Imports other custom widgets
    import ‘/custom_code/actions/index.dart’; // Imports custom actions
    import ‘/flutter_flow/custom_functions.dart’; // Imports custom functions
    import ‘package:flutter/material.dart’;
    // Begin custom widget code
    // DO NOT REMOVE OR MODIFY THE CODE ABOVE! import ‘package:carousel_slider/carousel_slider.dart’;
    import ‘package:go_router/go_router.dart’; class CarouselMenuEnhanced extends StatefulWidget {
    const CarouselMenuEnhanced({
    Key? key,
    this.width,
    this.height,
    this.carouselMenuItems,
    }) : super(key: key); final double? width;
    final double? height;
    final List? carouselMenuItems; @override
    _CarouselMenuEnhancedState createState() => _CarouselMenuEnhancedState();
    } class _CarouselMenuEnhancedState extends State {
    @override
    Widget build(BuildContext context) {
    int itemCount = widget.carouselMenuItems?.length ?? 0; return CarouselSlider.builder( itemCount: itemCount, itemBuilder: (context, index, realIndex) { var item = widget.carouselMenuItems?[index]; var title = item?.title ?? ""; var route = item?.route ?? "Home Page"; var imageUrl = item?.imageUrl ?? ""; return GestureDetector( onTap: () { GoRouter.of(context).go(route); }, child: Column( children: [ Expanded( child: Image.network(imageUrl, fit: BoxFit.cover, width: MediaQuery.of(context).size.width)), Text(title) ], ), ); }, options: CarouselOptions( autoPlay: false, enlargeCenterPage: true, aspectRatio: 2.0, ), ); }
    }

Add the custom carousel widget to a page

Click on the Widget Pallete menu item, then Components.

Drag the new custom widget to the screen. For the properties, I set width to 100% and height to 300px. I chose our carouselMenuItems that we created in app state for the list.

Save, then run your app in Test Mode.

Congrats on creating a custom carousel menu in Flutter Flow!

One last thing, I have submitted a version of this that is just an image gallery, to the Flutter Flow marketplace. I’m waiting for approval. It has more parameters for further customization. I’m trying to think of an elegant way of handling tapping the item.

I’m thinking about just setting an action as a parameter and letting the user handle it that way. Let me know what you think.

Check out my other Flutter Flow articles
FlutterFlow Stepper Form with Firebase Firestore
Flutter Flow: Get Value From Multiple-Choice Choice Chips
Flutter Flow: Carousel Menu
Flutter Flow: Migrating the Carousel Menu to use data types
Flutter Flow: Adding Custom Markers for Google Maps
Flutter Flow: Use Supabase to show custom markers on Google Maps

Flutter Flow: Use the NHTSA API to get vehicle information

Flutter Flow: Use the NHTSA API to get vehicle information

I’m going to show you how to use the National Highway Traffic Safety Administration API to get the make and model of a car. in the next article, I will demonstrate how to use the VIN of a vehicle to get its information.

Custom development

I get a lot of requests for custom tweaks of Google Maps with Flutter.

I have created a form to capture these requests to better understand everyone’s needs. You can also request custom Flutter Flow development and/or Flutter Flow training.

https://coffeebytez.com/contact-me/

I will focus on the most highly requested items first, which will be available on my substack. I will also post exclusive in-depth tutorials there.

Please subscribe to my substack here:

https://coffeebytez.substack.com/?r=gdmkm&utm_campaign=pub-share-checklist

If you have urgent specific requests, please leave your contact information in the survey.

Adding API Calls

First, on the left side, click the API Calls tab.

Click on the Add button.

Get Car Makes

Now let’s define the car makes API

For the API name I used Get Car Makes

The method type is GET

The API URL is https://vpic.nhtsa.dot.gov/api/vehicles/GetMakesForVehicleType/car?format=json

If you click on the Response & Test tab, click Test API Call, you will see the response. Notice the results have MakeId, MakeName, etc.

Get Car Models

There are two ways to get the make from the model, by using the **MakeId (Get Models for Make) **or MakeName (Get Models for Make) from the make response.

I believe using MakeId would be a better option, because they may change the name anytime. For this simple example, I’m using MakeName.

I gave it the name Get Models For Make

The method type is GET

The API URL is https://vpic.nhtsa.dot.gov/api/vehicles/GetModelsForMake/[make]?format=json

If you want to use MakeId the URL is https://vpic.nhtsa.dot.gov/api/vehicles/GetModelsForMakeId/[make]?format=json

Notice I have make in square brackets. In this API we need to pass it as a path parameter.

Go to the Variables tab and add a String parameter

If you click on the Response & Test tab and click Test API Call, you will see the response. Notice the results have Make_Id, Make_Name, Model_Name, etc.

Create data types

For this example, I have created data types for the API responses, by going to the Data Types tab to the left.

Get Vehicle Make and Models UI

Now let’s create the UI for getting a vehicle’s make and models. For this example, I have two dropdown widgets.

I’m going to populate the first one once the screen is loaded. After the user chooses a make from the options, I will make a call to get the models for that vehicle. After the user chooses a model, it will populate the text field below it.

I have created three state variables on the top-level widget.

Makes and models are types of list of Data Types we created earlier

I have a z instead of a s at the end of the models state field. I believe I can’t reuse models because the data type uses it.

The makeAndModel state field is a nullable String

Querying vehicle makes

On the top-level widget, I am also creating an action to make the API Call to get the car makes.

For the Action Output Variable Name, I left it to what Flutter Flow generated.

If the API result was a success I update the page state by setting Results field to the makes page state

Showing make results in a dropdown

To show the list of makes in the first dropdown, click on the dropdown, and find Define Options.

Click the orange settings button, choose the makes page state variable, and choose MakeName as the value to show. In this example, I decided to sort them by the MakeName.

Making the Get Models API call when choosing a vehicle make

For the action of On Selected, on the makes dropdown, let’s create an action.

The first action calls the model API using the make value from the make dropdown. I keep the default generated Action Output Variable Name, but remember it so we can use it in the next steps.

In the success action, I am setting the action output to the modelz page state.

Showing the models in the dropdown

Showing the models in the models dropdown to what we did previously for the makes dropdown.

Use the page state variable modelz, choose the Model_Name as the value to show, and sort the items by Model_Name.

We will also create an action when a model is selected. It will set the String variable to the values of the dropdowns.

Your working example should look similar to this:

Unity Game Engine — Communicating with Javascript (Javascript Plugin)

Unity Game Engine — Communicating with Javascript (Javascript Plugin)

Unity Logo

In this tutorial, I’ll show you how to send messages from Unity to Javascript. I’ll also show you how to send messages back from Javascript to your game. Sometimes this is also commonly referred to as creating Unity WebGL Plugins.

Setup

First, we’ll create a blank Unity Game. Note that you don’t have to use a blank template. I am doing this for simplicity. In Unity Hub, click “New Project”. Next, click Core on the right and choose a core project. I’m choosing the 2D core project. Give your project a name and click “Create Project”. Wait for your project to open automatically.

Switch Platform to WebGL

When Unity finally opens up with your blank project, it will look like this.

You will need to switch the platform to WebGL. While in Unity click File > Build Settings.

Next click on WebGL. You will then need to click on Switch Platform.

You know it has finally been switched when the Unity Logo is next to WebGL. “Build” and “Build and Run” buttons will also be present. Check the screenshot below.

You can now close the Build Settings Dialog/Pop-up.

Add a GameObject to your scene

Next, we can add a blank GameObject to your scene. Right-click on Sample Scene then click GameObject > Create Empty. This can be any GameObject. We are using a blank one for simplicity.

Next, rename the GameObject to ExampleBridge by Right-clicking on the GameObject > Rename. You can name this whatever you want, but it’s referenced when sending a message from Javascript to Unity, which we will cover soon.

Now let’s create a new script. First, make sure to click on ExampleBridge and go to the Inspector tab which should be on the far right ( If you don’t see the inspector tab, in Unity you can click Window > General > Inspector ).

Click Add Component and search for “New Script”.

Click on New Script in the dropdown and name it ExampleBridge. Click Enter after typing the name to save it. You can also click the “Create and Add” button.

Create a Unity Javascript Plugin

Next, we will create a Unity Javascript Plugin to send messages to Javascript from Unity.

First, we will need to open the project in a code editor. I will use VS Code for this part.

You will notice there is an Assets folder. Create a folder under that named “Plugins”.

Next, create a file under that named ExamplePlugin.jslib

Add this code in ExamplePlugin.jslib

mergeInto(LibraryManager.library, {

    HelloWorld: function (message) {
        window.alert(message);
    },

});

The main thing to focus on is the HelloWorld block of code. It’s a function called HelloWorld that accepts a parameter. In the curly braces, you can write any Javascript code you want. Here we are just showing an alert.

Next, open the ExampleBridge.cs script we created earlier. We are going to send a message to Javascript from this script. We need to add this code above the Start() method to let this script know about the plugin Javascript function.

[DllImport("__Internal")]
private static extern void HelloWorld(string message);

You also need to add this import:

using System.Runtime.InteropServices;

Add the code below to the Start method to call the Javascript function.

HelloWorld("Hello World");

Let’s also add another method to get data back from Javascript. Add the code below. This will just print out a message, but it can be much more complex.

void MessageFromJavascript(string message)
{
    Debug.Log(message);
}

Now open up Build Settings in Unity again ( File > Build Settings ). Next click Build. It will ask what you want to save it as. We can name it unityWebTutorial for now. We need to build the game to write the code to send a message back from Javascript to Unity.

Send a message from Javascript to Unity

After Unity builds you will get a folder that looks like this.

Open index.html in VS Code. Notice the unityInstance variable. We can use this to send a message back to Unity. Add this code under the full-screen button onClick listener. ( You can also comment out the code that makes the button full screen )

unityInstance.SendMessage('ExampleBridge', 'MessageFromJavascript', 'Hello from Javascript');

Let us walk through this code.

  1. The first parameter is the name of the GameObject we created, NOT the script.
  2. The second parameter is the name of the function in the script that is attached to our GameObject.
  3. The third parameter is the message we want to send.

You can run the built game now. You should get a popup as soon as the game loads, which is the message sent from Unity to Javascript.

Also when you click on the blue button with arrows ( the full-screen button ) you will see “Hello from Javascript in the browser’s console. This is the message from Javascript to Unity.

Here is also the Unity WebGL documentation for reference:
WebGL: Interacting with browser scripting

Thank you for taking the time to read this tutorial.

Flutter Flow: Get Values From Multiple-Choice, Choice Chips

Flutter Flow: Get Value From Multiple-Choice Choice Chips

There is currently no built-in way in Flutter Flow to get the list of values from multiple-choice choice chips. I will show you an approach I took to solve this.

Custom development

I get a lot of requests for custom tweaks of Google Maps with Flutter.

I have created a form to capture these requests to better understand everyone’s needs. You can also request custom Flutter Flow development and/or Flutter Flow training.

https://coffeebytez.com/contact-me/

I will focus on the most highly requested items first, which will be available on my substack. I will also post exclusive in-depth tutorials there.

Please subscribe to my substack here:

https://coffeebytez.substack.com/?r=gdmkm&utm_campaign=pub-share-checklist

If you have urgent specific requests, please leave your contact information in the survey.

What are Choice Chips?

Choice Chips are material chips that let you choose multiple options. FlutterFlow’s implementation is a wrapper around Flutter’s choice chips with additional functionality.
ChoiceChips
ChoiceChip class – material library – Dart API

Example

I will walk through a small example to accomplish this. Start with a blank page and go to the UI Builder in FlutterFlow.

Search for choice chips in the UI Builder and drag it on your blank screen.

Add multiple options. For this example, I have two types of cars. Sedan and SUV. Also, turn the multiple-choice option on. Save the changes.

Drag a button and text field under the choice chips. Save the changes.

Note: Local State is now called App State in Flutter Flow

Now go to the Local State tab on the left-hand side of the screen. Create a local state of a list of strings. You may optionally choose to persist it.

Also, create a string local state to save the single string of car types. Save the changes.

Go to the UI builder and set the text field to the local state string variable. Save the changes.

Click on the button so that we can create an action for it. Choose On Tap as the action.

Scroll to the bottom to create a new action. You may also click on the Custom Code tab on the left to create an action.

For the custom action, I downloaded and looked at the flutter flow source code to get an idea of how they handle updating state. For this custom action, we are creating an app state variable and using that to update the state. We are setting the single string state from the local string list state. Save and compile this custom action.

Now go back to the button and ensure the action is used when tapping it.

Click on the choice chips so that we can create an action for this. Choose On Selected and click Update Local State. For the Set Fields option, choose the list of strings local state. For the update type, choose Set Value. For the Value Source choose From Variable.

Now click the orange Unset text and choose Widget State. Now choose the Choice Chips. Save the changes.

Now run the app, choose some choice chips, and click the button. The list of options should update the Text widget. This is a small example, but their are probably a lot more useful cases, such as making API requests using the local state values.

Source Code

// Automatic FlutterFlow imports
import '../../backend/backend.dart';
import '../../flutter_flow/flutter_flow_theme.dart';
import '../../flutter_flow/flutter_flow_util.dart';
import '../actions/index.dart'; // Imports other custom actions
import '../../flutter_flow/custom_functions.dart'; // Imports custom functions
import 'package:flutter/material.dart';
// Begin custom action code
// DO NOT REMOVE OR MODIFY THE CODE ABOVE!

Future listOfStringsToSingleString() async {
  // Add your function code here!

  var appState = FFAppState();

  appState.update(() {
    appState.typesAsString = appState.listOfCarTypes.join(", ");
  });
}

Check out my other Flutter Flow articles
FlutterFlow Stepper Form with Firebase Firestore
Flutter Flow: Get Value From Multiple-Choice Choice Chips
Flutter Flow: Carousel Menu
Flutter Flow: Migrating the Carousel Menu to use data types
Flutter Flow: Adding Custom Markers for Google Maps
Flutter Flow: Use Supabase to show custom markers on Google Maps

Flutter Flow: Get Values From Multiple-Choice, Choice Chips (Again)

Flutter Flow: Get Values From Multiple-Choice, Choice Chips (Again)

Previously I walked through how to get the value from Multiple-Choice Choice Chips using App State and a custom action.
Flutter Flow: Get Value From Multiple-Choice Choice Chips

Now I will show you another way to get the value using Page State and a custom function.

Custom development

I get a lot of requests for custom tweaks of Google Maps with Flutter.

I have created a form to capture these requests to better understand everyone’s needs. You can also request custom Flutter Flow development and/or Flutter Flow training.

https://coffeebytez.com/contact-me/

I will focus on the most highly requested items first, which will be available on my substack. I will also post exclusive in-depth tutorials there.

Please subscribe to my substack here:

https://coffeebytez.substack.com/?r=gdmkm&utm_campaign=pub-share-checklist

If you have urgent specific requests, please leave your contact information in the survey.

Set up the UI

I am going to set up the same UI as the previous article.

Search for choice chips in the UI Builder and drag it on your blank screen.

Add multiple options. For this example, I have two types of cars. Sedan and SUV. Also, turn the Allow Multi-Select option on. Save the changes.

Drag a button and text field under the choice chips. Save the changes.

Create Page State

Click the top-level Widget in the Widget Tree to create Page State.

On the far right, click the last tab and add a Local Page State Variable. Give it a name and set the type to String. You can make it nullable and set the Initial Field Value to No Selected Items

Now click the text field and set the value to the selectedItems Page State.

Create a custom function

Now let’s create a custom function to show the selected values in our text field. The choice chips gives a list of strings when multi select is on.

Go to Custom Code, click the purple + Add button, and Click **Function. **Give your function a name in camel case such as listOfChoiceChips.

Now go over to right of the screen to Function Settings. Set the Return Value to a String. Create one argument choiceItems of Type String and check Is List.

Our code is simple, we will reuse some of the code before. Add this line between the comments:

 return choiceItems?.join(", ") ?? "No selected Items";

Your final code should look like this:

import 'dart:convert';
import 'dart:math' as math;

import 'package:flutter/material.dart';
import 'package:google_fonts/google_fonts.dart';
import 'package:intl/intl.dart';
import 'package:timeago/timeago.dart' as timeago;
import '/flutter_flow/lat_lng.dart';
import '/flutter_flow/place.dart';
import '/flutter_flow/uploaded_file.dart';
import '/flutter_flow/custom_functions.dart';
import '/backend/backend.dart';
import 'package:cloud_firestore/cloud_firestore.dart';
import '/backend/schema/structs/index.dart';

String? listOfChoiceChips(List<String>? choiceItems) {
  /// MODIFY CODE ONLY BELOW THIS LINE

  return choiceItems?.join(", ") ?? "No selected Items";

  /// MODIFY CODE ONLY ABOVE THIS LINE
}

Save the function.

Create an action for the Button

Go back to our page, click the Button, and Click the Actions tab. For On Tap click Update Page State. Click Add Field.

Click the selectedItems Page State Variable.

Choose Set Value as the Update Type.

For Value to set, click the orange icon and find our listOfChoiceChips custom function.

For the choiceItems Function Argument, click UNSET or the orange icon, and under Widget State choose our ChoiceChips

Click Confirm. The Action for the button should now look like this.

Run the app in test mode

Flutter Flow: Youtube Playlist using Youtube Data API

Flutter Flow: Youtube Playlist using Youtube Data API

I’m going to discuss how you can show a YouTube playlist in Flutter Flow using the YouTube Data API


YouTube Data API | Google for Developers

Custom development

I get a lot of requests for custom tweaks of Google Maps with Flutter.

I have created a form to capture these requests to better understand everyone’s needs. You can also request custom Flutter Flow development and/or Flutter Flow training.

https://coffeebytez.com/contact-me/

I will focus on the most highly requested items first, which will be available on my substack. I will also post exclusive in-depth tutorials there.

Please subscribe to my substack here:

https://coffeebytez.substack.com/?r=gdmkm&utm_campaign=pub-share-checklist

If you have urgent specific requests, please leave your contact information in the survey.

Enable Youtube Data API

First, we need to enable the Youtube Data API on the Google Cloud console. It will prompt you to make a project if you do not have one.
Google Cloud console

Search for Youtube and click youtube data api v3

It will take you to the results. Click on the following

It will have a button that says ENABLE. I currently have it enabled so it shows manage

Now go to the credentials page
Google Cloud Platform

Click Create Credentials and choose API key. It will give you an API key. You can add Restrictions for security.

Create API call in Flutter Flow

Under API Calls in Flutter Flow, click Add to create a new one.

Give it a name such as Youtube Data API. The method type will be GET. For the API URL use

https://www.googleapis.com/youtube/v3/playlistItems?part=snippet

Also, add the Content-Type header

Content-Type: application/json

Create 3 String variables

  • playlistId — This is the playlist ID from YouTube.
  • apiKey — This is the API Key we created in the Google Console
  • maxResults — This will be the maxResults to show. I believe the limit is 50. I set a default of 5 for this example.

Also, create 3 query parameters. The name for these must match the YouTube Data API documentation
YouTube Data API | Google for Developers

I have given similar names to the variables. The only difference here is key is used instead of apiKey, because that is what is defined in the API documentation.

Note since the page key works differently in the Youtube Data API than what Flutter Flow supports, we can’t currently use infinite scrolling. A workaround is to use a database to load the list. You can still follow this tutorial and use it as a tool to add data to your database.

Click the Save button

Create Flutter Flow Video List UI

For the UI that shows the list of videos, I have a ListView. Within the ListView I have a Row. The Row has an image for the thumbnail and a column to hold the title and description.

Here is an example of the UI. I will show you how to make the call and hook everything up.

Click on the ListView, click on the Backend Query Tab, and add the following query. The Query Type is API Call. The Group or Call Name is the API we defined in Flutter Flow.

For the Variables, click each one and add your custom values. For the API key can have it as App State if you need to use it across multiple pages.

To get the playlistId, look for the list query parameter in the playlist url you want to use. For example in this playlist

https://www.youtube.com/watch?v=jfKfPfyJRdk&list=PL6NdkXsPL07Il2hEQGcLI4dg_LTg7xA2L

PL6NdkXsPL07Il2hEQGcLI4dg_LTg7xA2L would be the playlistId

Click on the Generate Dynamic Children tab. This will give us the repeating rows for each video in the playlist.

Give a variable name such as items. We will refer to this variable to show the info in the row UI.

For the value use

$.items

This refers to the array of items in the JSON response of the API.

Click on the image and set the path to $.snippet.thumbnails.default.url

There are multiple sizes you can choose from, you would just need to reference the API documentation

For the text views I am using $.snippet.title for the top view and $.snippet.channelTitle as the bottom text view.

Video Player Page

We could have shown all the videos on one page, but that will cause all of the data to load for each video even when they are not played.

The best practice is to launch the native player or have a separate page with the video player. I’ll show you how to use the in-app video player approach.

I’m keeping it simple and only have the Flutter Flow YoutubePlayer

For the Video Player page, add a page parameter videoId. We will pass the videoId from the previous page.

Click on the YoutubePlayer. We will use Text Combination to create the url from the passed videoId.

For Text 1 use

https://www.youtube.com/watch?v=

For Text 2 use the page parameter videoId

List Row Click Action

Go back to the ListView and click on the Row. Add an On Tap action that navigates to the VideoPlayer page and passes the videoId parameter.

In the same way we set the data in the row, we will pass the following JSON path

$.snippet.resourceId.videoId

Congratulations on adding a YouTube playlist to your Flutter Flow app!

Flutter Flow: Extracting Latitude and Longitude from LatLng

Flutter Flow: Extracting Latitude and Longitude from LatLng

When dealing with Google Maps and Place Picker on Flutter Flow, there often arises a requirement to extract and store the latitude and longitude details.

These coordinates are essential for a variety of purposes, including populating your preferred database with separate columns for latitude and longitude. This process enables precise location tracking and management within your Flutter application.

Create a custom function

First, go to the Custom Code menu on the far left.

Update the function name to getCoordinate

In the function settings set the return type to a Double. Now create two arguments, coordinates of type LatLng and isLatitude of type Boolean.


Custom Functions | FlutterFlow Docs

Implement the function

Our code is simple. If isLatitude is true, we will return the latitude from the LatLng coordinates object. If isLatitude is false we will return longitude.

if (isLatitude) {
    return coordinates?.latitude ?? 0.0;
}

return coordinates?.longitude ?? 0.0;

Now click Save, then go over two buttons to the box with the exclamation mark and check and click that button. It validates our code.

Here is the full code in case it helps. There are imports that Flutter Flow adds that we don’t need for our use case, but we can leave them alone for now.

import 'dart:convert';
import 'dart:math' as math;

import 'package:flutter/material.dart';
import 'package:google_fonts/google_fonts.dart';
import 'package:intl/intl.dart';
import 'package:timeago/timeago.dart' as timeago;
import '/flutter_flow/lat_lng.dart';
import '/flutter_flow/place.dart';
import '/flutter_flow/uploaded_file.dart';
import '/flutter_flow/custom_functions.dart';
import '/backend/schema/structs/index.dart';
import '/backend/supabase/supabase.dart';
import '/auth/supabase_auth/auth_util.dart';

double? getCoordinate(
  LatLng? coordinates,
  bool isLatitude,
) {
  /// MODIFY CODE ONLY BELOW THIS LINE

  if (isLatitude) {
    return coordinates?.latitude ?? 0.0;
  }

  return coordinates?.longitude ?? 0.0;

  /// MODIFY CODE ONLY ABOVE THIS LINE
}

Using our custom function to populate a field

For this example, we want to add latitude and longitude in their respective columns in Supabase. I have a parameter for a page that I’m passing a latLng variable to.

On the page that has this parameter, I have a button with an action to insert a row into my place table.

For the value of latitude select the orange, settings button to the right of the text Value. In the popup, find Custom Functions and choose our getCoordinate function.

for the coordinates field, choose our latLng parameter and set our isLatitude param to True. For longitude follow the same steps, except for isLatitude you want to set it to False.

Click confirm then save your changes. If all goes well you will see your latitude and longitude in your database of choice.

I have created a form to better understand everyone’s needs. You can also request custom Flutter Flow development and/or Flutter Flow training.

https://coffeebytez.com/contact-me/

Flutter Flow: Set up your Mac for Flutter development

Flutter Flow: Set up your Mac for Flutter development

I’ll walk you through the steps to set up your Mac computer for Flutter development. You can install the Flutter and Dart SDK through your IDE, but you will need to install additional tools to run your Flutter project.

Prerequisites

If you are using a Silicon Mac, you will need the Rosetta Translation environment. Open your Terminal application on Mac, type the following, and press enter.

Tip: To search for an application on your Mac, use the shortcut:
command + space

sudo softwareupdate --install-rosetta --agree-to-license

Download the Flutter SDK

Use the following link to download the Flutter SDK.
macOS install

In the terminal, enter the following commands:

mkdir ~/development
cd ~/development
unzip ~/Downloads/flutter_macos_3.3.8-stable.zip

Note: The flutter version may be different depending on when you are reading this. In that case, type everything up to flutter_macos_ , then press tab to autocomplete.

Set the Flutter PATH

Setting the Flutter Path in your zsh profile will make sure it sets the path every time it loads.

Enter the following commands in your terminal:

echo 'export PATH="$PATH:~/development/flutter/bin"' >> ~/.zshrc
cat ~/.zshrc
source ~/.zshrc

The cat command is optional. It is used to show the contents of the file. Note you may not see this file when using finder because it is a hidden file (any file name that starts with a period).

Install HomeBrew

Homebrew is an application manager for Mac. You may use it to install the rest of the tools. Enter the following command to install Homebrew.

/bin/bash -c "$(curl -fsSL https://raw.githubusercontent.com/Homebrew/install/HEAD/install.sh)"

Install the Android SDK

You will need the Android SDK to build Android apps. The easiest way to do this is to install Android Studio.
Download Android Studio & App Tools — Android Developers

Install Xcode

You will need Xcode to build iOS apps. You may get it from the App Store on your Mac.

Install Cocoapods

You will need Cocoapods to build iOS apps. Enter this command in the terminal.

brew install cocoapods

Install the Android SDK Manager

Flutter requires you to install the Android SDK Manager to build Android apps. Enter the following command in your terminal to set this up, but change your username below.

flutter config --android-sdk /Users/username/Library/Android/sdk

To find your username you may enter this command in the terminal:

whoami

Install Android Licenses

Enter the following command in your terminal. This is interactive, so you must agree to the licenses by typing the letter y and pressing enter.

flutter doctor --android-licenses

Install Dart

Dart is the programming language used to code Flutter applications. Enter the following commands in the terminal to install dart.

brew tap dart-lang/dart
brew install dart

Run Flutter Doctor

You can run the flutter doctor terminal command anytime you want to check if you are missing anything.

flutter doctor -v

Resources

Here are links to the documentation for the steps mentioned throughout this article.
macOS install
Homebrew
Download Android Studio & App Tools — Android Developers
Get the Dart SDK

I have created a form to better understand everyone’s needs. You can also request custom development and/or training.

https://coffeebytez.com/contact-me/