In some cases, you may want to specify an SSH key directly in the Git push command without configuring a permanent SSH setting. You can do this by overriding the SSH command Git uses temporarily.
Steps
To specify the SSH key for a git push command, you can use the GIT_SSH_COMMAND environment variable. This allows you to define the SSH key for a single command without altering global SSH or Git configuration.
Example Command:
GIT_SSH_COMMAND="ssh -i ~/.ssh/id_rsa_custom" git push origin main
Explanation:
GIT_SSH_COMMAND="ssh -i ~/.ssh/id_rsa_custom": This overrides the SSH command that Git uses, specifying the custom SSH key you want (~/.ssh/id_rsa_custom in this case).
git push origin main: Standard Git push command that pushes your changes to the remote repository (origin), on the main branch.
Advantages
Temporary: This method only applies to the current Git command, so there is no need to permanently change the SSH configuration.
Flexible: You can switch between different SSH keys as needed for specific repositories or branches.
By using this approach, you can easily manage multiple SSH keys without changing your global configuration or SSH config file.
I’m not really into the night life of Vegas now that I am older. I like to find new experiences that the whole family can enjoy. I’ll share some of my favorite places.
Strat
The Strat is one of my favorites because of the view of the entire city. It’s amazing to see the constant traffic of airplanes from the Harry Reid airport. There is also Sky Jumping and rides at the top of the Strat, which I’m not brave enough for. I do enjoy going to the outside observation deck and getting pictures of the sunset
The Forum Shops at Caesars
This is one of my favorite places to shop. They have restaurants, shopping, and a live show. Not to mention, the interior is also amazing.
Vegas Eiffel Tower
The Vegas Eiffel Tower can be a 2 in 1, as you can get great views of the city and also watch the Bellagio Water Show
Shark Reef Aquarium
I enjoyed the Shark Reef Aquarium. They had a variety of sea life, but mostly sharks of different shapes and sizes.
Sphere
The Sphere is a neat attraction. They also have concerts and movies to watch inside of the sphere.
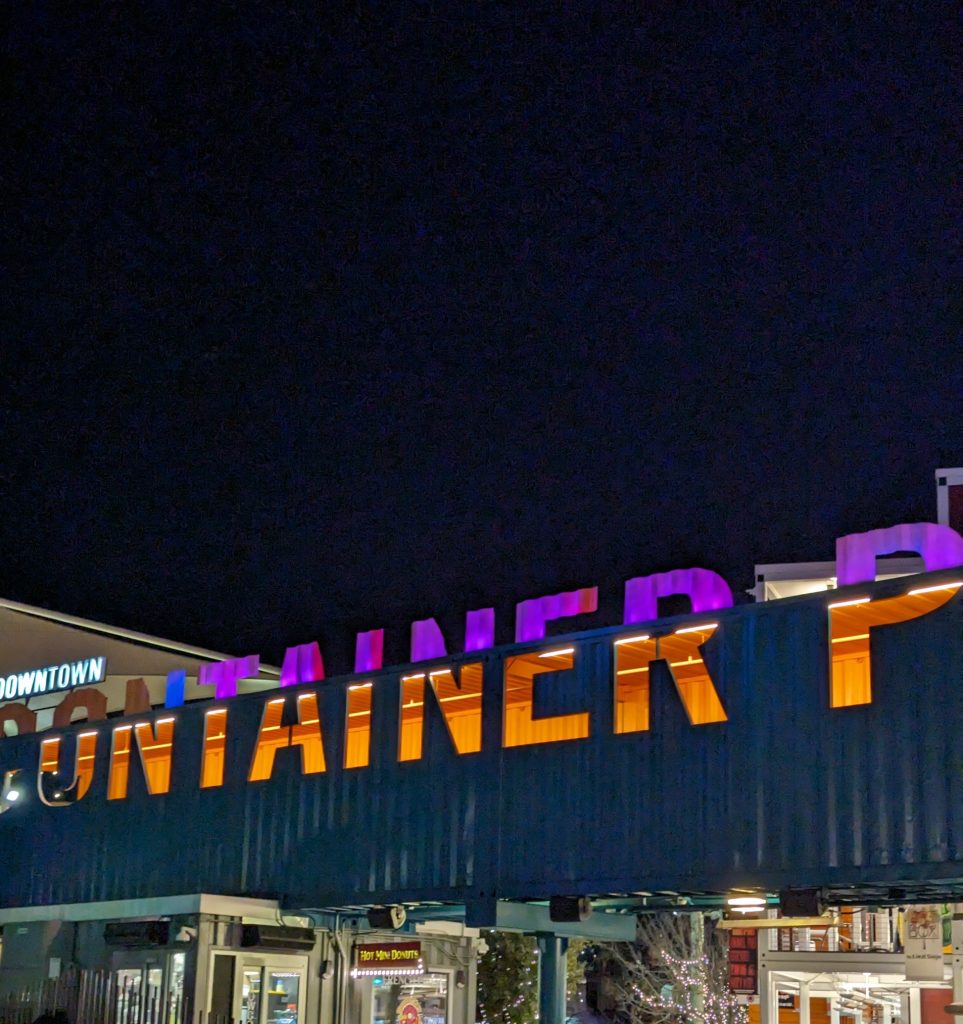
Container Park
Container Park is a neat place with local stores, entertainment, and amazing restaurants.
Seven Magic Mountains
This is located a little bit outside of Las Vegas. It’s neat structures of randomly stacked and painted boulders.
Mob Museum
The Mob Museum is a popular place that tells the unique history of the mob in Las Vegas. It was originally a court house, converted into a museum with live artifacts and a unique gift store.
Las Vegas Car Meets
If you are in Las Vegas for the weekend, there are amazing car meets every Saturday.
This is the original car Bonnie and Clyde ended their run in. This is a good 45 minutes from Las Vegas, but well worth it, especially to experience the local restaurants.
Recently we have reached record high temperatures in the Las Vegas area during Summer. The rest of the year is bearable.
I’ll share a few tips on how I stay cool as a local.
Stay Hydrated
One of the obvious ways to survive the heat is to stay hydrated. I make sure to bring a water bottle with me everywhere I go. While having fun in Vegas, you may not realize you’re dehydrated until much later.
If you are visiting Las Vegas, the ABC Stores have the best prices on snacks and beverages.
Before I moved to Vegas, I lived in Seattle for a year. I was used to having a lot of cloud coverage. In Vegas, cloud coverage is rare.
I noticed everything was way brighter than I was used to, even when not facing the sun. I eventually invested in sun glasses, which I haven’t worn in nearly a decade.
Leave your garage open
For locals with a garage, this may be helpful in the warmest months. Many factors may cause your garage to hold more heat than necessary.
Keeping your garage open also brings less privacy, theft, and other risk factors. Make sure to stay aware. I keep a Ring camera in my garage. I also have a remote garage opener, that lets me control the garage from anywhere in the world.
Wear a Neck Fan
I was skeptical about neck fans at first. My uncle who does landscaping for a living raved about them. I decided to try the most popular one out. It does work well but is less effective when the temperature is above 105 F.
Bring an umbrella
Umbrellas are one of my best friends on the hottest days. It does feel awkward to bring them to certain places. I mainly only use these on long walks outside.
Sunscreen and Lotion
I honestly don’t use sunscreen as much as I should, only for my face. I always keep a small bottle of travel lotion to keep my skin hydrated. The heat in the Las Vegas area is really dry!
I have used Intro.js in the past to help onboard new users on React.js and Angular applications. This feature allows us to walk the user through the features in our app. While searching for a flutter equivalent I found a similar library on pub.dev, ShowCaseView:
I will create a small example app demonstrating this. First, let’s create a blank Flutter app. I will be using Android Studio but you may also use Visual Studio Code.
We will use the default counter template it gives us: {% gist https://gist.github.com/cmcoffeedev/426f4f977519969cebd0efe72ba70416.js %} First, let’s add the ShowCaseView package as a library using this command in your terminal:
flutter pub add showcaseview
We will “install” the package using this command in the terminal:
flutter pub get
For simplicity we are going to use the default code the template gives us. In the stateless MyApp widget, wrap the home parameter of the Material App to with ShowcaseWidget.
Note for this package to work correctly, the parent widget must use ShowCaseWidget.
Next lets wrap the floating action button and the counter text with “Showcase” widgets. The “Showcase” widget takes a key and description. Add these variables below the _counter variable.
final GlobalKey _floatingActionKey = GlobalKey();
final GlobalKey _counterKey = GlobalKey();

final String _incrementDescription = "Press this button to increment the count";

final String _counterTextDescription = "This text shows how many times you have pressed the button";
Next, let’s wrap the counter text with the Showcase widget:
While working on an open-source project (Care Amarillo), I was looking for a way to guide users that are new. I’ve used Intro.js before so I searched and found a React wrapper for it. I will demonstrate the basic usage of this package. intro.js-react
Here is a small example of what we want to achieve:
Since App.js is a functional component we will use hooks for enabled, steps, and initialStep. Add this code right above the code that returns your HTML.
const [enabled,setEnabled] = useState(true)
const [initialStep,setInitialStep] = useState(0)
const onExit = () => {
setEnabled(false)
}
const steps = [
{
element: '#help',
intro: 'You can use this button for help',
position: 'right',
},
{
element: '#about',
intro: 'You can use this button to get more information',
},
{
element: '#contact',
intro: 'You can use this button to contact us',
},
];
We’ve set enabled to true and initialStep to 0. This will automatically make Intro.js whenever the user gets to this screen. The onExit function disables the Intro.js after we exit.
The steps object defines our steps. In our case, we use id’s but the package supports other selectors as well. Intro defines the message we want for each step.
Reload the page and this should be your result:
Here is the full source code for App.js :
import './App.css';
import 'intro.js/introjs.css';
import { Steps } from 'intro.js-react';
import React, {useState} from 'react';
function App() {
const [enabled,setEnabled] = useState(true);
const [initialStep,setInitialStep] = useState(0);
const onExit = () => {
setEnabled(false)
}
const steps = [
{
element: '#help',
intro: 'You can use this button for help',
position: 'right',
},
{
element: '#about',
intro: 'You can use this button to get more information',
},
{
element: '#contact',
intro: 'You can use this button to contact us',
},
];
return (
<div className="App">
<Steps
    enabled={enabled}
    steps={steps}
    initialStep={initialStep}
    onExit={onExit}
/>
<div id="buttonRow">
<button id="help">Help</button>
<button id="about">About</button>
<button id="contact">Contact Us</button>
</div>
</div>
);
}
export default App;
Thank you for taking the time to read this article!
How To Set Up a Free Business Email Using Your Domain
Setting up a professional email will help you stand out with your career and business. So instead of chris@gmail.com, I can use chris@mycompanyname.com. I personally have a professional email that I use on my portfolio site and LinkedIn. This also helps keep my personal email separate and a little safer.
I’ll show you how to create a professional email using Zoho. They are a well-known company with a suite of business applications. They give you 5 free emails starting out and you just pay $1 per extra email after that.
Setting Up Your Domain With Zoho Mail
Of course, if you don’t have a domain, you will need one to get started. I purchase my domains using https://namecheap.com. Zoho also allows you to purchase a domain after signing up.
You will need to fill out this form and use your phone number or email to verify your account.
Next, verify your account:
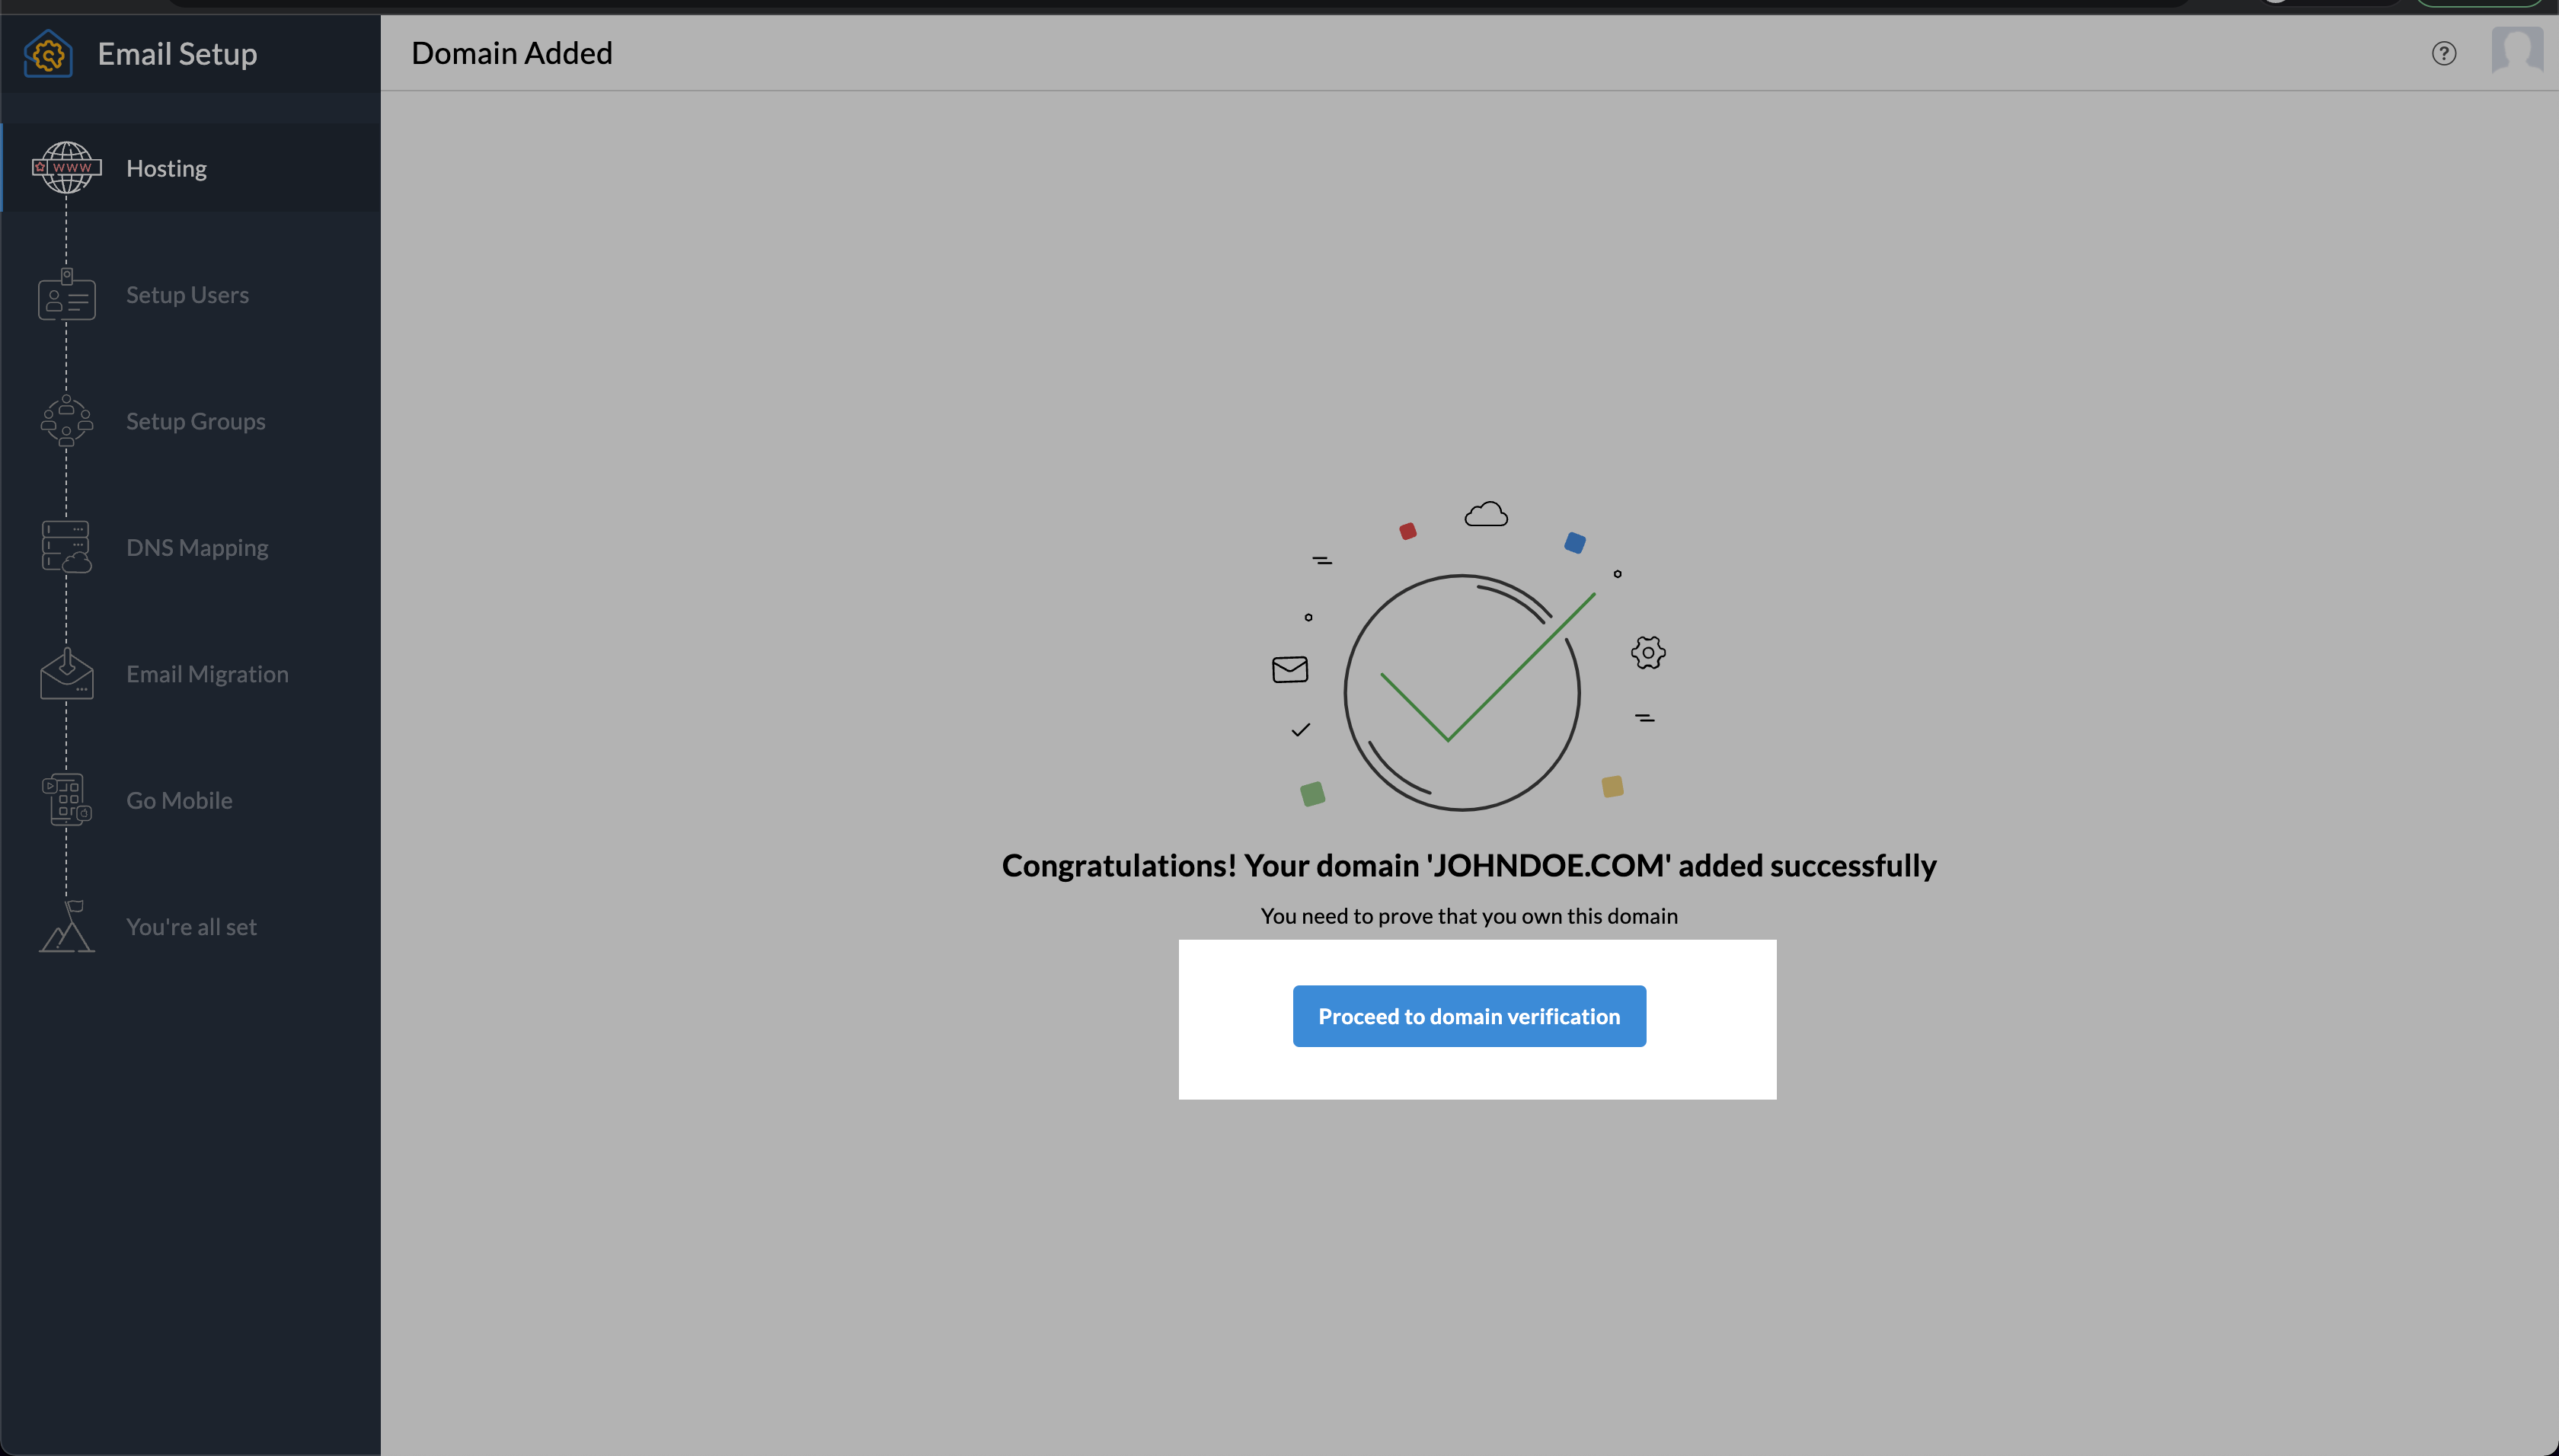
You will get a welcome screen after verifying. You can click on the “Add Now” button if you already have a domain or “Buy Now” to buy one. I’ll assume you have bought one so click Add Now.
Click the Proceed to domain verification button.
Zoho can usually detect where your domain is hosted. I have my domain pointed to Digital Ocean, so it tries to help me out. Either way, the steps are the same across the board.
I’ll walk through Digital Ocean, but it will be the same thing to copy and paste across the board.
I’ve found on Digital Ocean where I need to create records. I chose the TXT tab to add a TXT record and added the value I copied. For the hostname using “@” (without quotes of course).
I will click “Create Record” to create my TXT record. Now we need to go back to Zoho and click the “Verify TXT record” button.
You will now choose your administrator email. You can use your name, “info”, “support”, etc.
Click the “Create” button. You can add more users if you would like. Let’s go to DNS Mapping by clicking next on the “Setup Users” and “Setup Groups” pages.
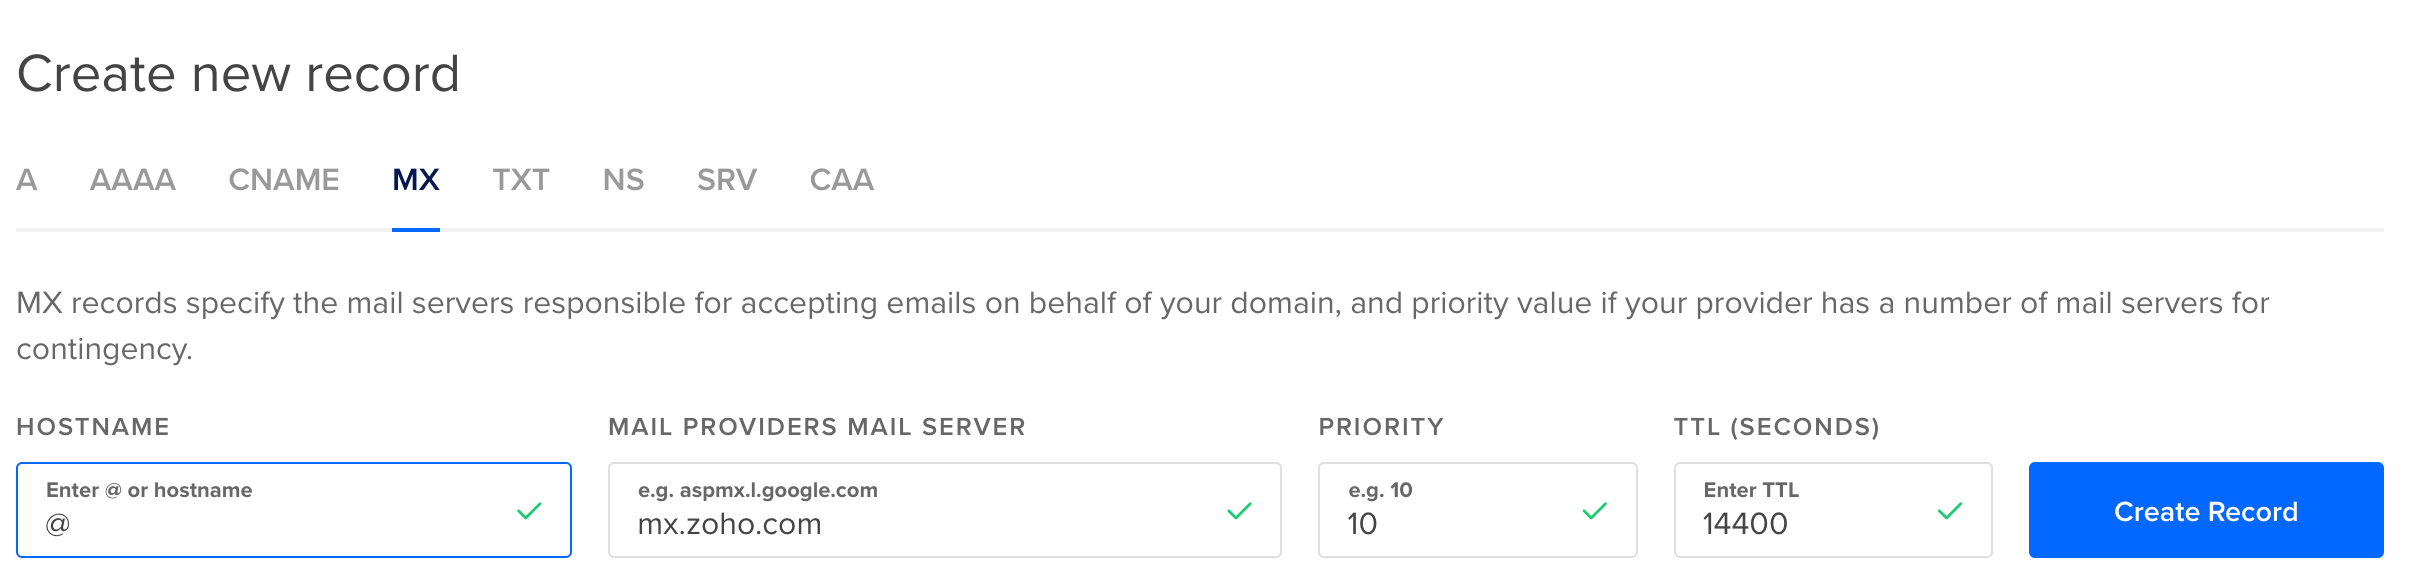
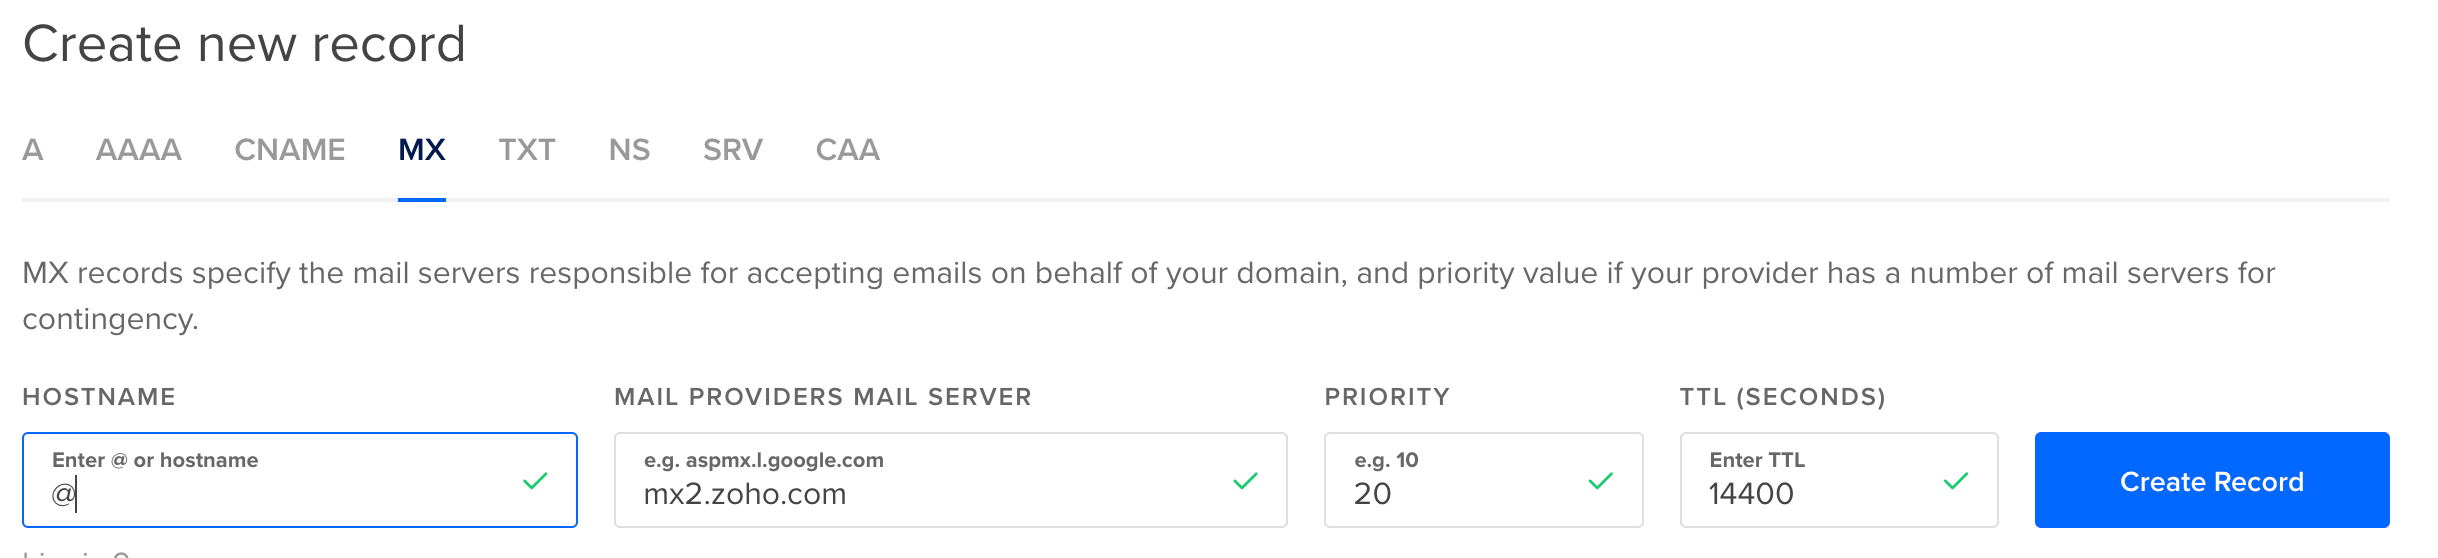
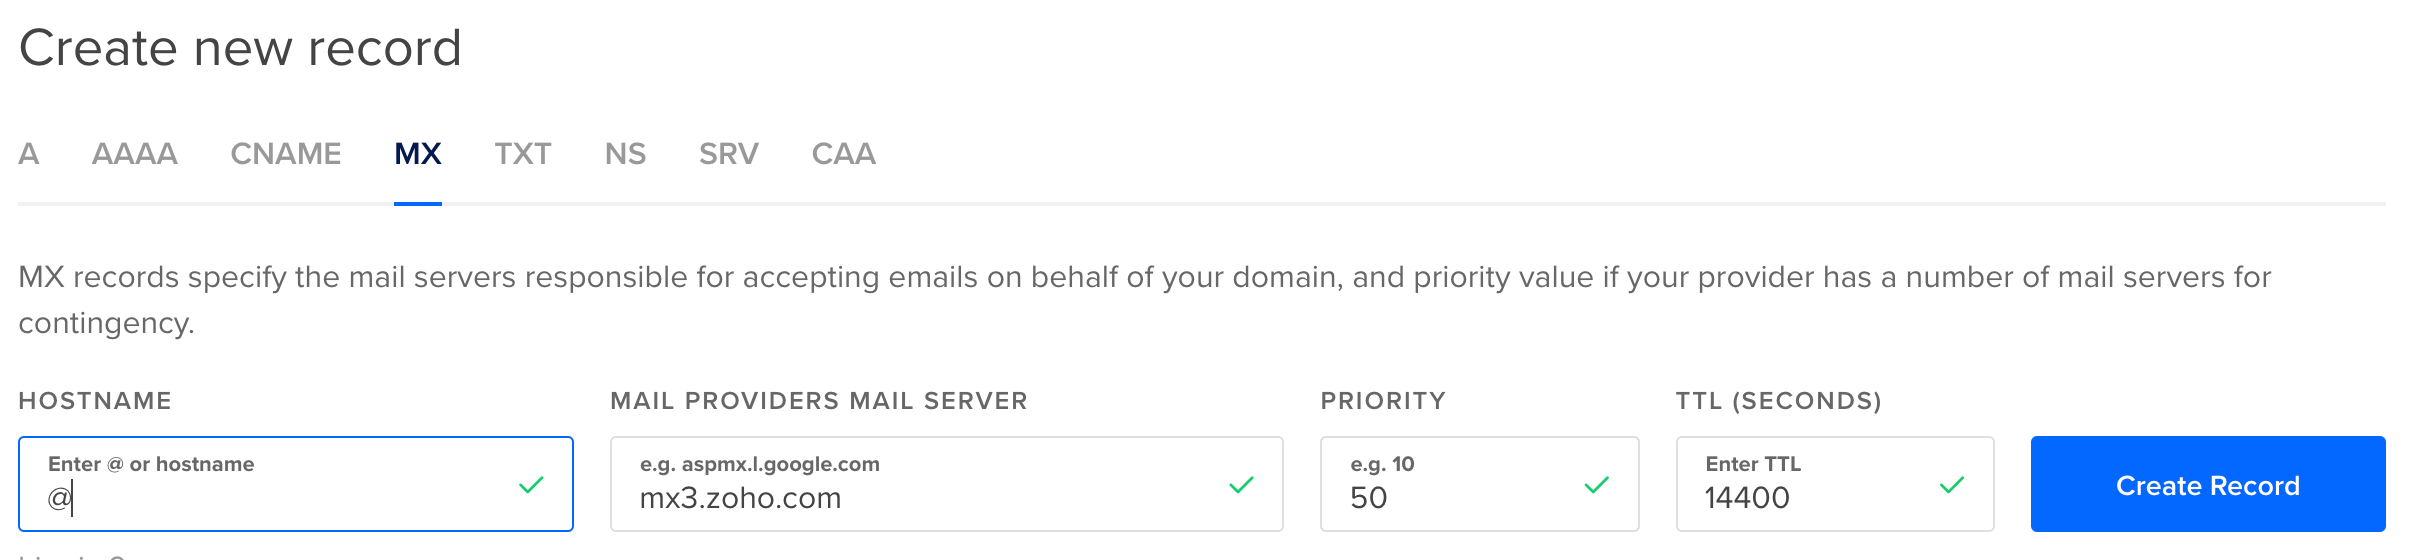
You see we need to add 3 MX records, and 2 TXT Records. Let’s work from the bottom up.
We need to add a TXT record. First copy :
zmail_domainkey
Now set this as the host in Digital Ocean. You will set the value in the Value field.
Now let’s copy:
v=spf1 include:zoho.com ~all
This is the last TXT Record to add. Set the host name as “@” (without quotes”).
Now let’s add all three MX records. In Digital Ocean we can click on the MX tab.
Now you can click “Verify All Records”. Depending on the TTL you set when adding the records, it may take a while to verify some of them. I usually keep the defaults when using Digital Ocean.
You also do not have to wait to verify the records. The emails will work without staying on this page. They may also ask you to verify on the desktop when you log in, but not necessary.
If you do choose to wait for verification, you will get this message.
Congratulations, you have set up your first professional email!
Join Medium with my referral link. Your membership fee directly supports Christopher Coffee and other writers you read. You’ll also get full access to every story on Medium. Join Medium with my referral link – Christopher Coffee
You can host your static websites for free using a Google service known as Firebase Hosting. Static websites include using React.js, Angular, and Vue.js. You can also of course host vanilla Javascript, HTML, and CSS projects. They also give you a free firebase domain that you can not alter. You can also use your domain.
It is also only free up to a certain usage per day, but the cost is low after that. Starting out you might not have as much traffic, so this will save you money early on. Firebase Pricing
Firebase Hosting Limitations
You will not be able to host backend code on Firebase such as Node.js, Go, etc. You would also not be able to host a WordPress site on Firebase Hosting. Google does have other options that let you host these types of applications.
Getting Started
First, you need to download the firebase command-line tools. Don’t worry it’s simple. You don’t need to be a command-line expert. Also using an IDE such as Visual Studio Code or Webstorm will make this easier, as you can use the terminal directly in these applications.
For Linux, UNIX, and macOS (is UNIX I believe) users, you can open your terminal and enter this command:
curl -sL https://firebase.tools | bash
Install using NPM
You can also install the tool using npm. You will need Node.js installed on your computer. You can install it here: Download | Node.js
You will now need to install firebase tools. You only have to do this once. You can skip this step for future websites you may host.
In your terminal/command line app enter this command:
npm install -g firebase-tools
Then press Enter.
Logging in
On your Windows or Mac machine, type this in the terminal and press enter:
firebase login
This will open your browser to log in to your google account. You may also create a new Google account for your website.
After you log in, go back to your terminal and you will see a success message.
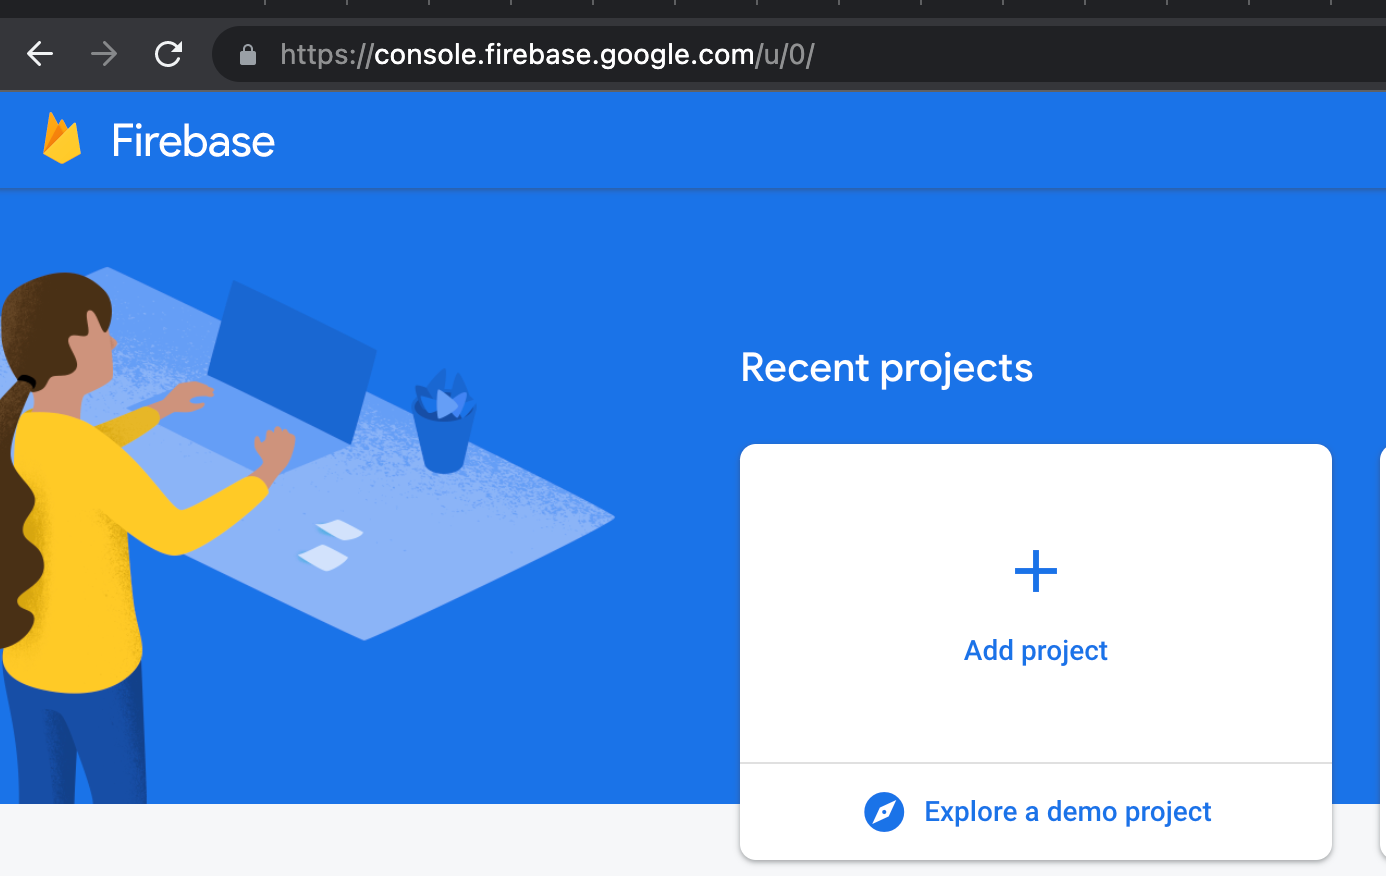
Creating a New Project on the Firebase Console
You will now need to create a new project on the Firebase Console. Go to this link below: Sign in – Google Accounts
Now click “Add Project”
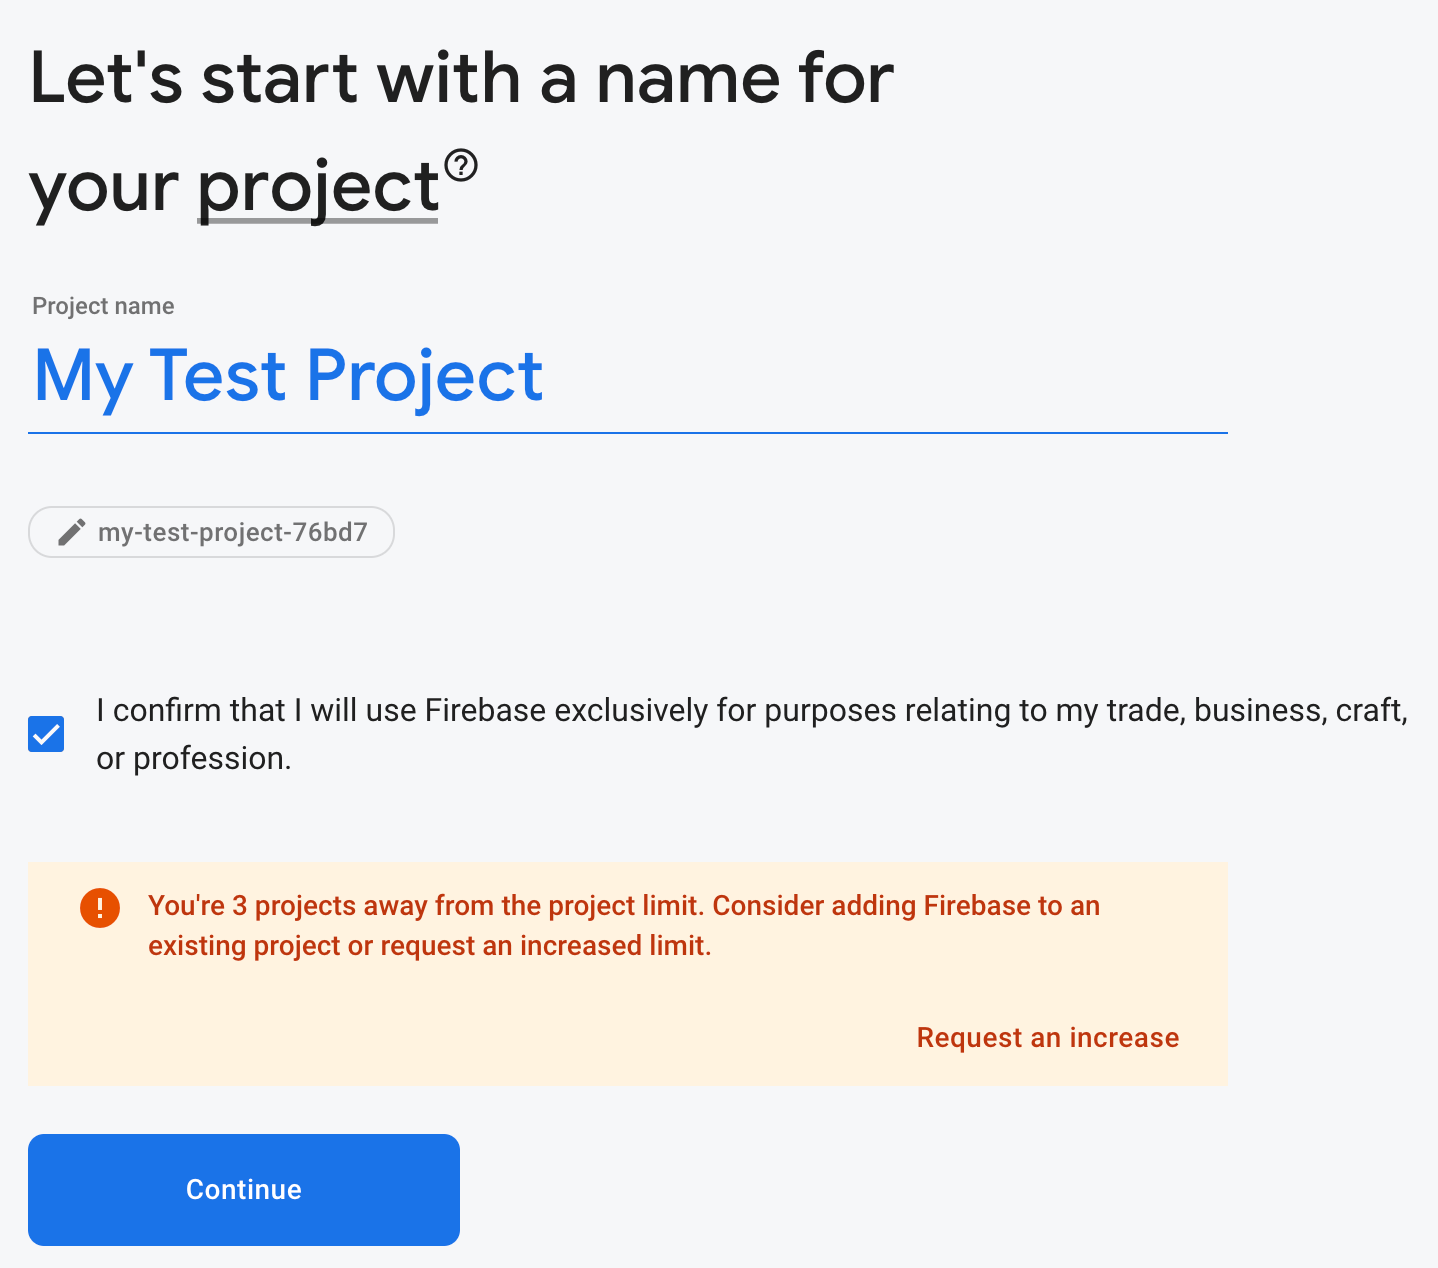
Now give your project a name and click Continue:
You can choose to enable Google Analytics for your project and click Continue.
If you enable Google Analytics you will need to specify a Google Analytics account or create a new one.
Now click Create Project.
This may take a while to complete.
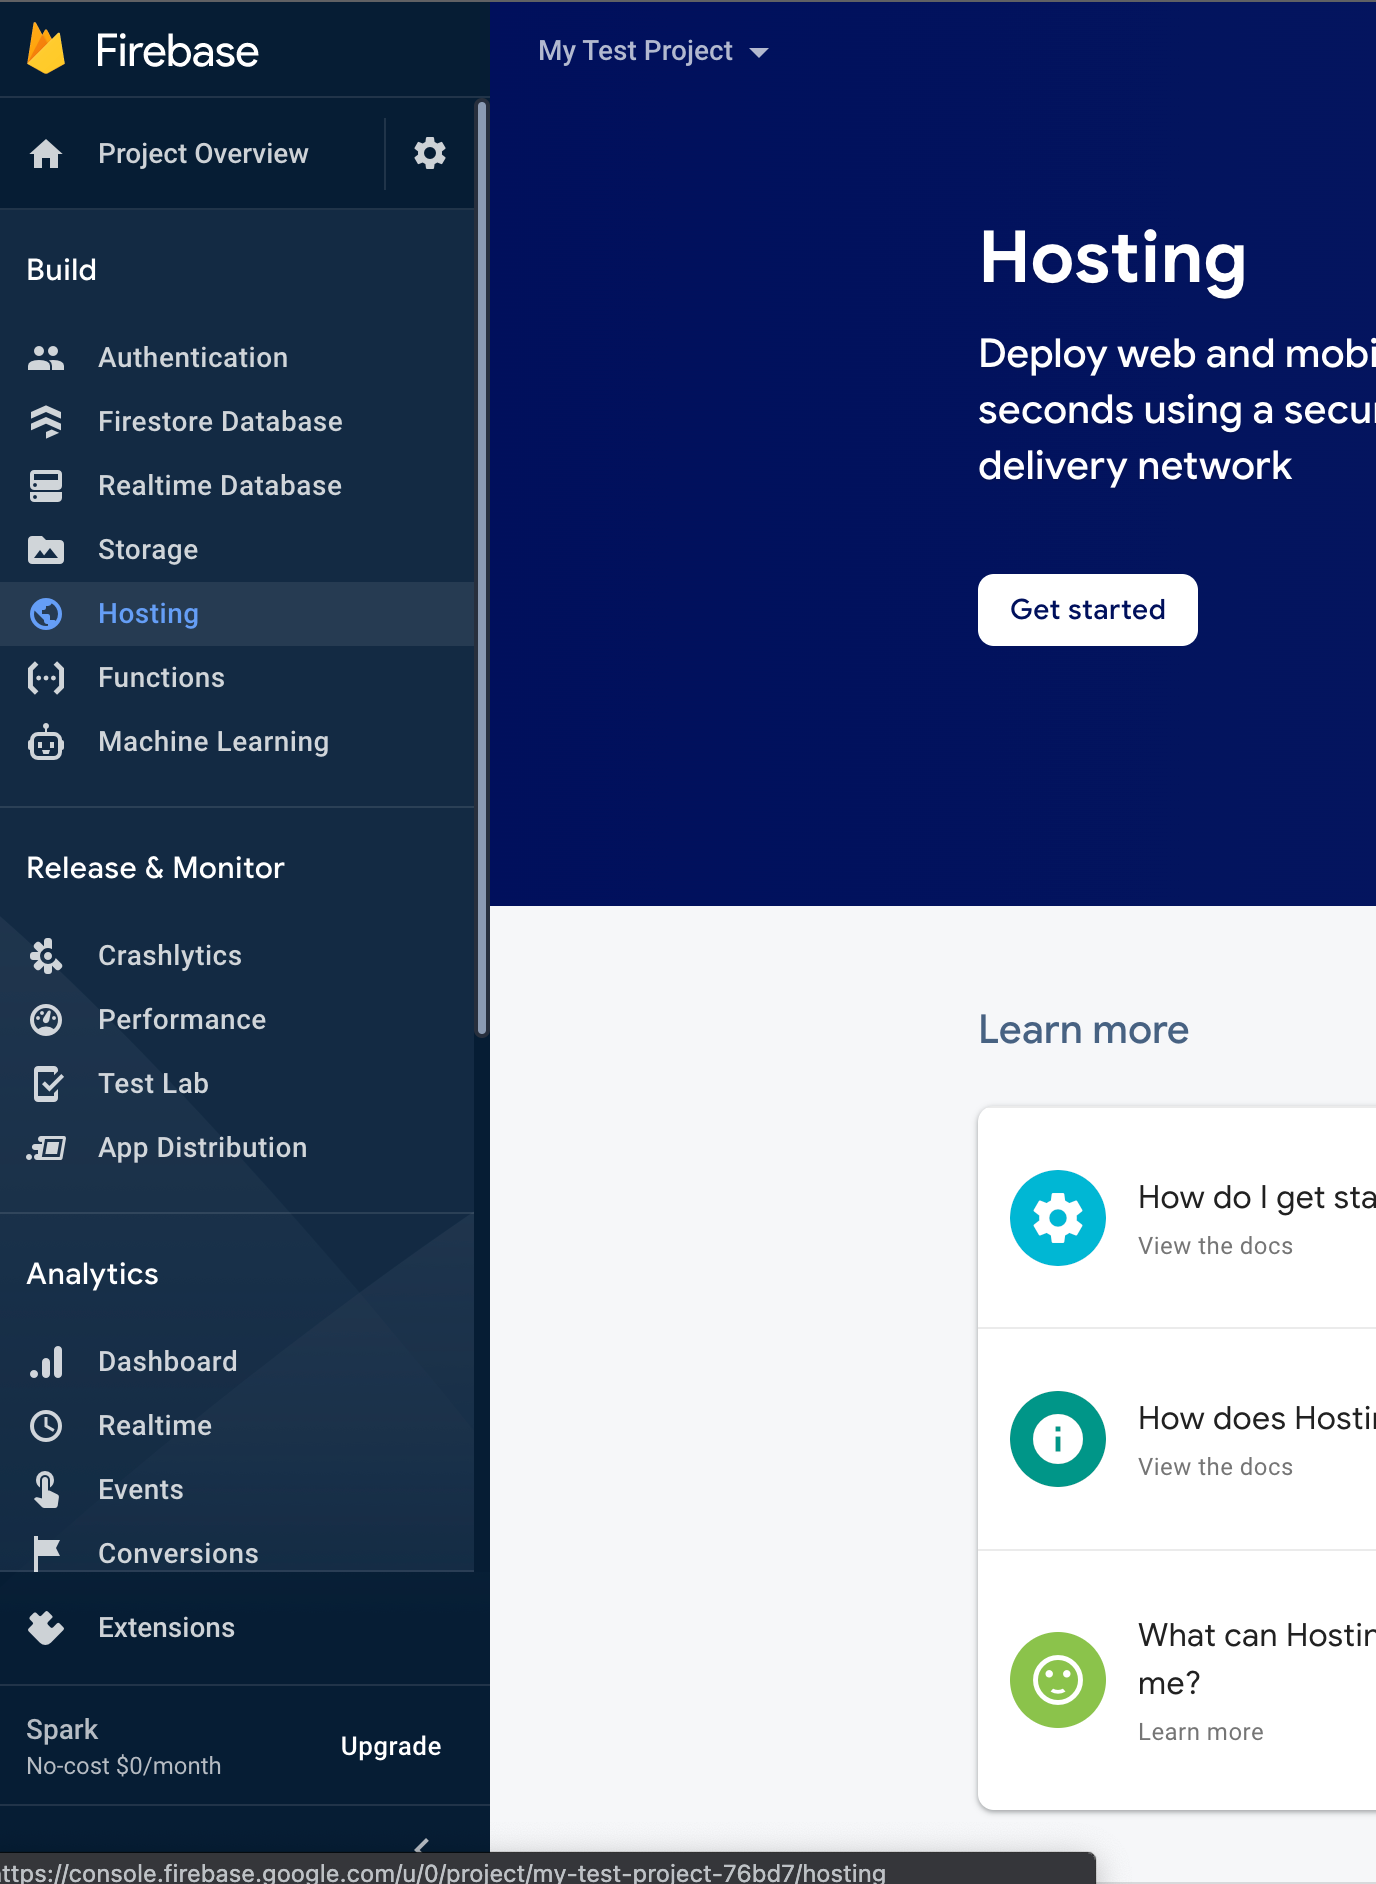
Now click on the hosting tab on the left:
Click the **Get Started **button.
Next, it shows a screen of instructions to follow.
It will ask if you want to see steps on adding the Firebase Javascript SDK. We are going to skip this step.
Now you will need to initialize your firebase project on your computer. If you already have a website you want to upload, go to the terminal and go to the directory of the root of your website project. You will then enter:
firebase init
It will ask you many questions.
You will enter yes to the Is this a single-page app/website? question if your website is React, Angular, etc.
Also, enter **no **when it asks you to overwrite index.html
Click **Continue **on Firebase Hosting until you get to **Register your app. **You will need to specify a name here.
Click Register and continue
Next, we will add the Firebase SDK to your project. You can use npm if you are using React, Angular, Vue, etc. You can also use the script tag on any project. You will copy the script tag to the bottom of your index.html file above the closing tag.
Now deploy your website by entering this in the terminal and pressing Enter.
firebase deploy
It will show you the URL of your newly hosted website!
Go back to the firebase console and click Continue to console.
You can add your custom domain by clicking on the Add custom domain button and following the steps.
Congratulations on your first firebase hosted website!
Join Medium with my referral link. Your membership fee directly supports Christopher Coffee and other writers you read. You’ll also get full access to every story on Medium. Join Medium with my referral link – Christopher Coffee
I will show you how to create a custom widget in FlutterFlow to show a Stepper widget with form fields. We will submit the data to Firestore. This code is also reusable in non FlutterFlow generated apps.
You may copy and paste the code, but I want to walk through the thought process of how I would implement this for educational purposes. We will create an app saves the user’s grocery list.
Custom development
I get a lot of requests for custom tweaks of Google Maps with Flutter.
I have created a form to capture these requests to better understand everyone’s needs. You can also request custom Flutter Flow development and/or Flutter Flow training.
If you have urgent specific requests, please leave your contact information in the form.
Creating the Form Field
First, we will use the FlutterFlow UI builder to create a TextFormField. You may also write the code yourself. In the blank home page of your project. Drag and drop a form field and style it how you want. I will also add the hint text.
Creating the Firestore Collection
Now let’s create the Firestore Collection in FlutterFlow. I am assuming you have already followed FlutterFlow documentation on connecting your firebase project.
Click on the Firestore tab, then click Create Collection. It will ask if you want to use a template, and you can choose the product template. I have deleted some fields.
Creating the Custom Widget
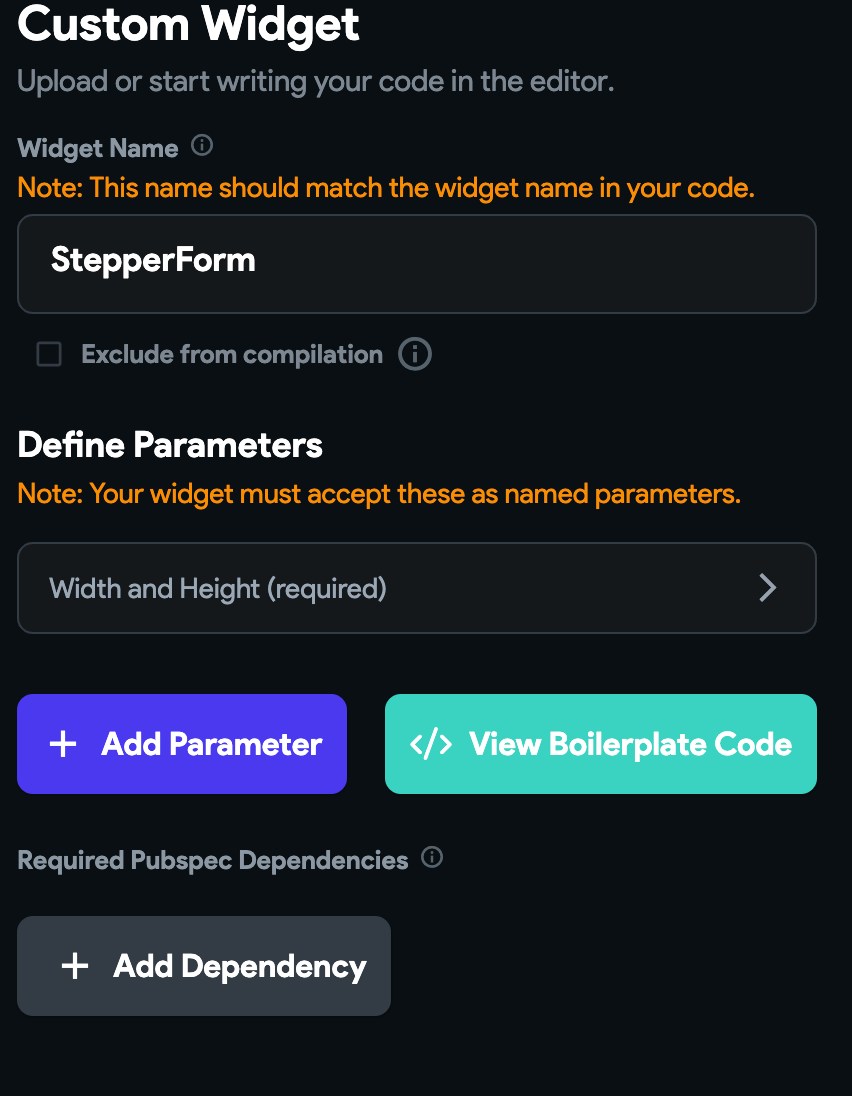
Now let’s create the custom form widget. Click the Custom Function tab on the left, then click the Custom Widget tab within that screen. Click the purple Create button. You should now see this screen. Name the widget and click View Boilerplate Code.
This will show another popup. Click Copy to Editor.
Click Save.
Go back to the TextField you created. Right-click on the TextField from the **Widget Tree **and click Copy Widget Code.
Go back to the custom widget you created and click the edit button (pencil icon). Above the build function, we will create another function that returns our form.
 @override
 Widget build(BuildContext context) {
Create a function that takes a textController and hint text. Type return, then copy and paste the code you copied earlier. The decoration code may be different depending on how you styled your code.
We will replace the steps with our custom text fields.
We also copied the index variable, so that we may change Steps.
Replace the steps with the following code. In the first Step widget, we will have only one text field, which is the name field. Notice we are passing the nameController and the hint text.
In the second Step widget we have a column that holds the price text field, quantity text field and the save button. The save button calls a function called submit form, which we haven’t defined yet. We could also wrap the Stepper widget with a column and add the button at the bottom. For simplicity, we will keep it like this.
Above the build function, create another function named submitForm.
 void submitForm() async {

 }
In FlutterFlow’s UI builder, when creating an action to save the data, it has methods it generates that are exposed through backend.dart. It would generate code like this to save data. Although this will work if you download the code, it will not compile on the FlutterFlow platform.
Format and Save your code. Click edit again, then click Compile and Preview. You should see a preview of your form.
Test your custom StepperForm widget
Now let’s go back to the UI builder in FlutterFlow. Remove the text field you created and replace it with the custom StepperForm widget.
You can now use Test Mode to test it out.
After you click the Save button, go to Firestore in the Firebase console. You should see the data from your form. You could use a dialog to show the success of the submission.
If you have urgent specific requests, please leave your contact information in the survey.
Custom Widget
First, let’s create our custom widget. Click the custom functions tab on the left-hand side of the flutter flow platform
Now click Add > Widget
Give your new widget a name such as CarouselMenu
We will need to pass JSON as a parameter to build our menu items. I will discuss this more later. Create a parameter called jsonMenuItems of type JSON.
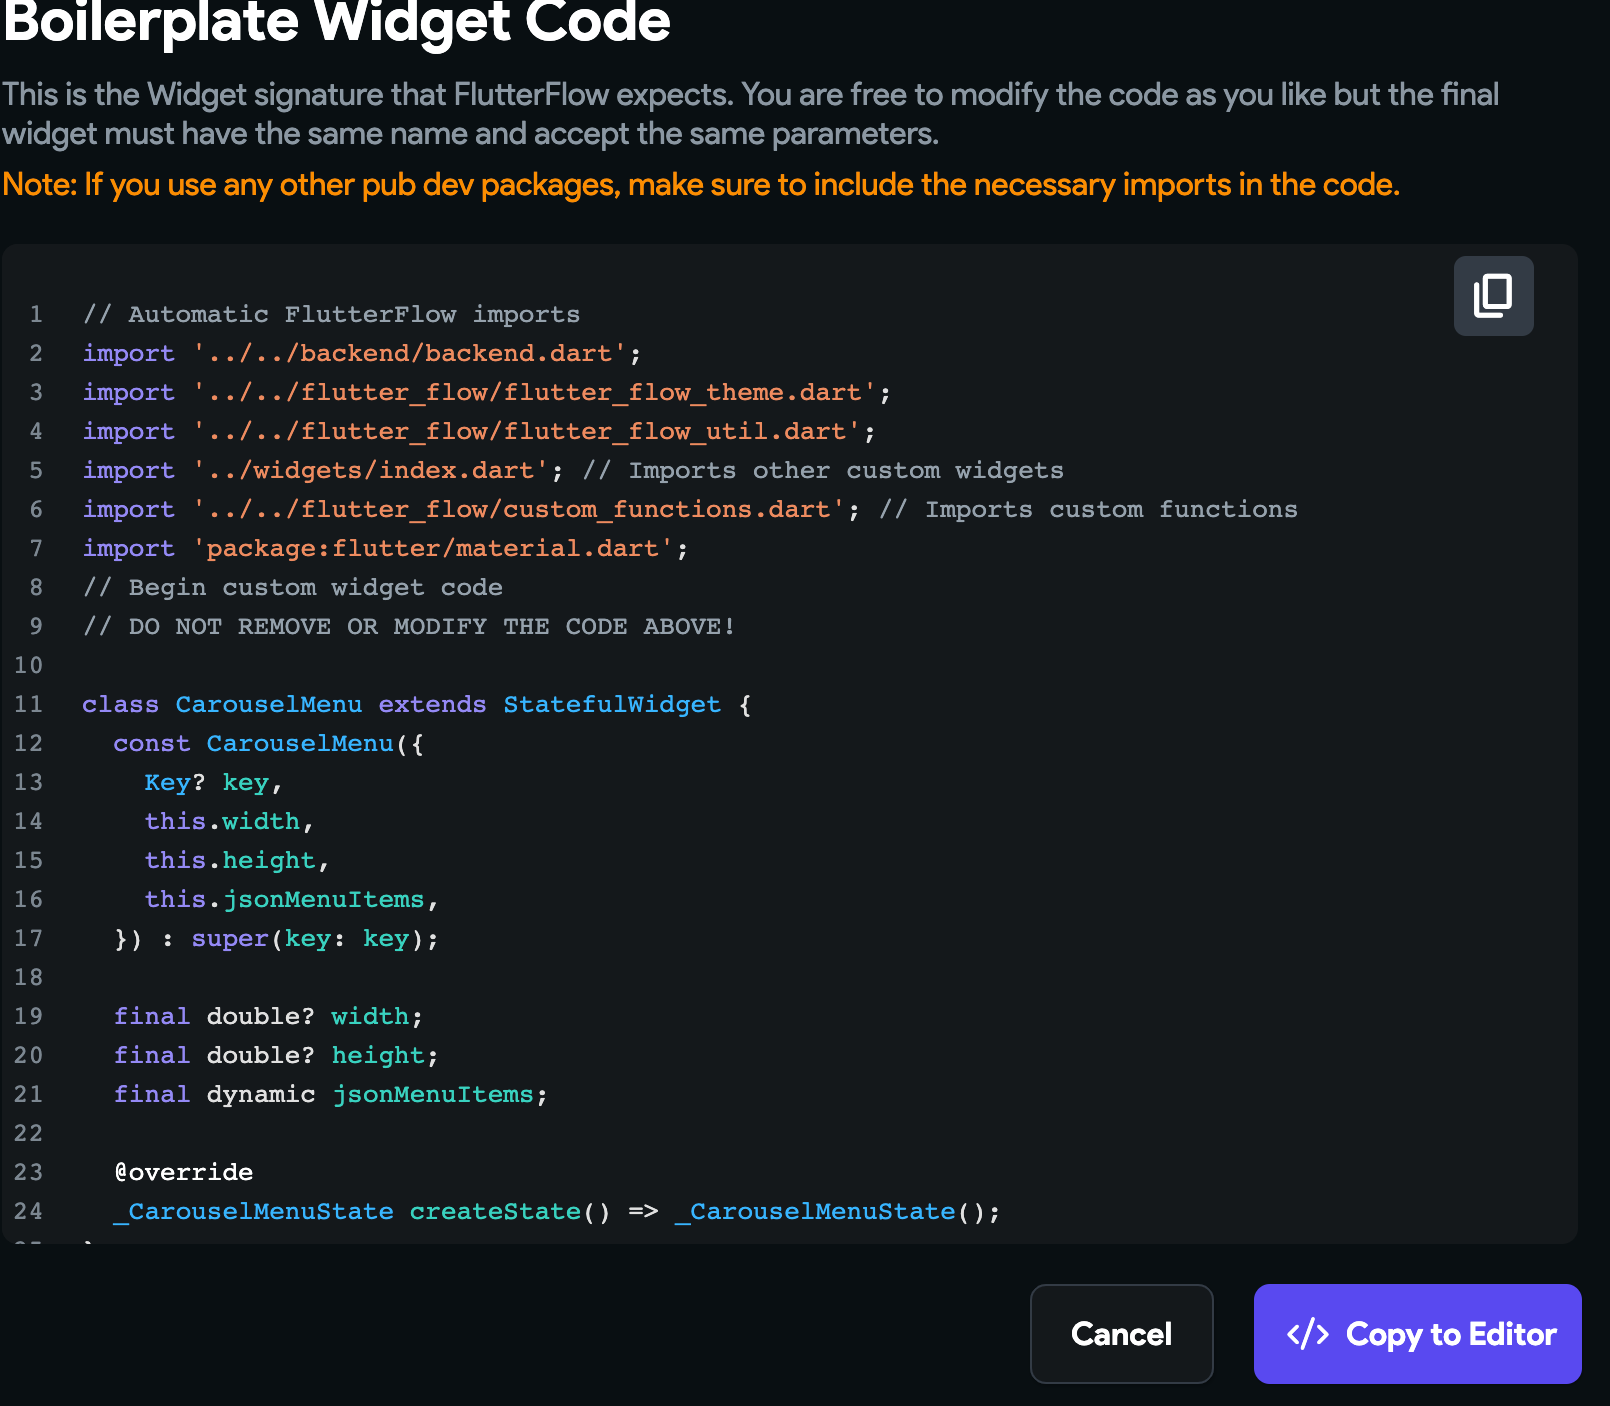
Click the green View Boilerplate Code button.
It should show this screen.
Click Copy to Editor
Now click Save at the top right of the screen
Adding Carousel Slider dependency
Under the parameters add the carousel_slider dependency.
Click Save again. Then click Compile.
Adding JSON menu items to local state
For this example, we are going to store our menu items in Flutter Flow local state. You could also retrieve the JSON from an API.
Click on the Local State tab.
Now click Add State Variable.
Add a JSON field. You can name it the same as the parameter we created earlier.
Menu Item Example JSON
You can use this example JSON array to populate your menu carousel. This is a JSON Array containing three JSON Objects. Each object is a menu item and contains a title, route, and imageUrl. {% gist https://gist.github.com/cmcoffeedev/48cf66c91b930840df767d1abbd6968e.js %} If you look at the Flutter Flow source code you will see they use named routes to navigate in the app using the go router dependency. The route will be each screen’s Scaffold name. You will see this later.
Copy this JSON as the default value for the state variable we just created.
Save this using Ctrl-S/CMD-S.
Writing the custom carousel menu code
Go back to our custom widget so that we may implement the carousel menu.
First, add the import for the carousel_slider and go_router dependencies.
Under initState, create a method to build our carousel widgets. This method doing 3 things.
Iterating through each JSON Object in the JSON array.
Creating a CarouselItem object with the current object’s value.
Adding this object to the carouselItems list.
Let’s change our build method to return the carousel_slider.
Notice that I have context.pushNamed(route); commented out. This is the code FlutterFlow uses, but in the online editor, it will give you errors when compiling but will work when downloading the project.
There are some workarounds to get it to run on the Flutter Flow platform. Essentially, after you launch the app in test mode, uncomment the code, save it, and click instant reload.
Alternatively, we can instead use the following:
GoRouter.of(context).go(route);
Save and compile what we have so far.
Setting up screens to run our custom widget
Next, go to the Widget Tree tab to create our screens.
Create four screens. One that has our custom widget and three others that the carousel items will navigate to. These are the names that you will use as the route in the custom JSON state.
On the page/screen you want your custom widget, go to the UI Builder and drag and drop the custom widget.
Here are my settings for the custom widget.
Notice I set the JSON variable from our local state JSON variable.
Save the project and click the run in test mode button on the top right.
To test clicking the menu items, go back to the custom code and uncomment it. Save and then compile it. Go back to Test Mode and click instant reload. This will work fine when you download the code.
Here is the full source code:
// Automatic FlutterFlow imports
import '../../backend/backend.dart';
import '../../flutter_flow/flutter_flow_theme.dart';
import '../../flutter_flow/flutter_flow_util.dart';
import '../widgets/index.dart'; // Imports other custom widgets
import '../../flutter_flow/custom_functions.dart'; // Imports custom functions
import 'package:flutter/material.dart';
// Begin custom widget code
// DO NOT REMOVE OR MODIFY THE CODE ABOVE!

import 'package:carousel_slider/carousel_slider.dart';
import 'package:go_router/go_router.dart';

class CarouselMenu extends StatefulWidget {
  const CarouselMenu({
    Key? key,
    this.width,
    this.height,
    this.jsonMenuItems,
  }) : super(key: key);

  final double? width;
  final double? height;
  final dynamic jsonMenuItems;

  @override
  _CarouselMenuState createState() => _CarouselMenuState();
}

class _CarouselMenuState extends State<CarouselMenu> {
  List<CarouselItem> carouselItems = [];

  @override
  void initState() {
    // TODO: implement initState
    super.initState();

    buildCarouselWidgets();
  }

  void buildCarouselWidgets() {
    for (var data in widget.jsonMenuItems) {
      carouselItems
          .add(CarouselItem(data['imageUrl'], data['title'], data['route']));
    }
  }

  @override
  Widget build(BuildContext context) {
    return CarouselSlider.builder(
      itemCount: carouselItems.length,
      itemBuilder: (context, index, realIndex) {
        var item = carouselItems[index];
        var title = item.title;
        var route = item.route;
        var imageUrl = item.imageUrl;
        return GestureDetector(
          onTap: () {
            GoRouter.of(context).go(route);
          },
          child: Column(
            children: [
              Expanded(
                  child:
                      Image.network(imageUrl, fit: BoxFit.cover, width: 1000)),
              Text(title)
            ],
          ),
        );
      },
      options: CarouselOptions(
        autoPlay: false,
        enlargeCenterPage: true,
        aspectRatio: 2.0,
      ),
    );
  }
}

class CarouselItem {
  String imageUrl = "";
  String title = "";
  String route = "";
  CarouselItem(String imageUrl, String title, String route) {
    this.imageUrl = imageUrl;
    this.title = title;
    this.route = route;
  }
}