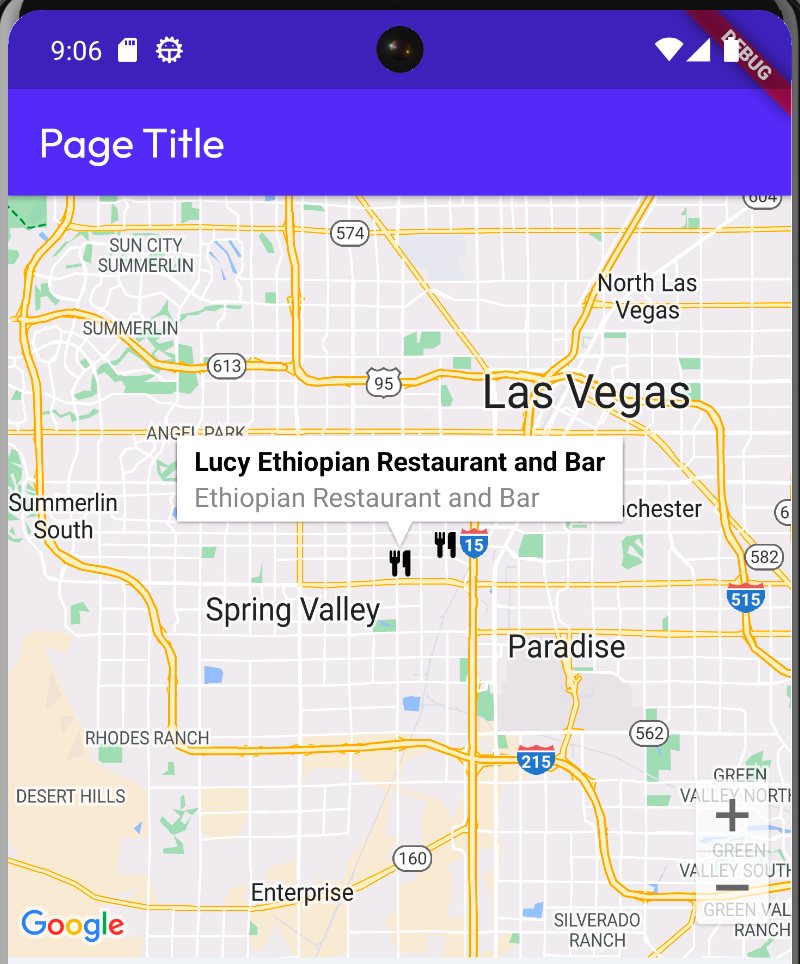
Flutter Flow: Adding Custom Markers for Google Maps

Custom markers on Google Maps is one of the highest requested features on Flutter Flow. I’ll walk through how to achieve this using a custom widget.
This tutorial goes through manually adding data in Flutter Flow to show the icons. For a more dynamic approach check out my other approach using Supabase Flutter Flow: Use Supabase to show custom markers on Google Maps
Or Firebase: Flutter Flow: Google Map Custom Markers with Firebase
Setting up custom data types for our markers
First, let’s set up a custom data type to hold information related to Google Map Markers.
Click on the Data Types menu item on the left.
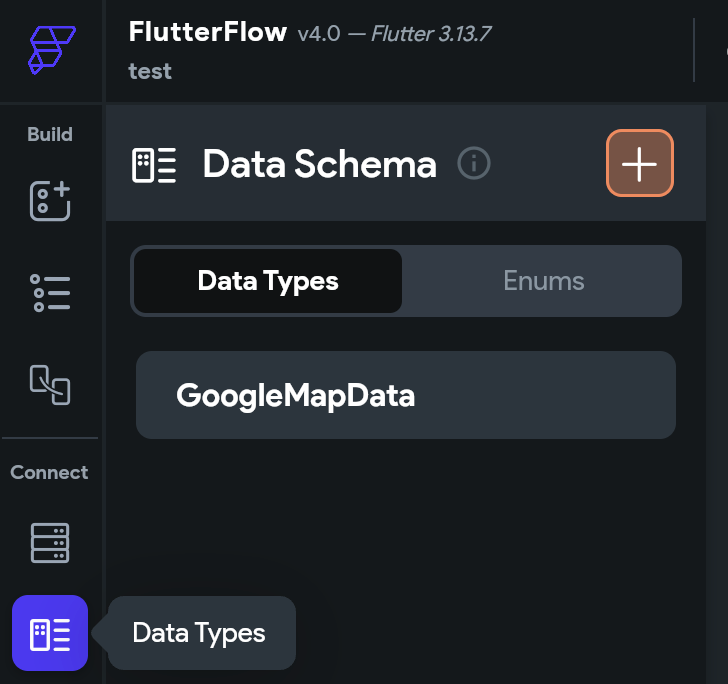
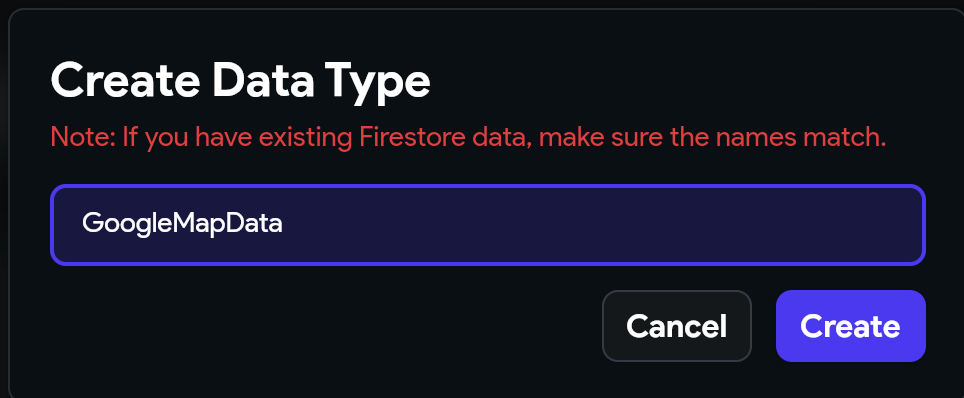
Click on the orange button to Create a Data Type. Let’s use the name GoogleMapData.
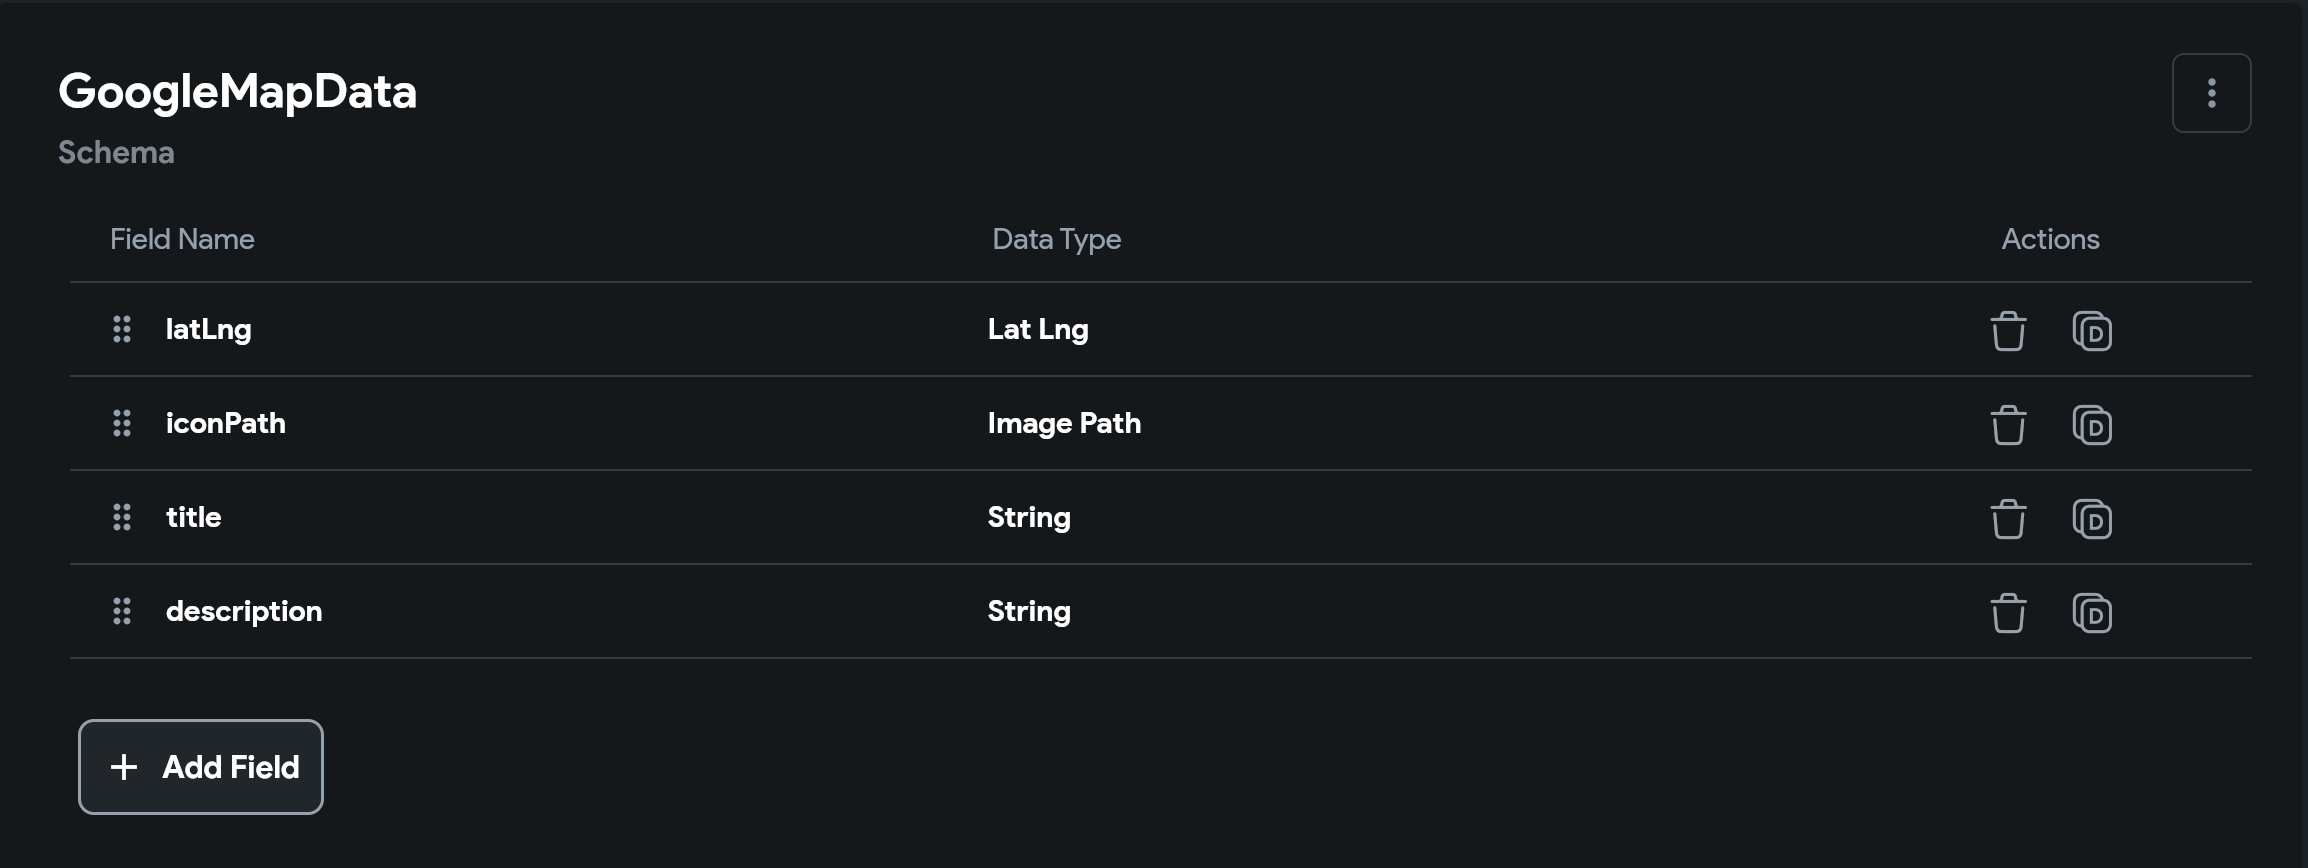
Let’s give four fields for our data type.
-
latLng : This will hold our coordinates for each marker
-
iconPath: This will be our image name including the file extension. You can also specify an url for network images.
-
title: This is the title that shows on the popup when clicking the marker
-
description: This is the description that shows on the popup when clicking the marker
Create our list of markers
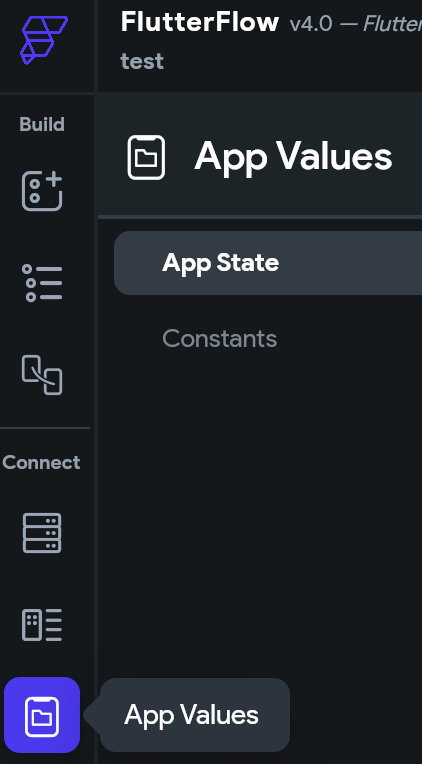
To create our list of data, click on the App Values menu.
Click on Add App State Variable
Let’s give it the name **googleMapData. **Choose Data Type as the Data Type. Choose our custom Data Type Google Map Data. Also, make sure to check **Is List. **Click Create

Click the arrow to expand the state variable and you should see Add Item. Notice I already have two items.

Click **Add Item. **I will show you how to add new data.
Notice the data I have for one of my items. You don’t have to enter the coordinates manually. First, copy the name of the place you want to add then click the orange location icon.
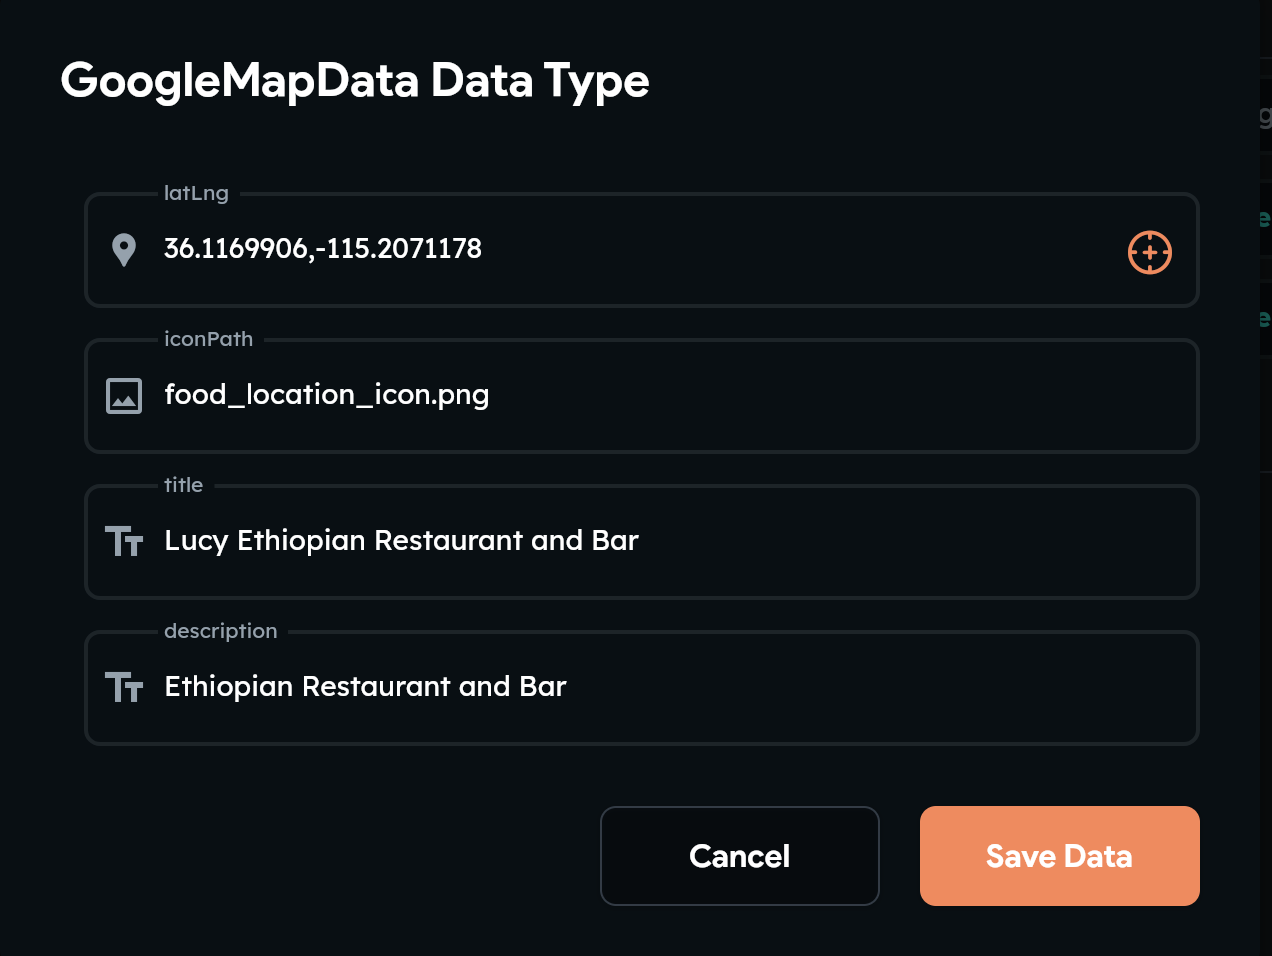
In my case, I copied Lucy Ethiopian Restaurant and Bar. It will pop up with a text field to search for your place.

Also, notice I added the name of the icon that I want to show for this place. I will show you how to upload the images after adding these items.
This is the other item I added.
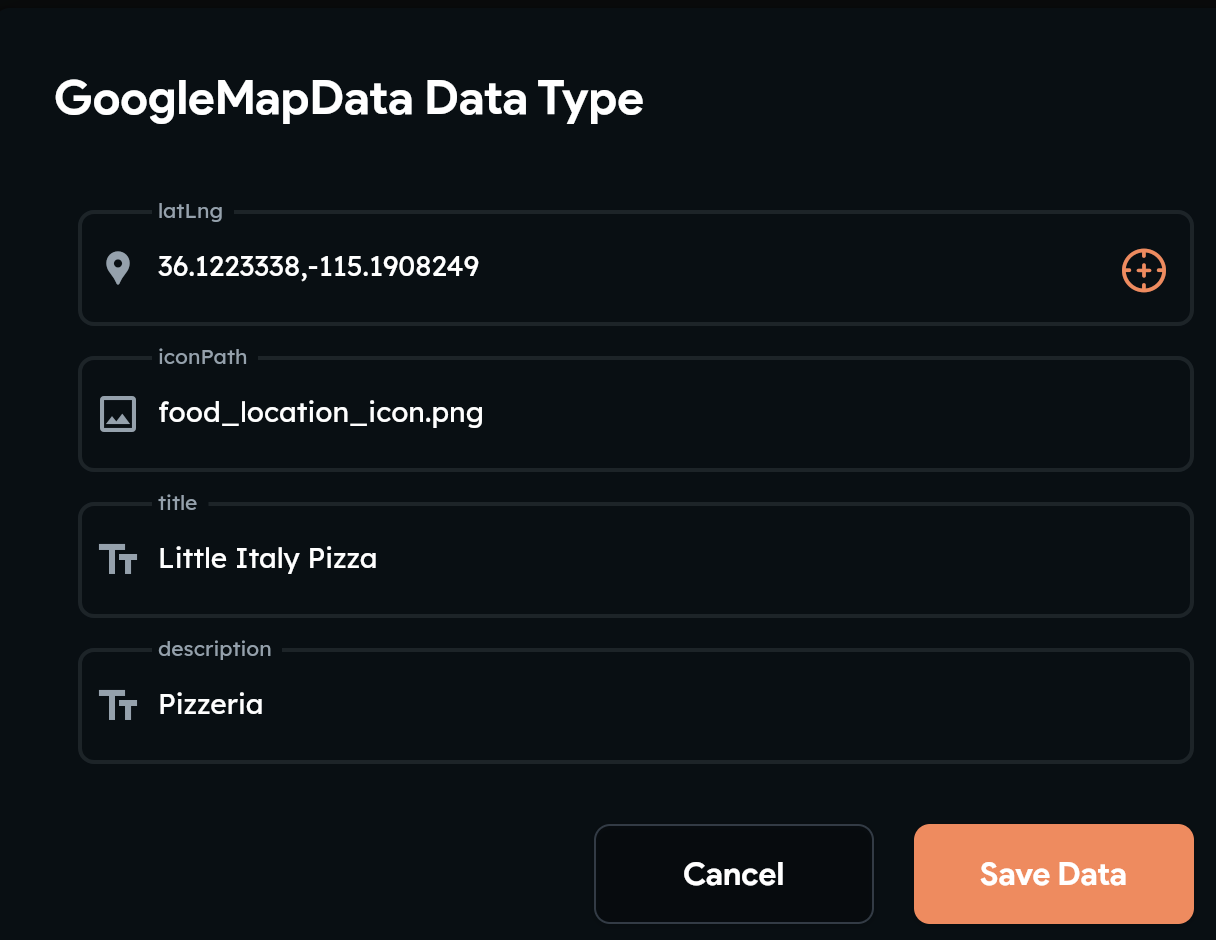
I want to target Little Italy Pizza in Las Vegas, NV but I don’t see it in the list.

It looks like they are using the Google Places API, which I’ve used in a lot of projects.
The trick is if it doesn’t initially show any of the correct places, you can also type the city and/or state after the place name.

Uploading your icons
For simplicity, I’m just using one icon. Adding an icon is straightforward. You can find icons on many sites including Icon Finder and Icons 8.
Use underscores instead of spaces and don’t add any special characters. This is usually an issue that will show up with Android. I’m not sure if Flutter Flow handles it for you on their side.
Click on the Media Assets menu, click Upload Media, and choose your assets.

Creating our custom Google Maps Widget
Click on the Custom Code menu
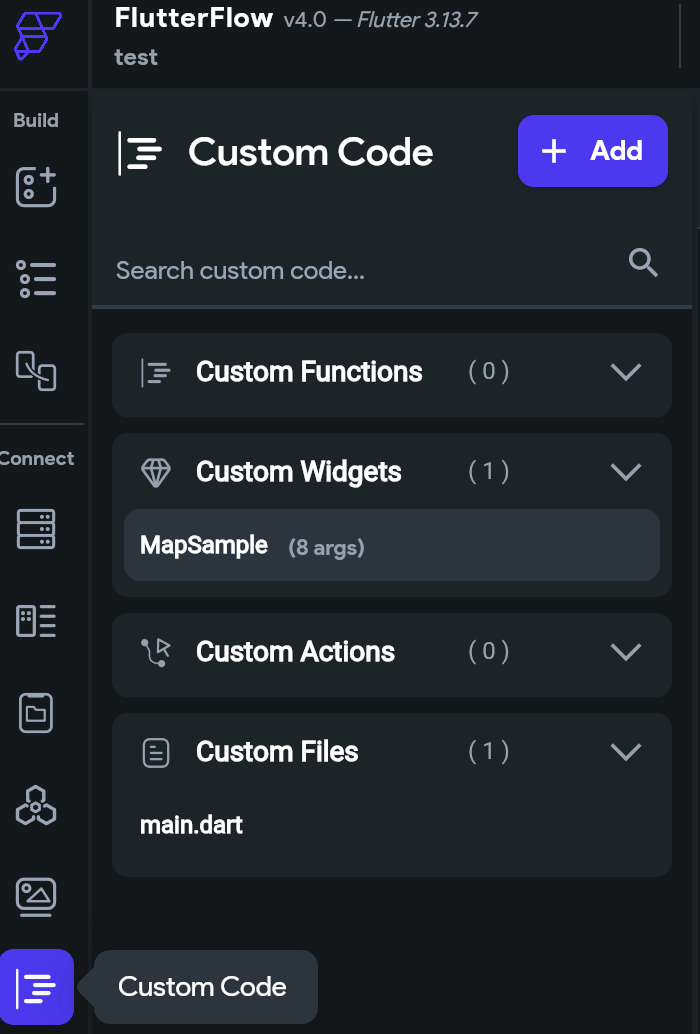
Click Add > Widget
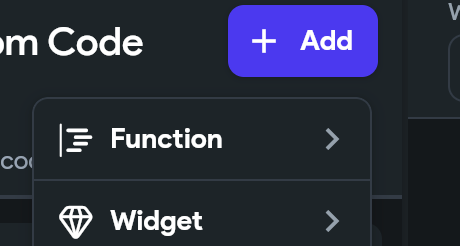
I gave it the name MapSample.

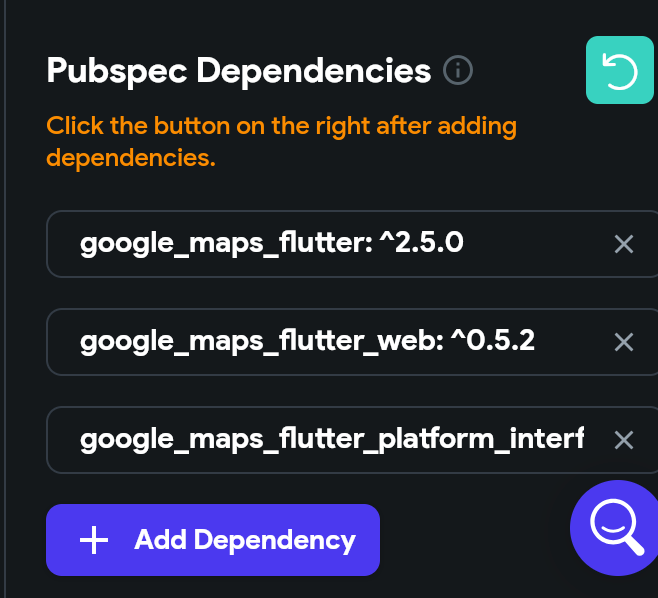
Now let’s add the following dependencies. Make sure to click the green button after adding all of them.
google_maps_flutter: ^2.5.0
google_maps_flutter_web: ^0.5.2
google_maps_flutter_platform_interface: ^2.4.1
Note: Adding dependencies is no longer required.
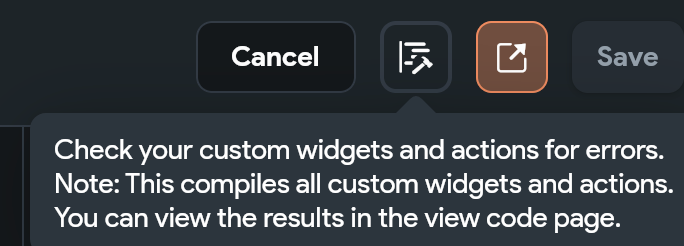
Click Save, then click the compile button (button with a hammer)
Let’s add the parameters for our custom widget. Most of these are the same parameters included in Flutter Flow’s Google Map widget.
Also, notice I have the starting center latitude and longitude as two separate parameters. Part of the workaround is using an alias to reference Flutter Flow’s LatLng type. It throws an error because of a conflict with Google Maps LatLng type.
I’ve also left out the map style. I wanted to do it more elegantly, but a quick way to change it would be to add another custom data type and copy the map that’s used in Flutter Flow’s flutter_flow_google_map.dart file. Let me know if you want an example for that as well.
-
mapData: this is a list data type of our custom data type GoogleMapData
-
allowZoom: Boolean type
-
showZoomControls: Boolean type
-
showLocation: Boolean type
-
showCompass: Boolean type
-
showMapToolbar: Boolean type
-
showTraffic: Boolean type
-
centerLat: Double type. The starting center latitude
-
centerLng: Double type: The starting center longitude.
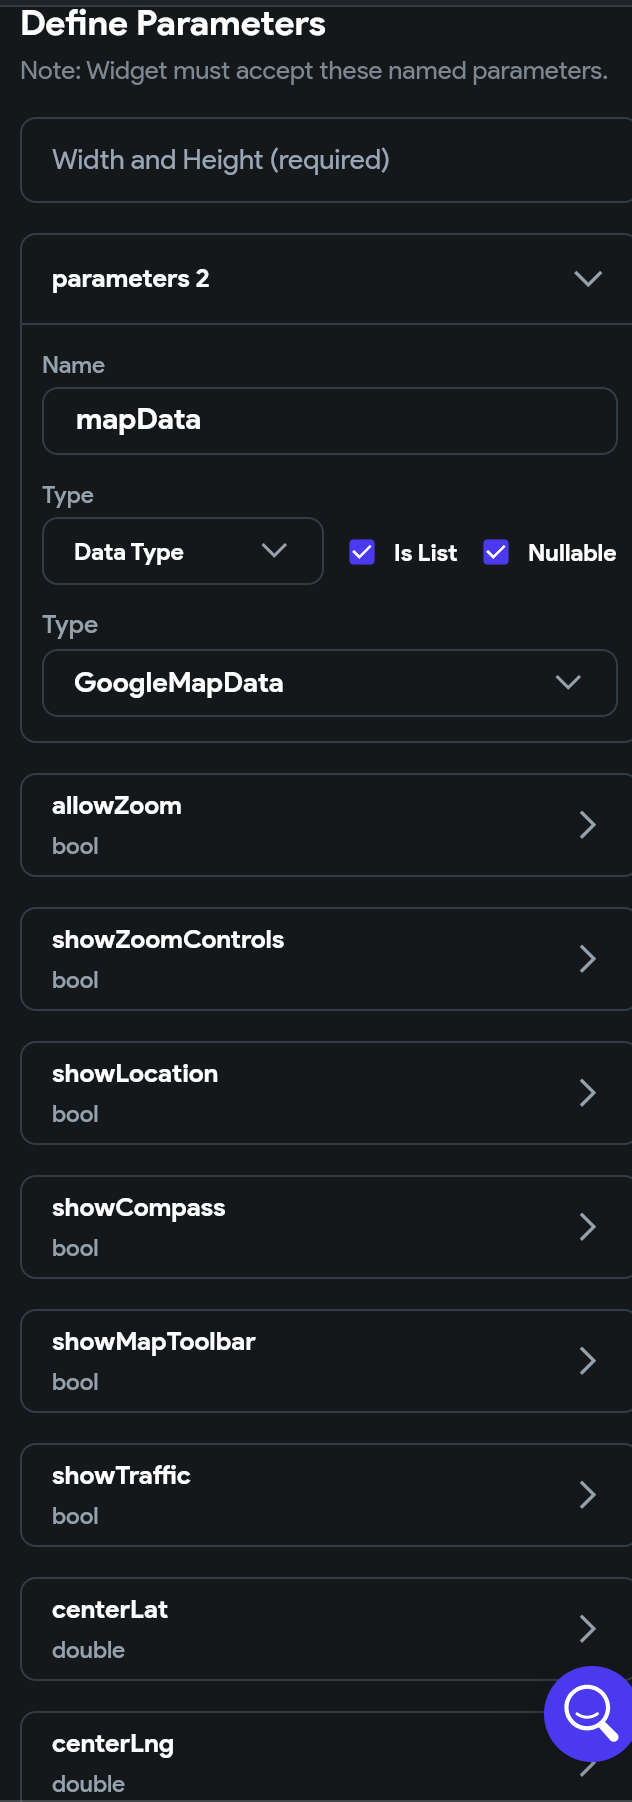
Click Save.
Next, I will give you the code, but also walk through it, in case you want to add anything later.
Add the following code, click Save, then click the compile button to make sure you don’t get any errors.
// Automatic FlutterFlow imports
import 'dart:ui';

import '/backend/schema/structs/index.dart';
import '/backend/supabase/supabase.dart';
import '/flutter_flow/flutter_flow_theme.dart';
import '/flutter_flow/flutter_flow_util.dart';
import 'index.dart'; // Imports other custom widgets
import '/custom_code/actions/index.dart'; // Imports custom actions
import '/flutter_flow/custom_functions.dart'; // Imports custom functions
import 'package:flutter/material.dart';
// Begin custom widget code
// DO NOT REMOVE OR MODIFY THE CODE ABOVE!

import 'package:google_maps_flutter/google_maps_flutter.dart'
    as google_maps_flutter;
import '/flutter_flow/lat_lng.dart' as latlng;
import 'dart:async';
export 'dart:async' show Completer;
export 'package:google_maps_flutter/google_maps_flutter.dart' hide LatLng;
export '/flutter_flow/lat_lng.dart' show LatLng;


// Set your widget name, define your parameter, and then add the
// boilerplate code using the green button on the right!

class MapSample extends StatefulWidget {
  const MapSample({
    Key? key,
    this.width,
    this.height,
    this.mapData,
    this.allowZoom = true,
    this.showZoomControls = true,
    this.showLocation = true,
    this.showCompass = false,
    this.showMapToolbar = false,
    this.showTraffic = false,
    this.centerLat = 0.0,
    this.centerLng = 0.0,
  }) : super(key: key);

  final double? width;
  final double? height;
  final List<GoogleMapDataStruct>? mapData;
  final bool allowZoom;
  final bool showZoomControls;
  final bool showLocation;
  final bool showCompass;
  final bool showMapToolbar;
  final bool showTraffic;
  final double centerLat;
  final double centerLng;

  @override
  _MapSampleState createState() => _MapSampleState();
}

class _MapSampleState extends State<MapSample> {
  final Completer<google_maps_flutter.GoogleMapController> _controller = Completer();
  final Map<String, google_maps_flutter.BitmapDescriptor> _customIcons = {};
  Set<google_maps_flutter.Marker> _markers = {};

  late google_maps_flutter.LatLng _center;

  @override
  void initState() {
    super.initState();

    _center = google_maps_flutter.LatLng(widget.centerLat, widget.centerLng);

    _loadMarkerIcons();
  }

  Future<void> _loadMarkerIcons() async {
    Set<String> uniqueIconPaths =
        widget.mapData?.map((data) => data.iconPath).toSet() ??
            {}; // Extract unique icon paths

    for (String path in uniqueIconPaths) {
      if (path.isNotEmpty) {
        if (path.contains("https")) {
          Uint8List? imageData = await loadNetworkImage(path);
          if (imageData != null) {
            google_maps_flutter.BitmapDescriptor descriptor =
            google_maps_flutter.BitmapDescriptor.fromBytes(imageData);
            _customIcons[path] = descriptor;
          }
        } else {
          google_maps_flutter.BitmapDescriptor descriptor =
          await google_maps_flutter.BitmapDescriptor.fromAssetImage(
            const ImageConfiguration(devicePixelRatio: 2.5),
            "assets/images/$path",
          );
          _customIcons[path] = descriptor;
        }
      }
    }

    _updateMarkers(); // Update markers once icons are loaded
  }

  Future<Uint8List?> loadNetworkImage(String path) async {
    final completer = Completer<ImageInfo>();
    var image = NetworkImage(path);
    image.resolve(const ImageConfiguration()).addListener(ImageStreamListener(
            (ImageInfo info, bool _) => completer.complete(info)));
    final imageInfo = await completer.future;
    final byteData =
    await imageInfo.image.toByteData(format: ImageByteFormat.png);
    return byteData?.buffer.asUint8List();
  }

  void _updateMarkers() {
    setState(() {
      _markers = _createMarkers();
    });
  }

  void _onMapCreated(google_maps_flutter.GoogleMapController controller) {
    _controller.complete(controller);
  }

  @override
  Widget build(BuildContext context) {
    return Scaffold(
      body: google_maps_flutter.GoogleMap(
        onMapCreated: _onMapCreated,
        zoomGesturesEnabled: widget.allowZoom,
        zoomControlsEnabled: widget.showZoomControls,
        myLocationEnabled: widget.showLocation,
        compassEnabled: widget.showCompass,
        mapToolbarEnabled: widget.showMapToolbar,
        trafficEnabled: widget.showTraffic,
        initialCameraPosition: google_maps_flutter.CameraPosition(
          target: _center,
          zoom: 11.0,
        ),
        markers: _markers,
      ),
    );
  }

  Set<google_maps_flutter.Marker> _createMarkers() {
    var tmp = <google_maps_flutter.Marker>{};

    // Assuming widget.mapData is a list of objects that contain a 'latLng' property of type latlng.LatLng
    widget.mapData?.forEach((mapData) {
      // Directly use the latlng.LatLng object
      final latlng.LatLng coordinates = mapData.latLng as latlng.LatLng;

      // Convert to google_maps_flutter.LatLng
      final google_maps_flutter.LatLng googleMapsLatLng =
          google_maps_flutter.LatLng(
              coordinates.latitude, coordinates.longitude);

      google_maps_flutter.BitmapDescriptor icon =
          _customIcons[mapData.iconPath] ??
              google_maps_flutter.BitmapDescriptor.defaultMarker;

      // Create and add the marker
      final google_maps_flutter.Marker marker = google_maps_flutter.Marker(
        markerId: google_maps_flutter.MarkerId(mapData.title),
        position: googleMapsLatLng,
        icon: icon,
        infoWindow: google_maps_flutter.InfoWindow(
            title: mapData.title, snippet: mapData.description),
      );

      tmp.add(marker);
    });

    return tmp;
  }
}
Note: Make sure to keep your images small
First, notice the _center variable. I initialized it with the center of Las Vegas, but you can use the center you would use anyway as the parameter.
We reassign it in the initState function using the parameters.
If you don’t have multiple maps in the app, you can remove the parameters and remove the line in initState.
The _loadMarkerIcons function just takes the iconPath name and creates a BitMap Description to use as the Google Marker icon. Maybe iconPath isn’t the best name.
Also notice that we are determining whether it is a network images by check if the url has https. You can improve this depending on your needs.
The _createMarkers function goes through our list of mapData and creates the Google Map markers
Add the new Custom Google Map Widget to our page
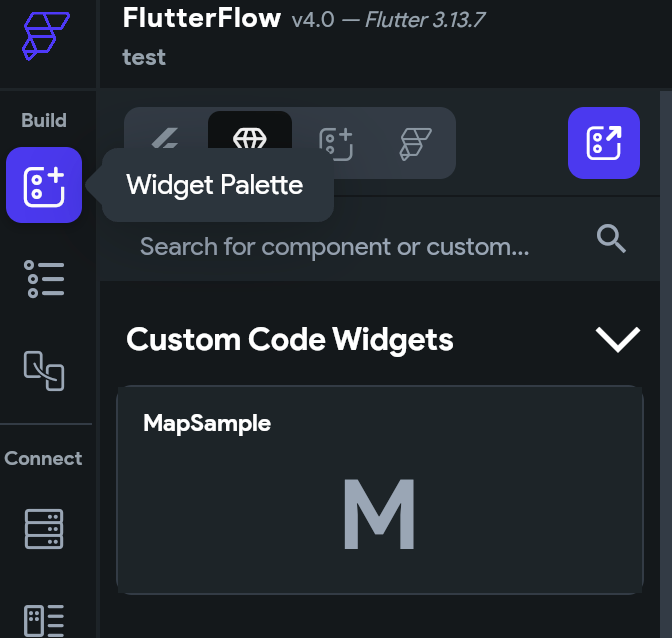
Go to the Widget Pallete and drag MapSample to your desired page**.**
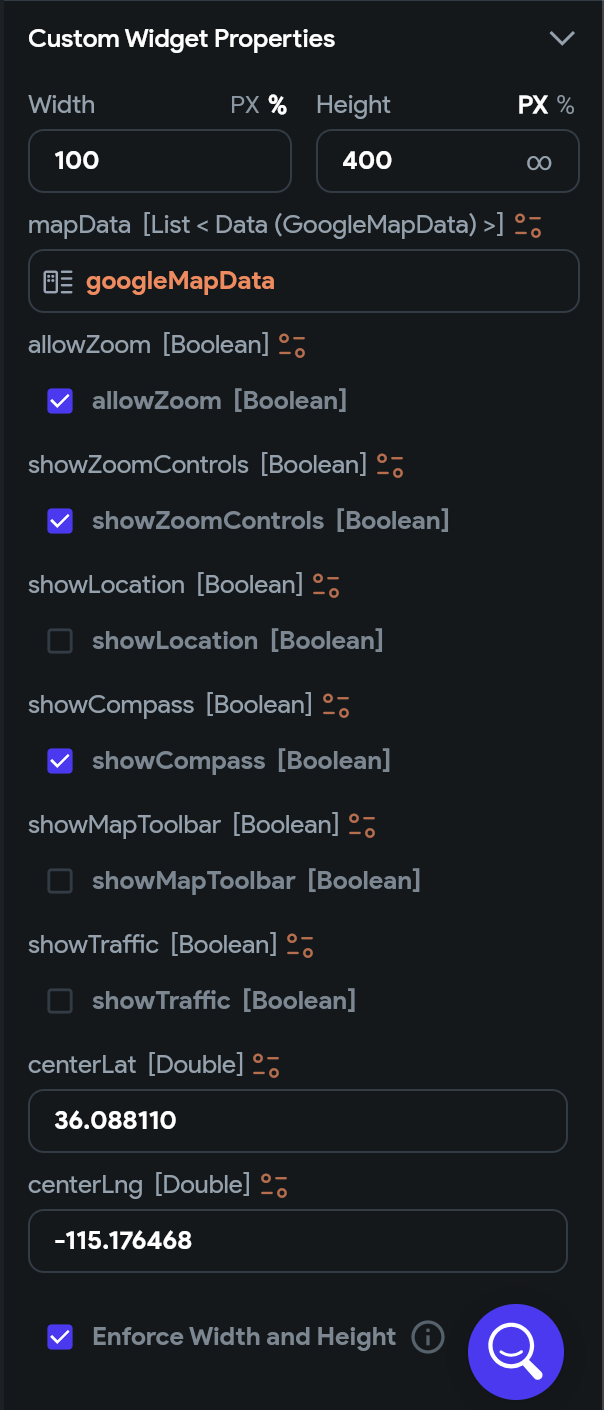
This is what I used for the properties. Notice I’m using the list we created in the App Values menu, the googleMapData App State Variable.
Save (CMD + S on Mac, Ctrl + S on Windows)
Note: The following issue is now fixed. You can still follow the next section on adding your API keys to a downloaded Flutter Flow project.
You won’t get any errors initially, but if you try to run this using Test Mode, you will get an error. This is a bug with Flutter Flow’s online platform. If you download the project it will work fine.
Before you download the project though, we have a few more steps.
Create a new page for a Flutter Flow workaround
Flutter Flow won’t add your API keys to your downloaded project unless you have a page that uses their Google Map widget.
As a workaround, I created a page that’s not connected to anything and added their Google Map widget.
They also won’t include your icons, unless you add them to a page as an asset image. This could get ugly if you have a lot of icons, but it may be easier than adding it manually.
This makes sense on Flutter Flow’s part as to why they would do this, maybe we can request something that allows us to choose what to include.

Add the Google Maps API keys
You can follow the Flutter Flow Google Maps API keys.
https://docs.flutterflow.io/settings-and-integrations/integrations/google-maps
Another thing to note is that after creating the API keys, while still in the Google Developer Console, click on it and choose the platform you want to use it for, or it may not work correctly.
Conclusion
Download the project and run the app, you should see your custom icons.

Congrats on adding custom markers in Google Maps to your Flutter Flow project!
You can generate any widget including maps with custom markers, polylines, polygons, etc at https://codewhims.com/
Check out my other Flutter Flow articles FlutterFlow Stepper Form with Firebase Firestore Flutter Flow: Get Value From Multiple-Choice Choice Chips Flutter Flow: Carousel Menu Flutter Flow: Migrating the Carousel Menu to use data types Flutter Flow: Adding Custom Markers for Google Maps Flutter Flow: Use Supabase to show custom markers on Google Maps
Ready to Build Something Amazing?
Whether you need development expertise or technical consultation, I'm here to help bring your ideas to life.